Migrating Checkpoint R77.30 to R80.30
R77.30 is now EoL and no longer supported by Checkpoint, the recommendation is to migrate any existing management servers, or upgrade security gateways on to R80.x
The recommendation is also to migrate any Windows management servers to GAIA as going forward Checkpoint will not support this type of deployment.
In this step-by-step guide, we will be migrating a R77.30 Windows management server onto a R80.30 GAIA virtual appliance, we will also upgrade the gateway to R80.20.
We will not be migrating out the logs, I will cover the import process for logs in a separate post.
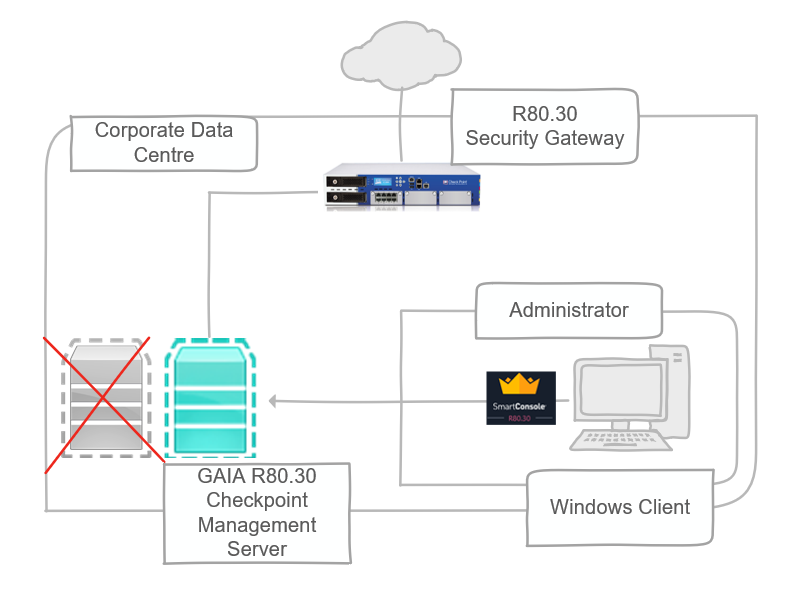
The current topology is setup as below:

The Windows 2008 R2 Server is a virtual machine within Hyper V running as the Checkpoint management server, the gateway is a virtual appliance managed using the Checkpoint management server and the Windows 10 Client is running the Checkpoint “Smart tools” for management access.
We will initially use migration tools on the Windows 2008 R2 server to perform verification that the migration Is possible. Following the success, we will export out the R77.30 database from the Windows management server. We will build a new VM on R80.30 running GAIA OS, this will be used to import the exported database. New Smart tools will be installed onto the windows client machine ,once the Import process is successful, we will test and push out policies from the new GAIA management server. The final steps will be to upgrade the gateway to R80.20 using the CPUSE.
Please note that the same IP address and hostname will need to be used for the new GAIA management server, therefore there will be a requirement to isolate each device.
Lets get started!
Preparation
Step 1. Download the migration tools for the windows platform,
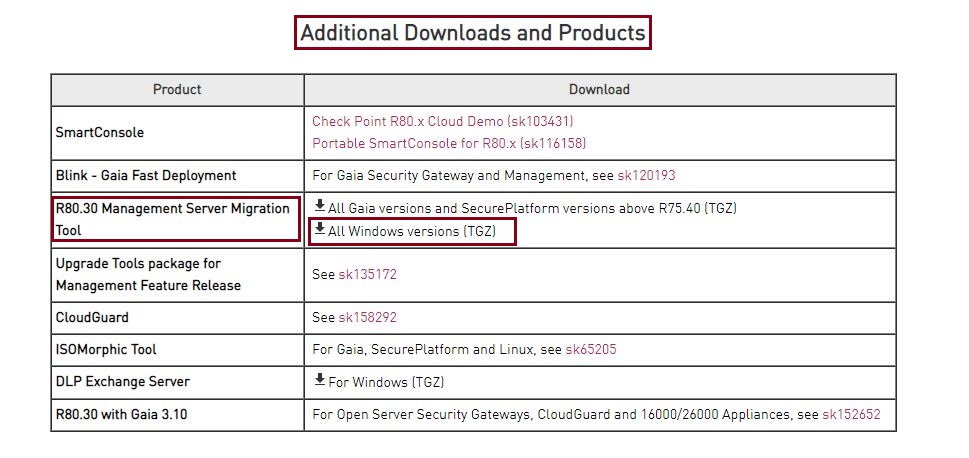
To download the migration tools for Windows, you will need to navigate to the checkpoint R80.30 product page, this is sk144293, you will need a valid support contract to download the relevant files.
on the page scroll down to “Additional Download and Products”, and download R80.30 management Server Migration Tool – “All Windows versions (TGZ)”
Step 2. Once the file has downloaded, extract the files.
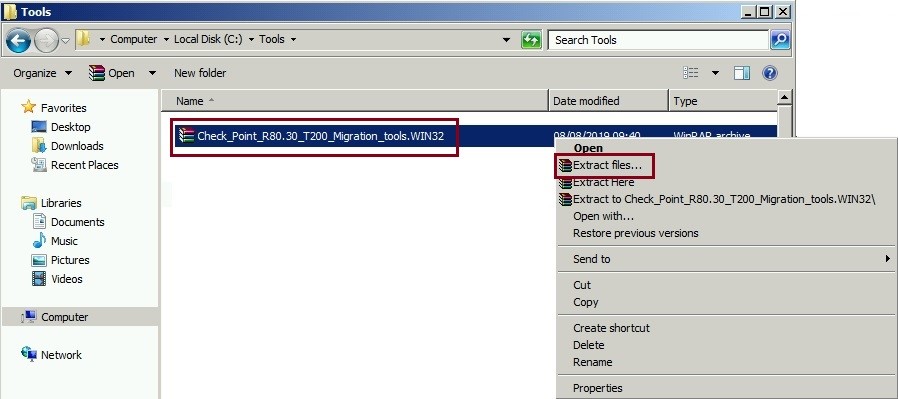
I preferred to rename the folder to make navigation easier due to the length of the original filename.
![]()
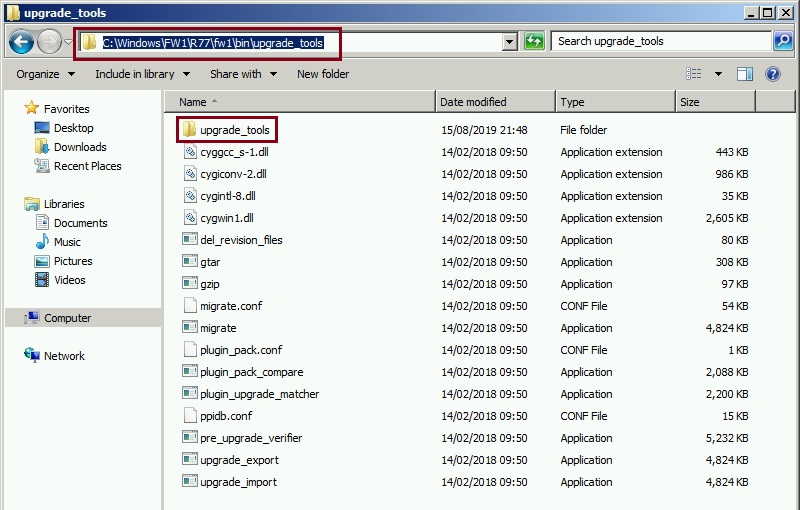
Copy this extracted folder in the following directory on the Windows Management Server,
“C:\Windows\FW1\R77\fw1\bin\upgrade_tools”
Step 3. Launch a command prompt as Administrator and change to the directory where the new tools have been placed.
#cd %FWDIR%\bin\upgrade_tools\upgrade_tools

To ensure we are in the correct directory, issue
#dir
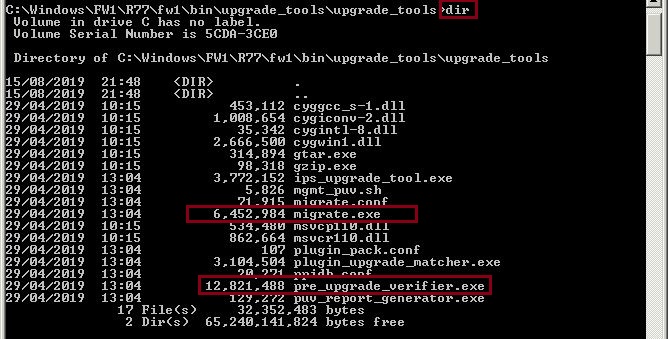
We should see a list files such as “migrate.exe” “pre_upgrade_verifier”
Step 4. The Pre Upgrade Verifier is the most essential tool, as it will run a scan of the current environment and advise if the upgrade path that we have chosen is possible. It will also highlight any issues that need to be rectified before an upgrade can take place.
If we run the tool, we can see what the usage requirements are, including syntax
#pre_upgrade_verifier.exe
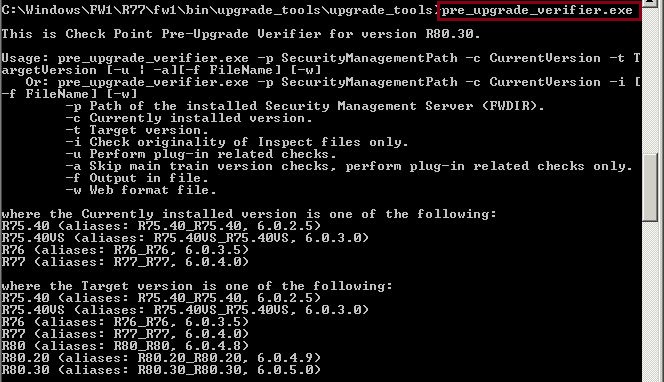
Once we have determined our requirements we can run the tool with the correct syntax
#pre_upgrade_verifier.exe –p %FWDIR% -c R77 –t R80
Above we have specified the following
pre_upgrade_verifier.exe – run the tool
–p %FWDIR% – the current location of R77.30 is in the following path
-c R77 – Current installed version is R77
–t R80 – target version we wish to upgrade to is R80
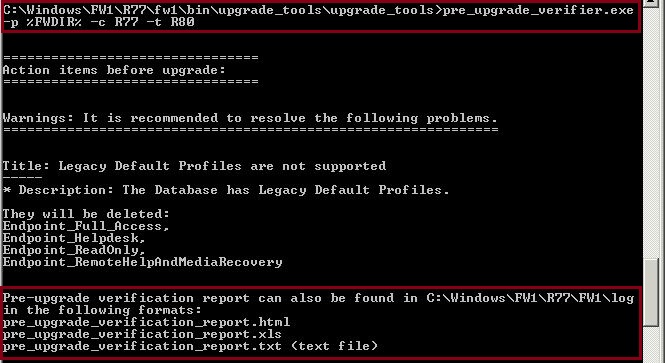
We can see that the tool has run successfully and an output file is placed in the following location
“C:\Windows\FW1\R77\log”.

If we launch the pre_upgrade_verification_report in html we can view it with a web browser
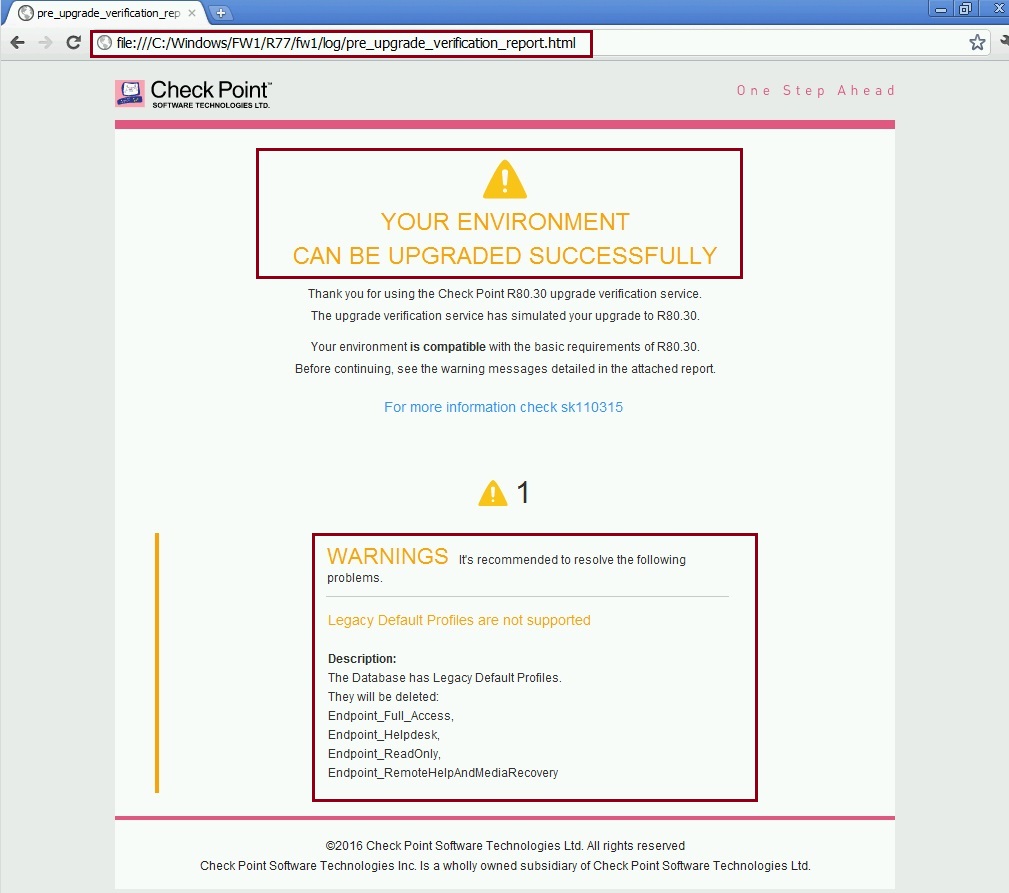
From the report it is clear that this environment can be successfully upgraded to R80.30, there are a few warnings – these warning refer to legacy default profiles, as we don’t use them this issue will not affect us.
We can safely move onto migrating out the database.
Exporting out the database
Step 1. To ensure the database is exported out correctly, close down all connections to Smart Dashboard. On the Windows Management Server, stop the checkpoint services, by clicking “Start” – “Checkpoint” – “Stop Security Management Server”


Step 2. From command prompt, run the migrate tool to see what options are available and the syntax that is required for the export.
#migrate.exe
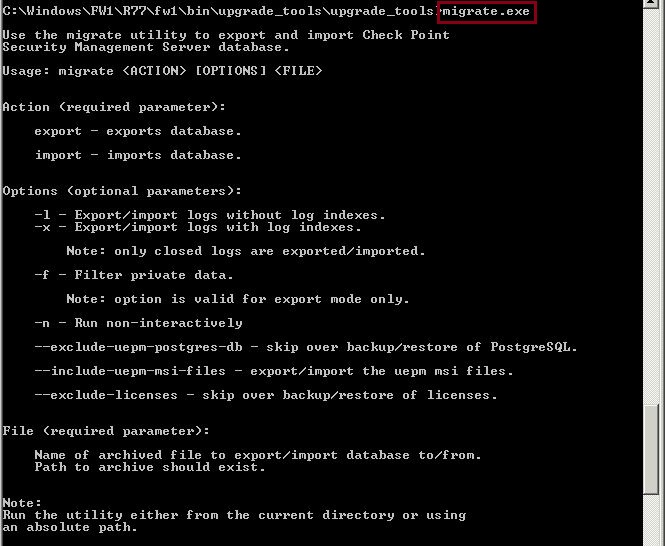
From the output we can see the following:
-l – This option allows the export/import to be completed with logs but without the log indexes.
-x – This option allows the export/import to be completed with logs and the log indexes
Both of the above options are for exporting/importing the logs, however option –x should be used if “Smart Log” is being used, this will ensure the indexes are carried across with the export.
As we are not using smart log and we are migrating the logs separately, we can simply bypass these options and export out the database only.
#migrate.exe export R80.30
Migrate.exe – we are saying, run the import/export tool
Export – export out the database
R80.30 – Filename of the exported file
The location the file will be placed into will be the root folder of where the tool is running from, ensure you have enough disk space to allow this to complete successfully. Alternatively, you can specify a path.
![]()
Select “y” at the prompt

The process will run, this can take a long time depending on how big the database is. Let it run and be patient, the process is not highly interactive.
![]()
Once complete it will specify the operation completed successfully and the location of where the exported file has been exported to.

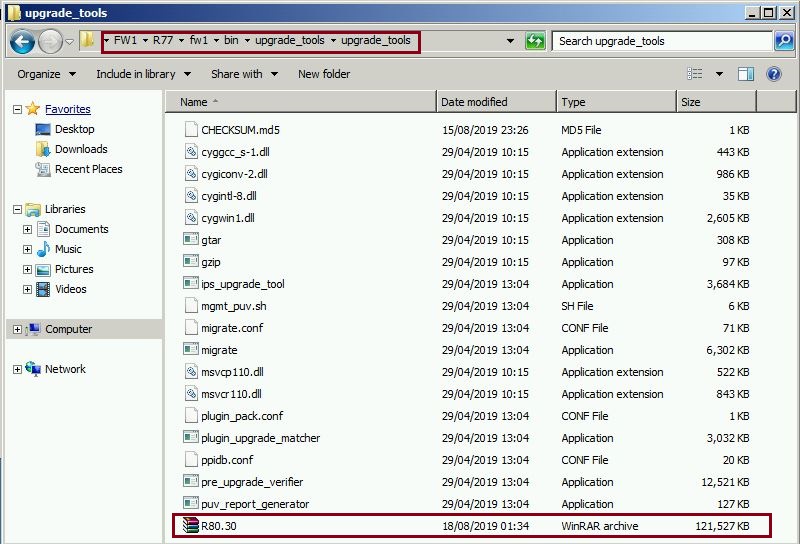
If we navigate to the location of the exported file,
“C:\Windows\FW1\R77\fw1\bin\upgrade_tools\upgrade_tools\R80.30.tgz”
we can see that a .tgz file is now available. This file size will vary and depends on how large the environment is – we only have a few objects within this database however if this was a real production database this could be a few gigabytes.
Step 4. To ensure our file is not corrupted during the transfer and import process, we can capture the MD5 hash of the file for comparison later. Using a MD5 hash tool, check the hash key and save the MD5 Hash to a text file.

Step 5. As we will be using the same IP address we need to ensure the Windows management server is isolated, therefore store the required files within a specific folder and copy them off the Windows management server, this can be copied to a central location such as a shared folder or a client machine that will be used to access the new GAIA management server on R80.30.

Step 6. Isolate the Windows Management Server,
i.e if within a virtual environment – disconnect the virtual NIC
if within a physical environment – disconnect the network cable/shutdown the switch port
Build the new GAIA Management Server
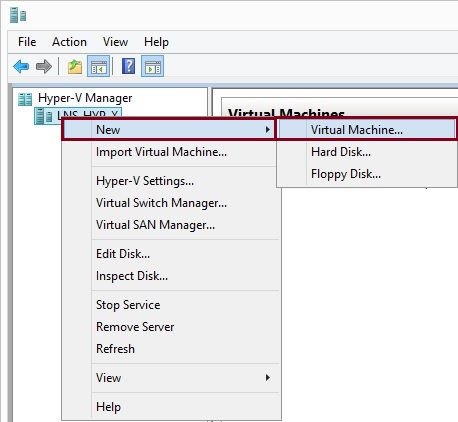
Step 1. Create a new VM, within Hyper V, Click “New” and select “Virtual Machine”
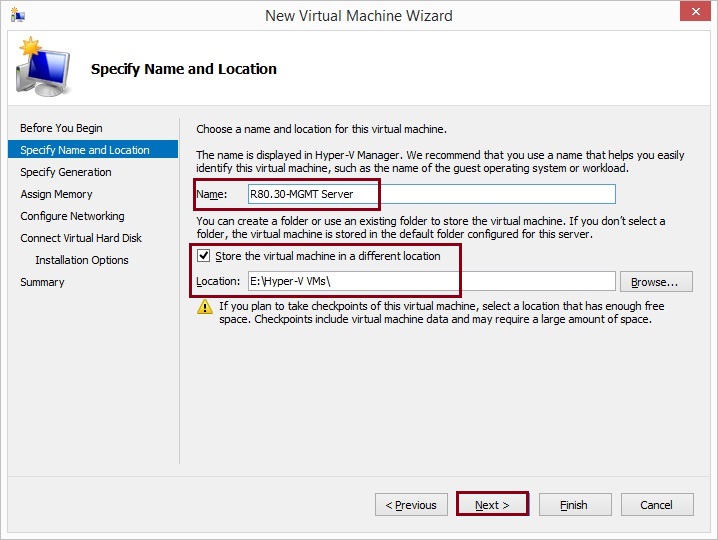
Give the new machine a name, in this case “R80.30-MGMT Server” and select a location to store the virtual machine. Click “Next”
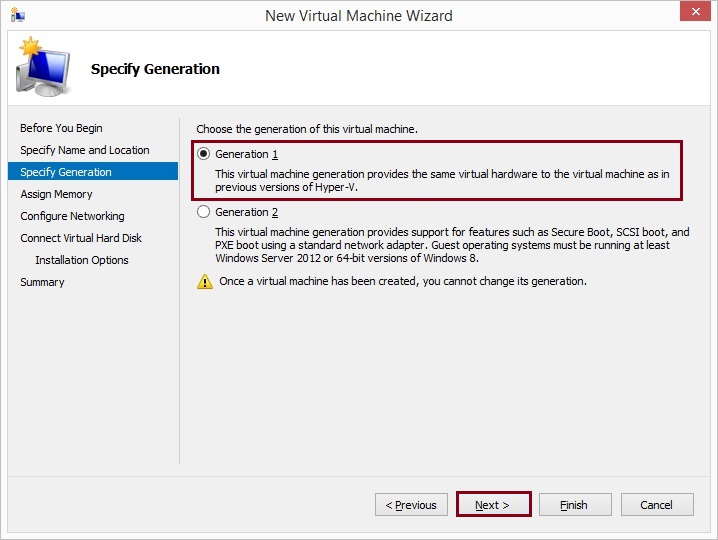
Note that when using Hyper V either Generation 1 or 2 will can be used, if using VMware Linux Red Hat will need to be selected.
Full recommended specs can be found here:

Select “Generation 1” and click “Next”
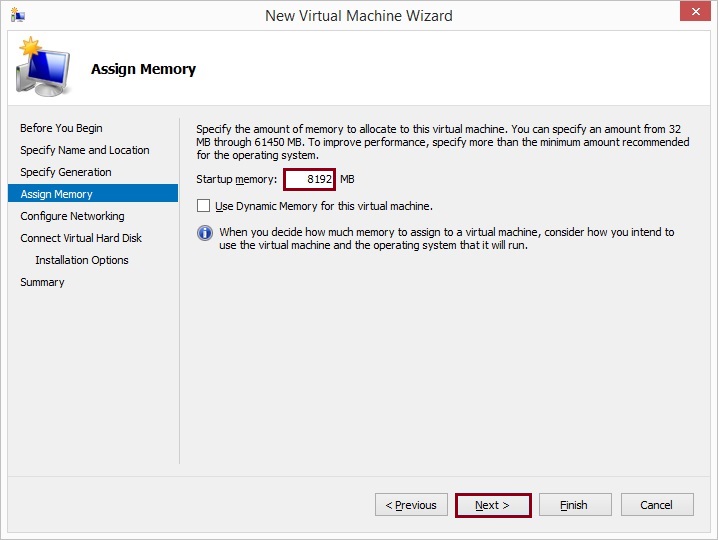
Specify the required memory, minimum recommended memory for the Security Management Server is 6GB, click “Next”
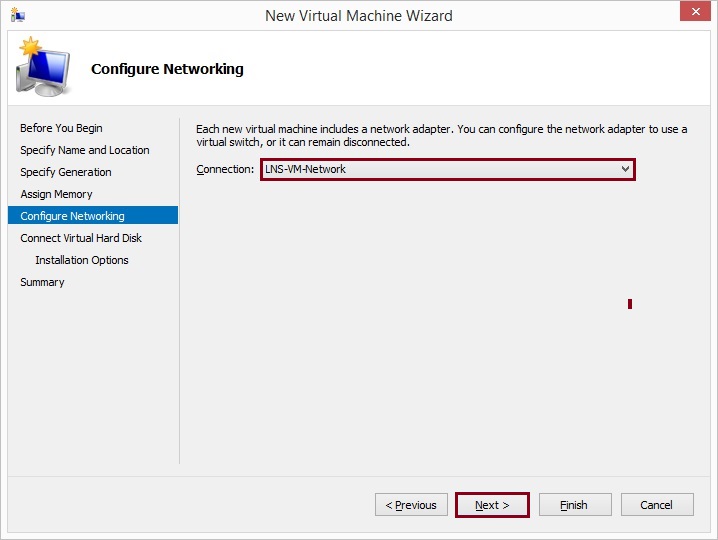
Select the correct network or virtual switch and click “Next”
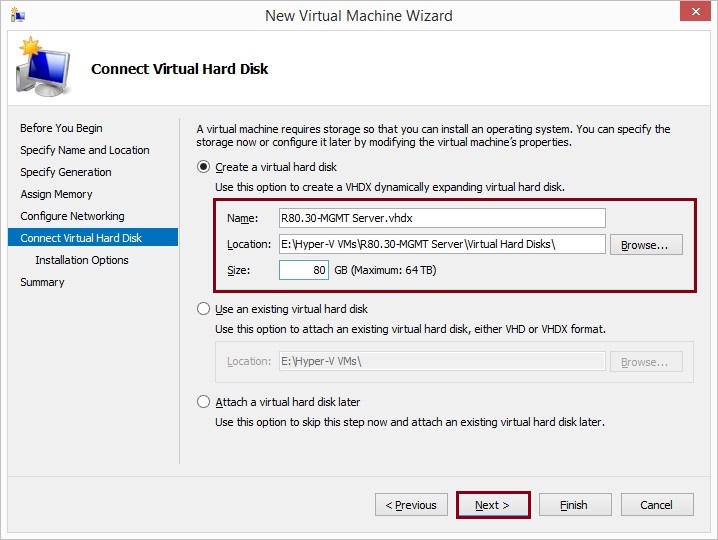
Create a new virtual hard disk (VHD) or select an existing one, depending on the environment this will vary, the minimal recommended size is 500GB, in this case we are creating a new VHD with 80GB disk space. Specify the location to store this and click “Next”
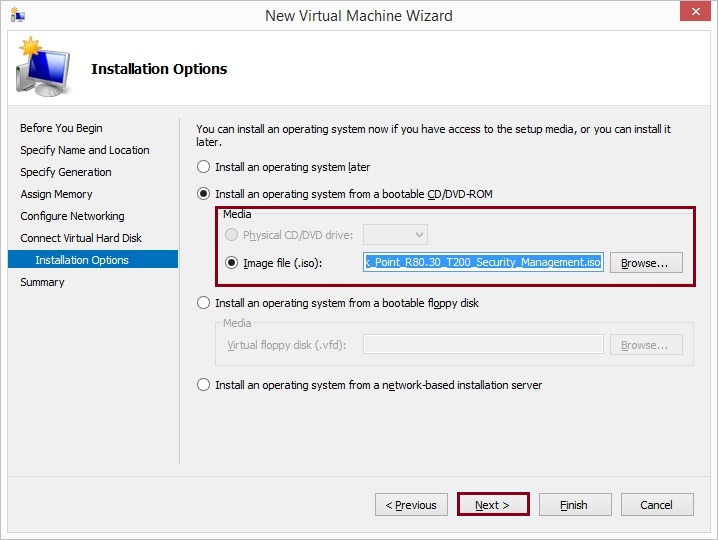
Attach the ISO file “Check_Point_R80.30_T200_Security_Management.iso” and click “Next”
The ISO can be downloaded directly from Checkpoint.
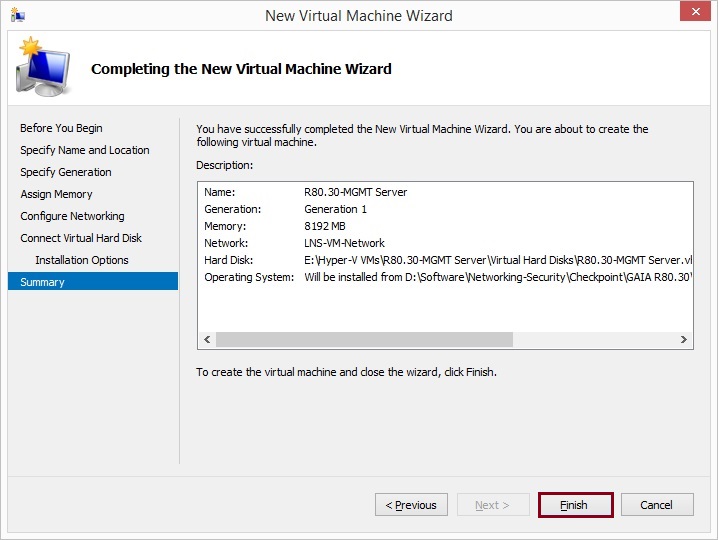
Review the summary and click “Finish”
Step 2. Right click the VM and “Connect” to the Virtual Machine

Select “File” and click “Settings”
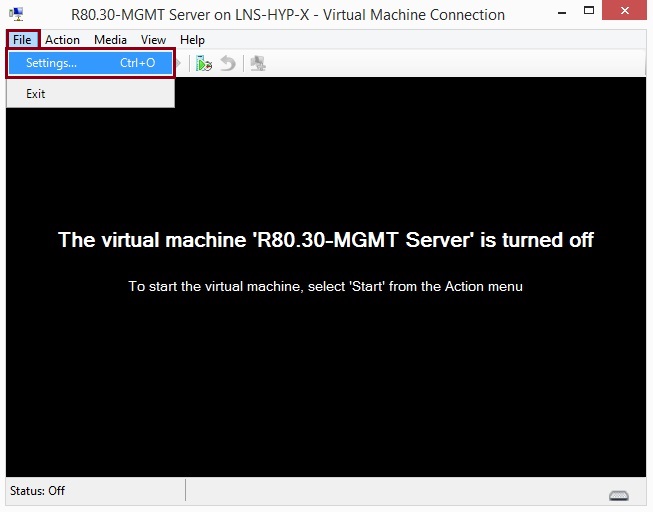
Select “Processor” and increase the number of processors to 4, click “Apply” and hit “OK”

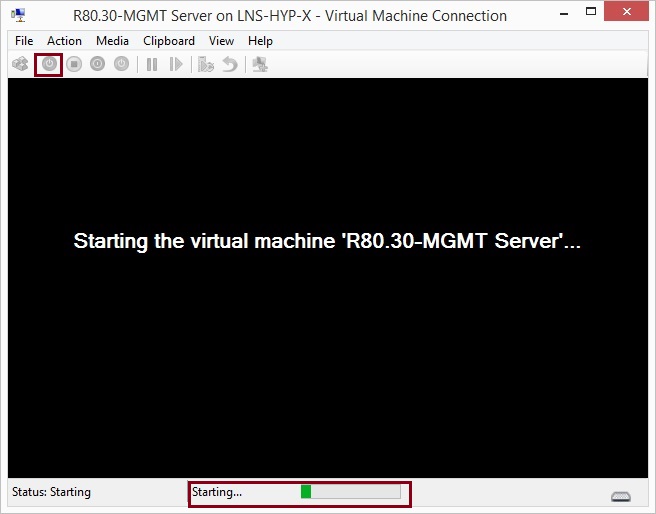
Step 3. Start the Virtual machine
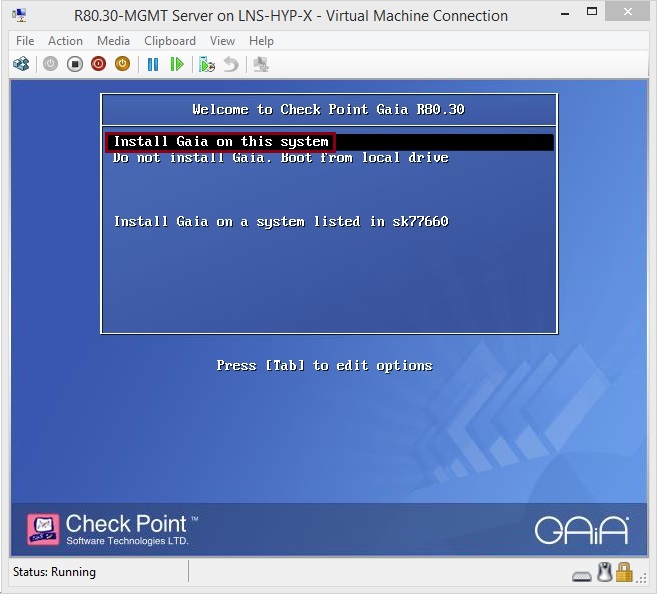
At the prompt select ”Install Gaia on this system”
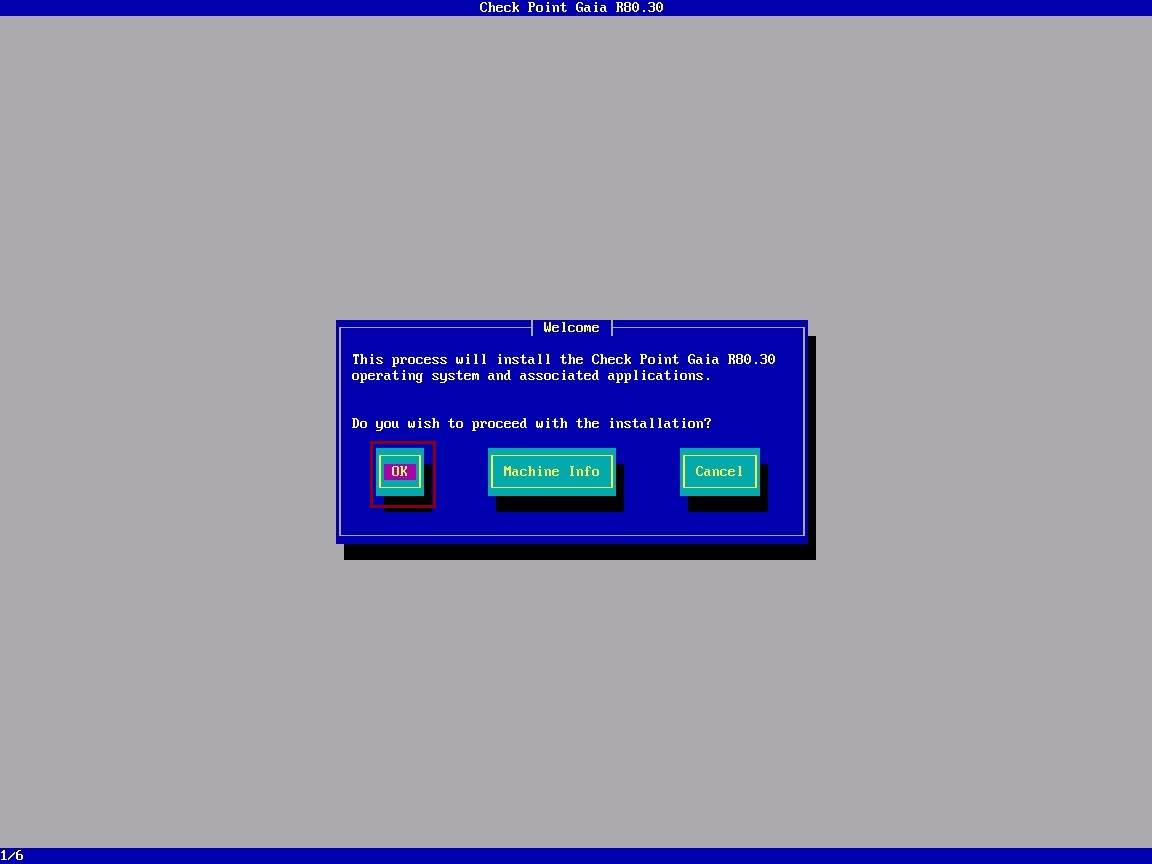
At the prompt, select “OK”
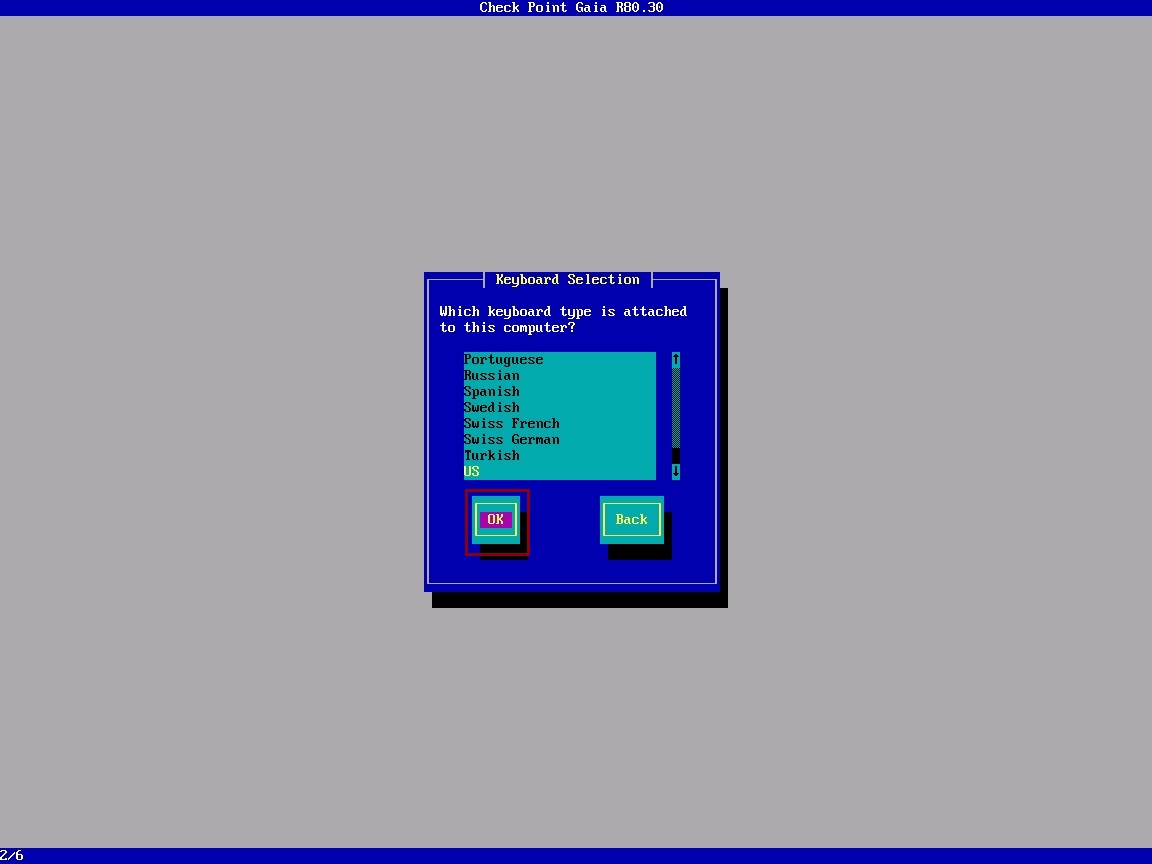
Select “US” and it “OK”
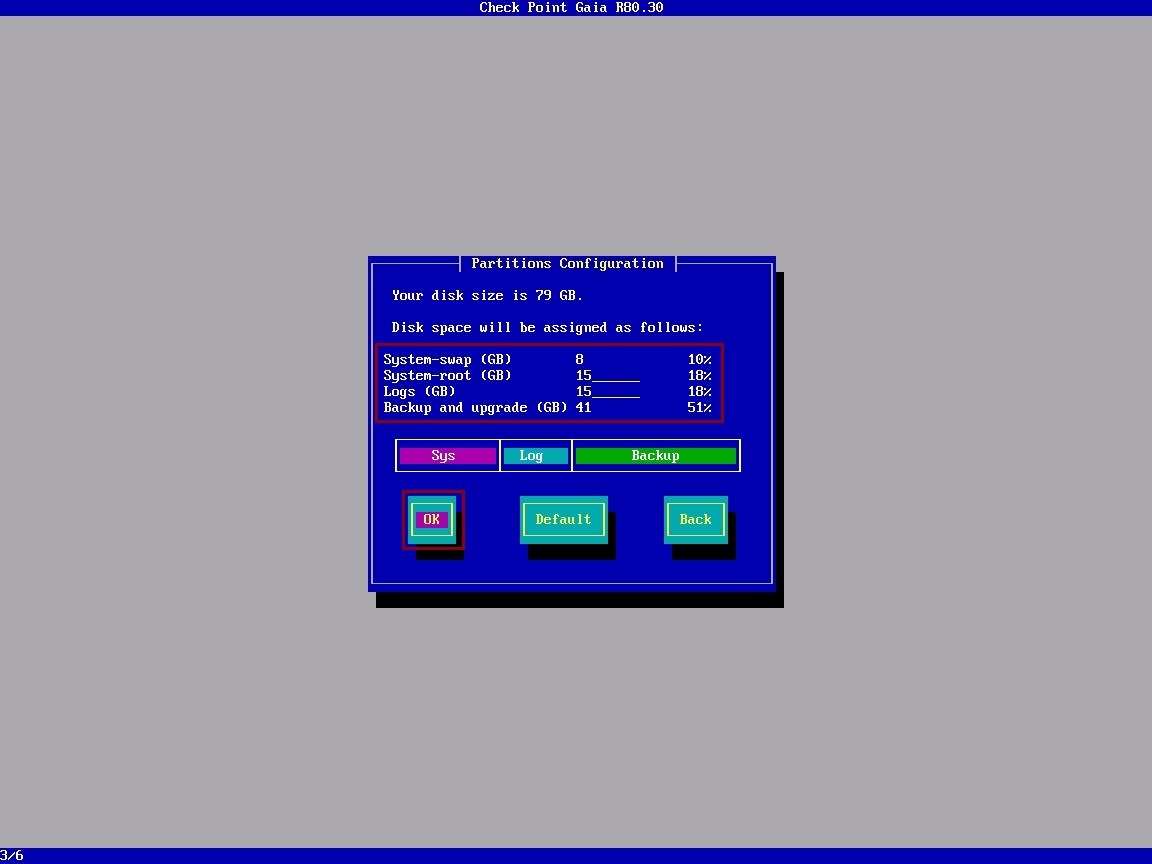
At the disk partitions page you will need to work out how to allocate this, it will depend on your logging and backup requirements.
In this case we are using the default settings, select “OK”
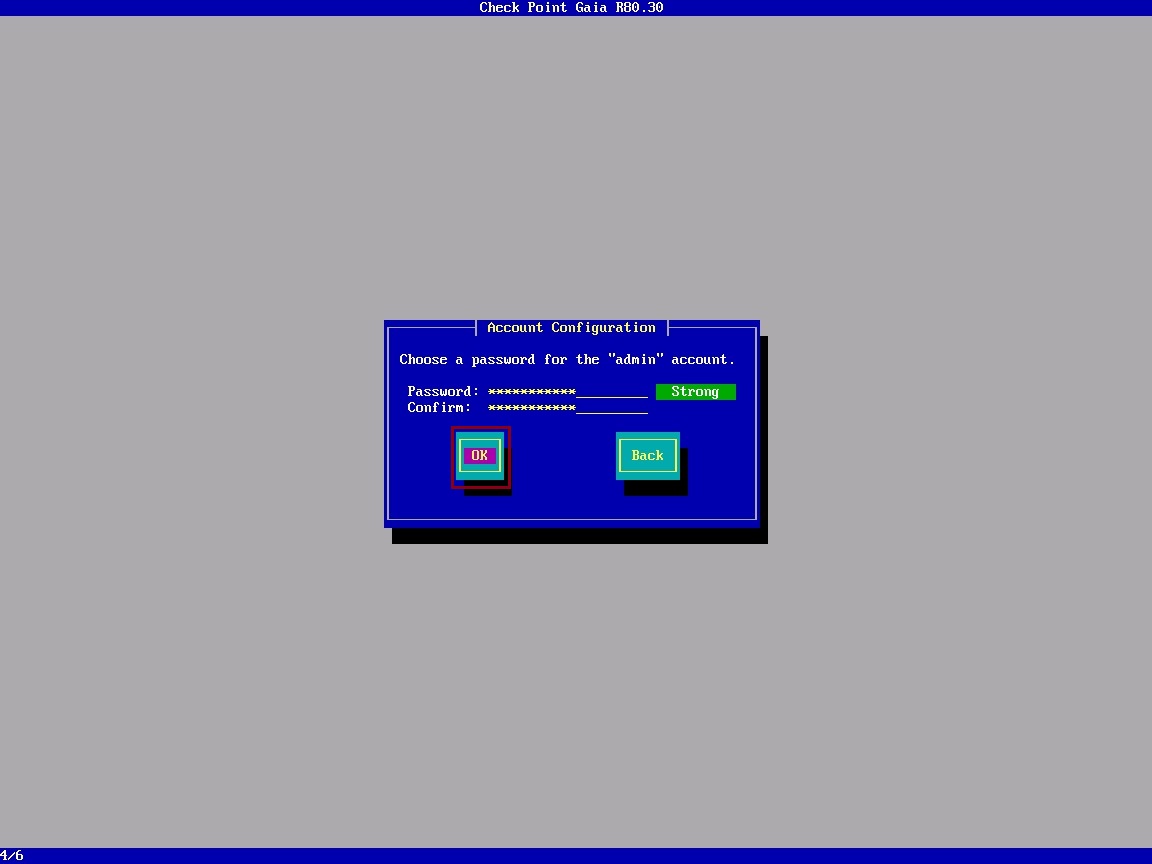
Specify the password for the local Admin account and select “OK”
Specify the management IP address and subnet mask, we don’t need a default gateway unless we are managing this device from a different subnet.
As we will be using this machine to migrate the existing R77.30 environment onto, the IP address must match the current device.
Click “OK”

Select “OK” to start the installation
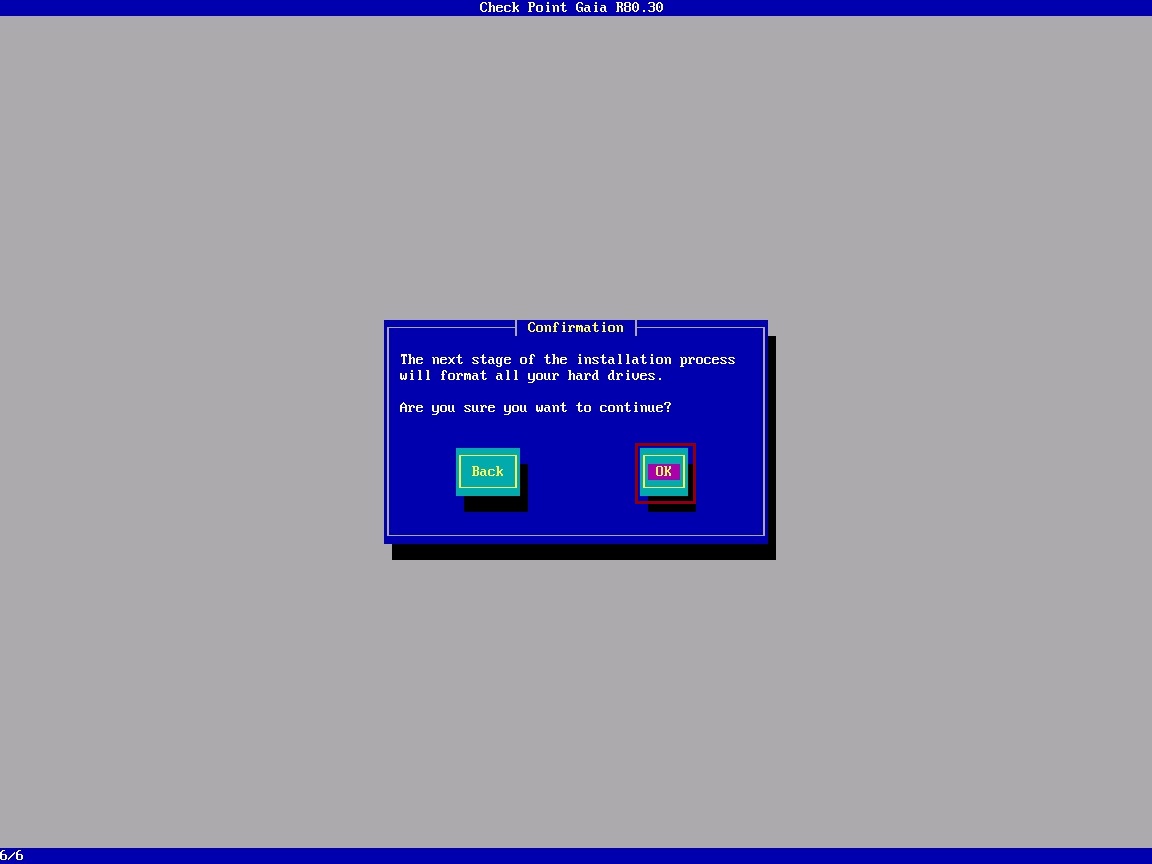
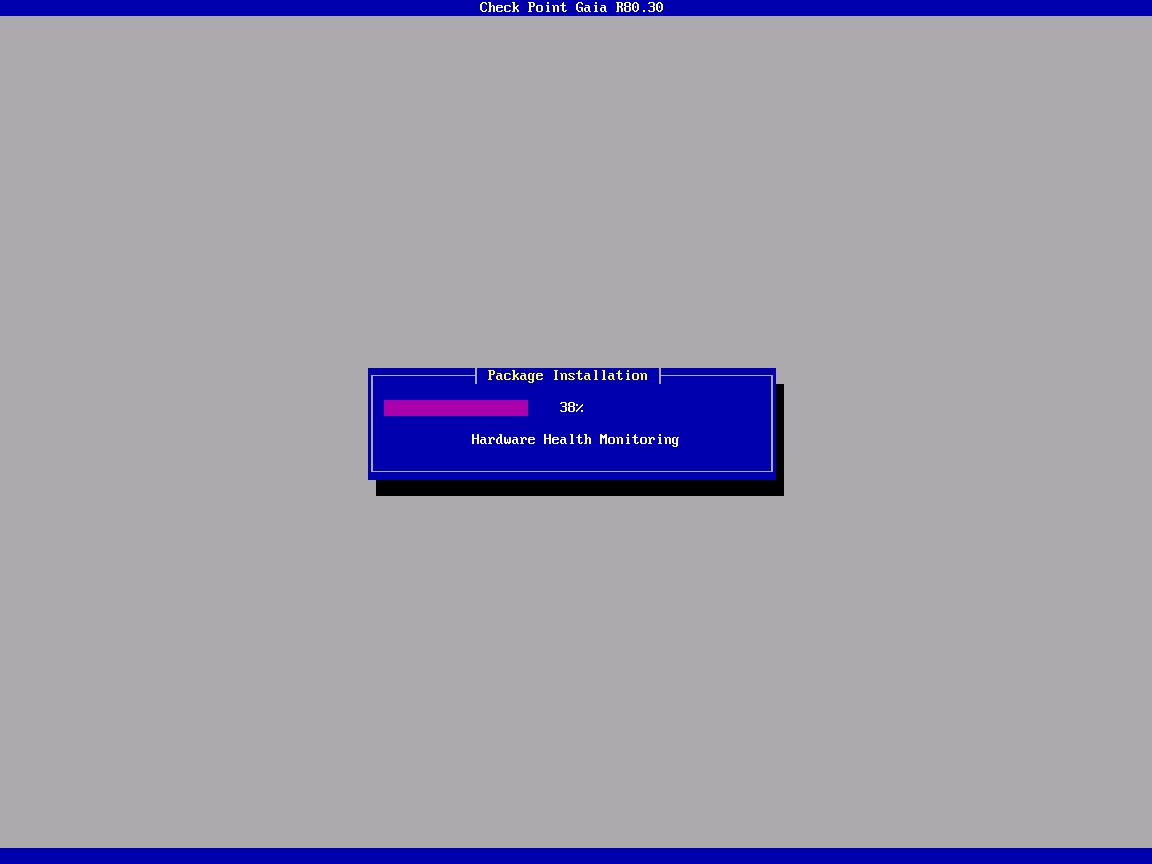
At the prompt select “Reboot”

Prepare the new GAIA Management Server
Step 1. Open a browser and navigate to the IP address of the GAIA Management Server, “https://192.168.1.101”
Click “Advanced” and select “Proceed to 192.168.1.101 (unsafe)”

At the login prompt login using the admin credentials created earlier.
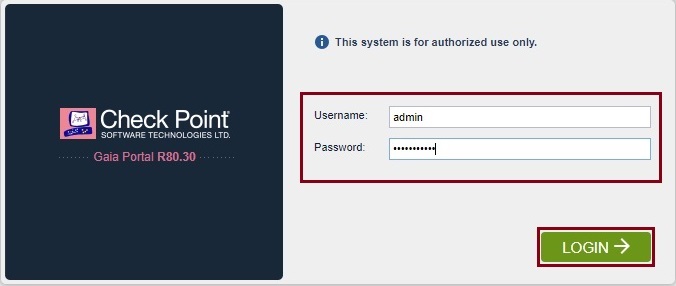
Step 2. Upon login the “First Time Configuration Wizard” will automatically run, click “Next”
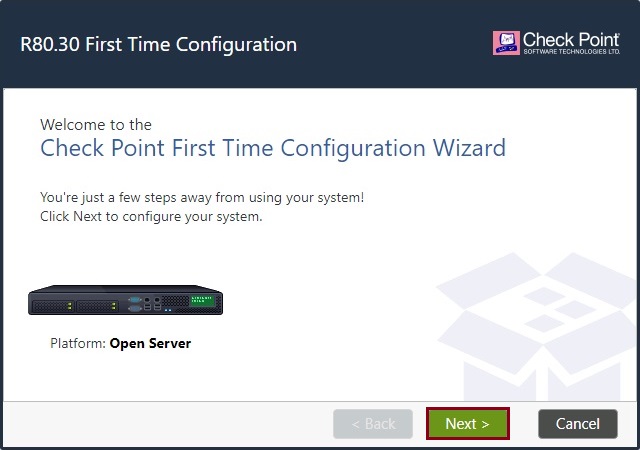
Select “Continue with R80.30 Configuration”, click “Next”

Review the IP address details and click “Next”

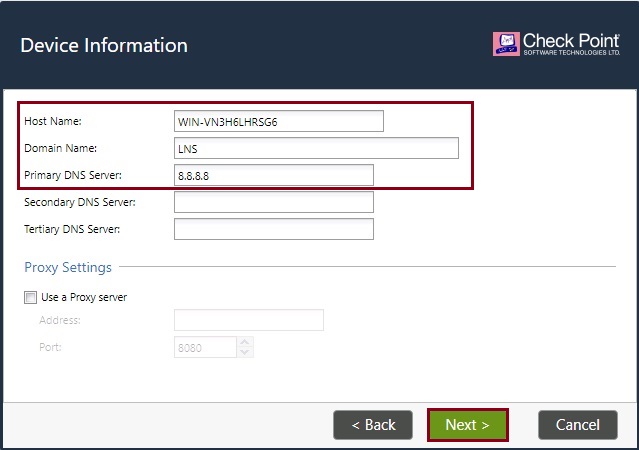
Specify the host name of the device, and DNS information. As we are performing a migration the host name must match the current R77.30 Windows Management Server
Click “Next”
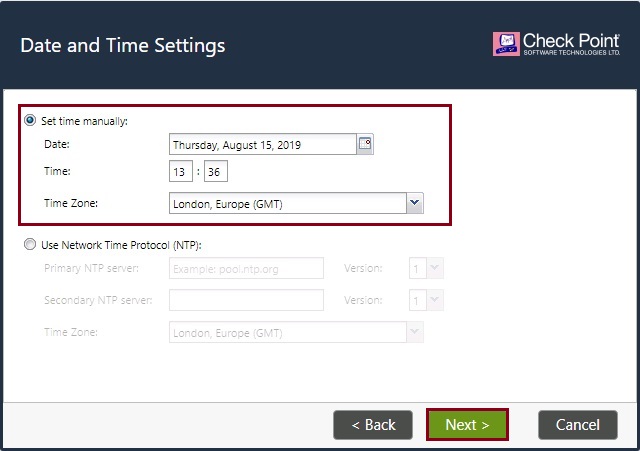
Ensure the date and time settings are correct and click “Next”
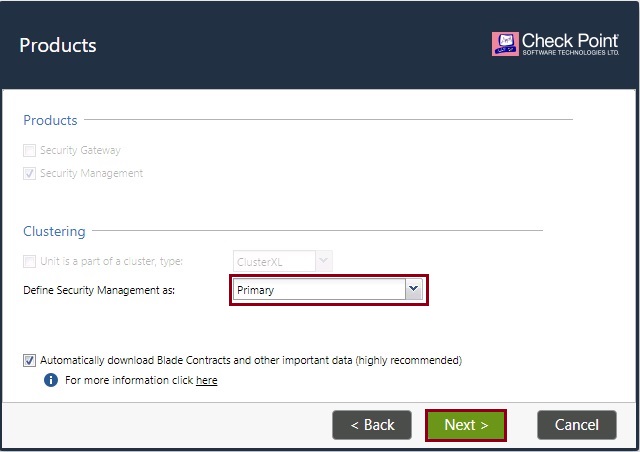
Select “Security Management” and click “Next”

Click “Next”
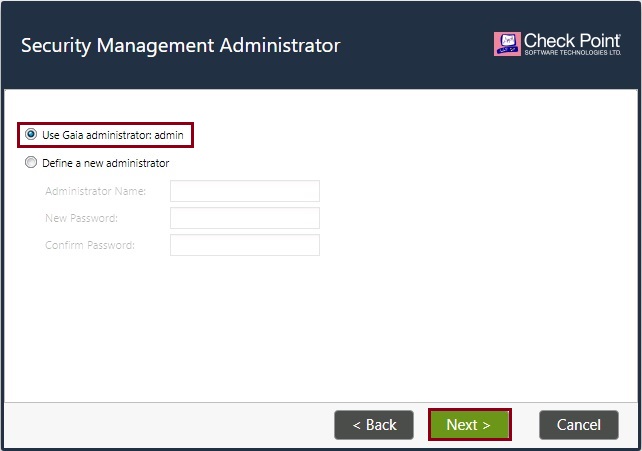
Leave the default “Use Gaia Administrator” and click “Next”
You may specify the networks/hosts that are allowed to connect to the device, or you may leave this for later once the migration is complete. In this case we can leave it as “Any IP Address” and click “Next”

Click “Finish” to begin configuration
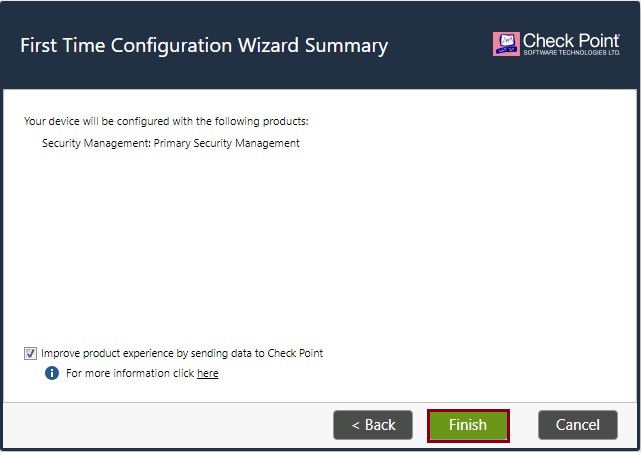
Select “Yes”

Once the configuration is complete, at the prompt click “OK”
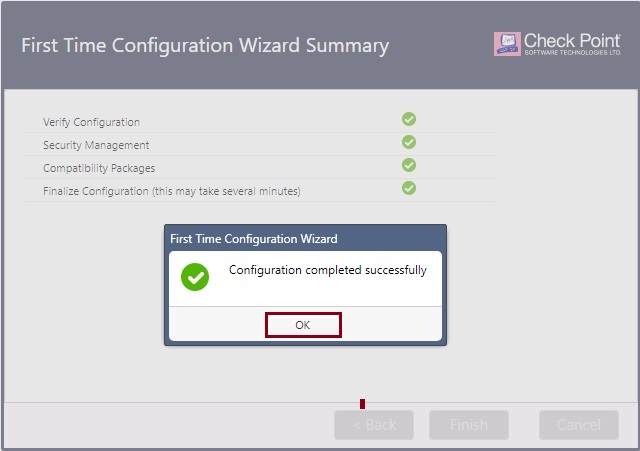
The device does not need a reboot and will normally redirect you to the main page.
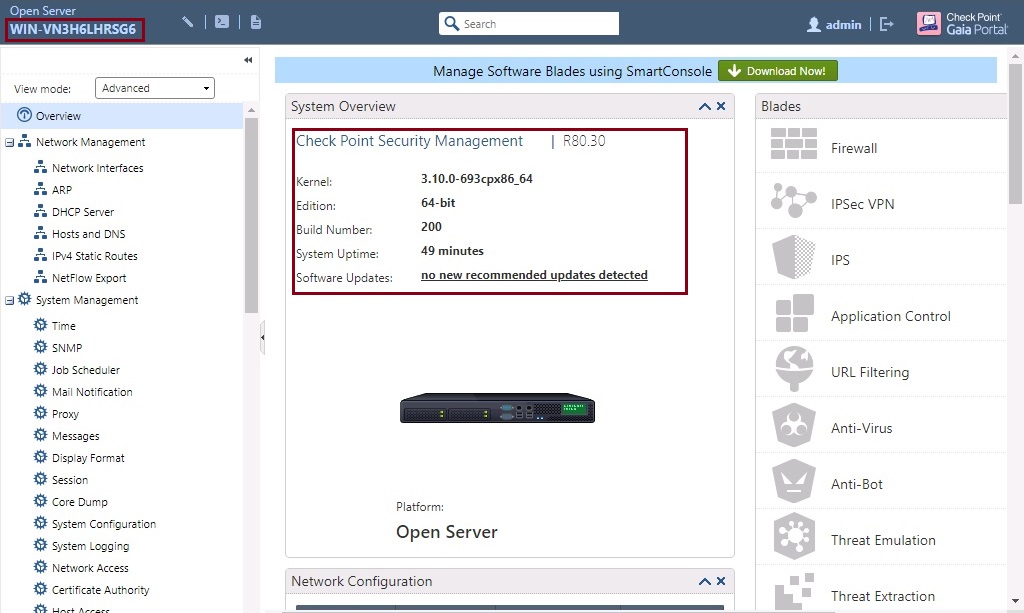
Step 3. In some cases, you may find that the management server fails to load after a first reboot, this normally indicates a bad installation, to verify that the server has installed and configured successfully – this will be a good time to test this.
From the CLI issue a reboot, alternatively we can do a CPSTOP/CPSTART
#reboot
#y

Step 4. Once the device is back up and running issue the following commands to check the status of the server.
#$MDS_FWDIR/scripts/cpm_status.sh
#$MDS_FWDIR/scripts/server_status.sh

Smart Console Installation
Step 1. On the Windows client machine that will be used to run smart console, install the application.
Download the correct version of the application and double click to run the installation wizard.

At the security prompt select “Yes”
Smart Console normally requires additional pre-requisites such as C++ select “OK” at the prompt to continue.

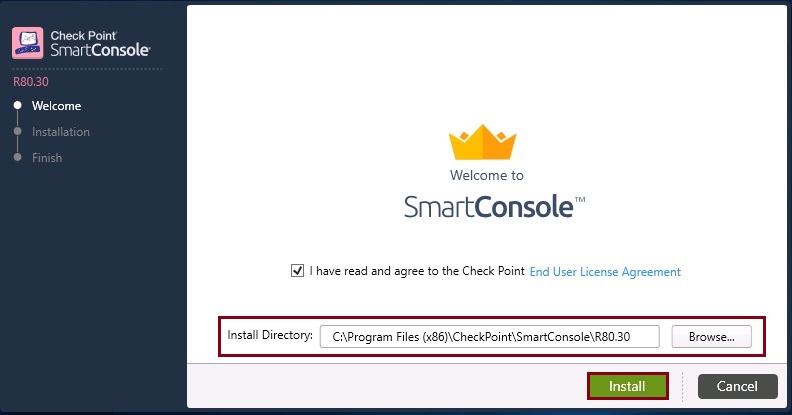
Select the installation directory and click “install”, the location specified below is the default.
The installation will run and will take some time to complete.
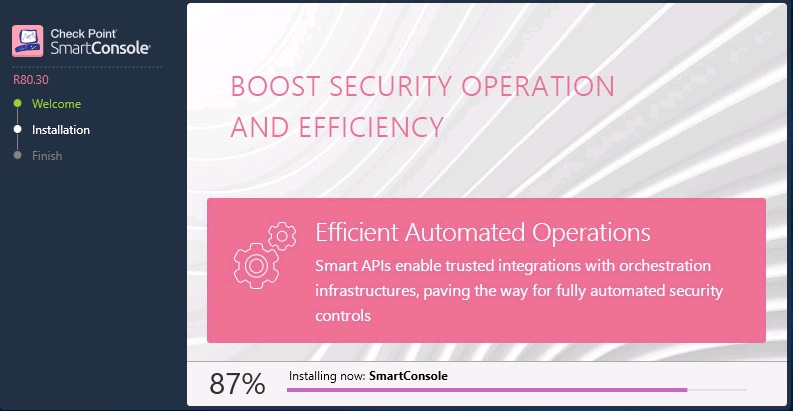
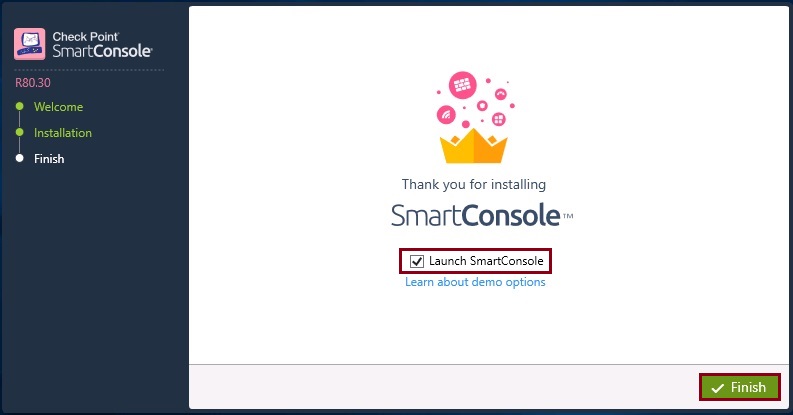
Once the installation is complete, click “Finish” and launch the application
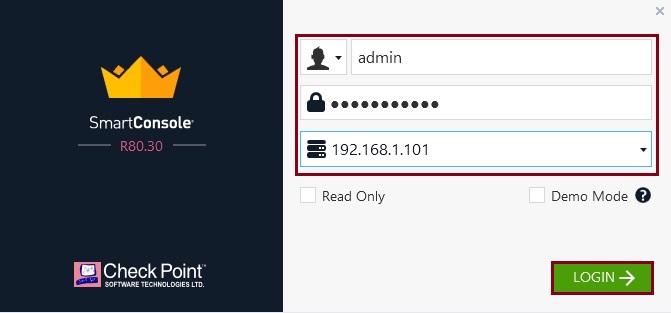
Step 2. Now that we have the GAIA management server ready and the smart console application for R80.30 is installed on our client device, we can login to the new server and verify its all working before we begin importing in the database.
At the login window, specify username and password that was created earlier on the new management server and specify the IP address of the device, click “login”
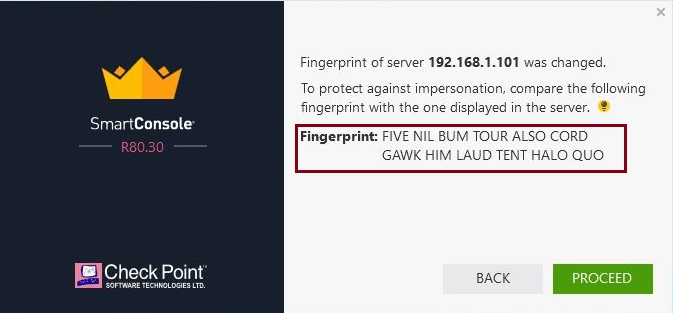
During the first initial connection, the certificate fingerprint will be shown to verify you are connecting to the correct device. Before clicking proceed, you can match the fingerprint to ensure it is correct.

Step 3. On the console window of the management server, login and type
#cpconfig
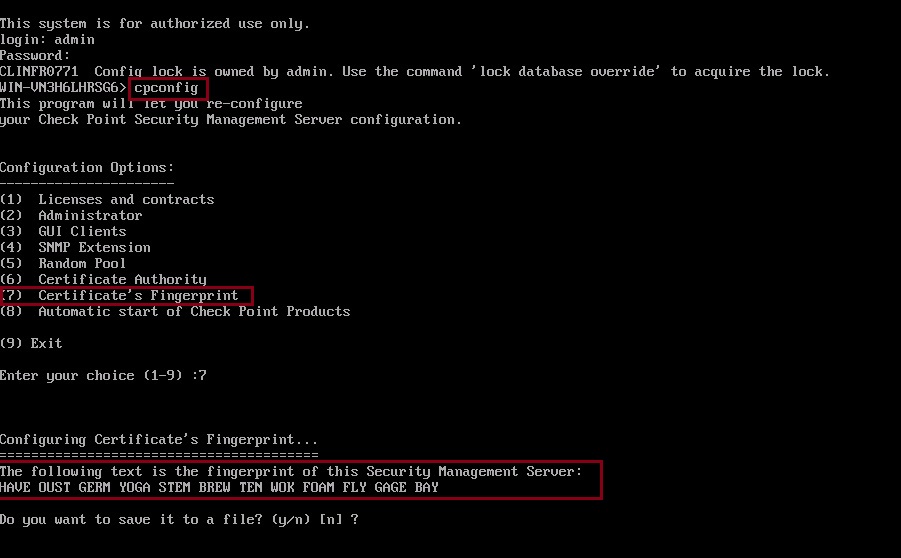
Select option “(7) Certificate’s Fingerprint” from the presented menu, you may save this fingerprint to a file or simply compare with the smart console warning message.
Step 4. Click “Proceed” on the smart console window and connect to the management server.
Smart console will now load, as you can see below, there is no configuration and no gateways present.

We have now confirmed, this device is ready and available for our migration of R77.30. close all the windows and sessions
Importing the Database
Step 1. In order to be able to transfer the database onto the GAIA appliance, we need to use an application such as WINSCP, this requires the user to connect as “Bash” this essentially means connecting to the Linux shell, to do this we can elevate the permissions to take the user straight to bash upon login.
This can be done either the CLI or GUI,
CLI –
Connect to the GAIA Management Server appliance using console/SSH and
#set expert-password
#expert
#chsh –s /bin/bash admin
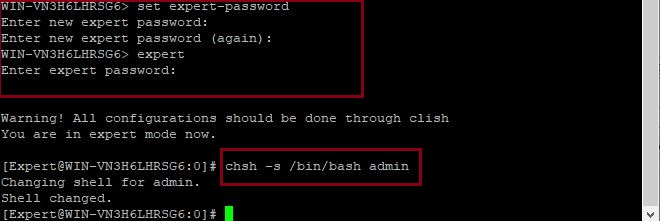
GUI –
Login into the GAIA management Server Web GUI, navigate to “Users” select the “admin” user and hit “Edit” from the left hand side under “Shell” select “/bin/bash”
Click “OK”.
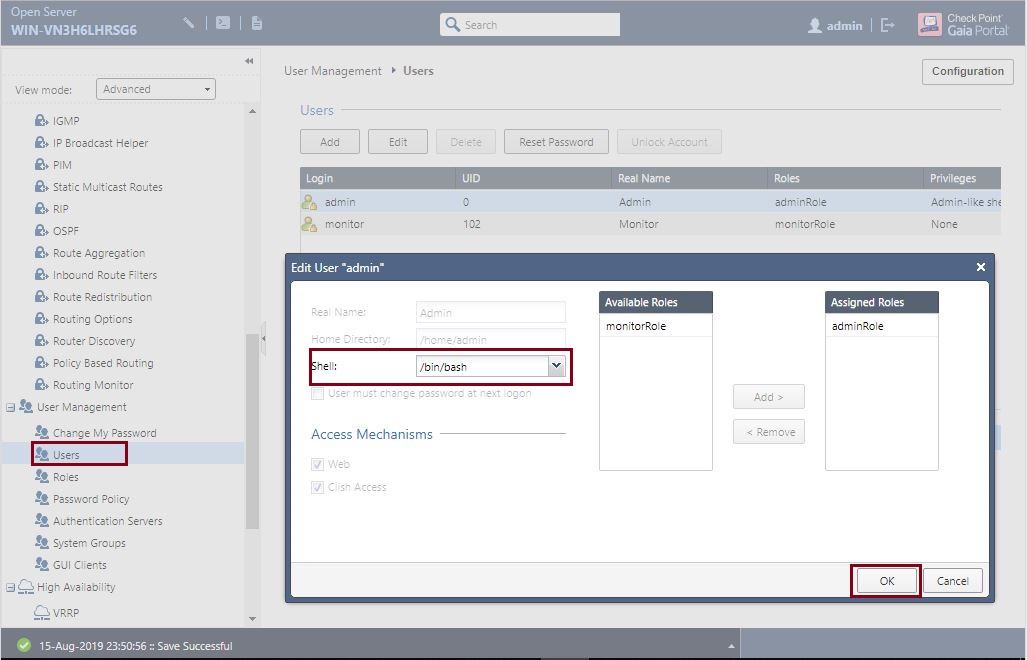
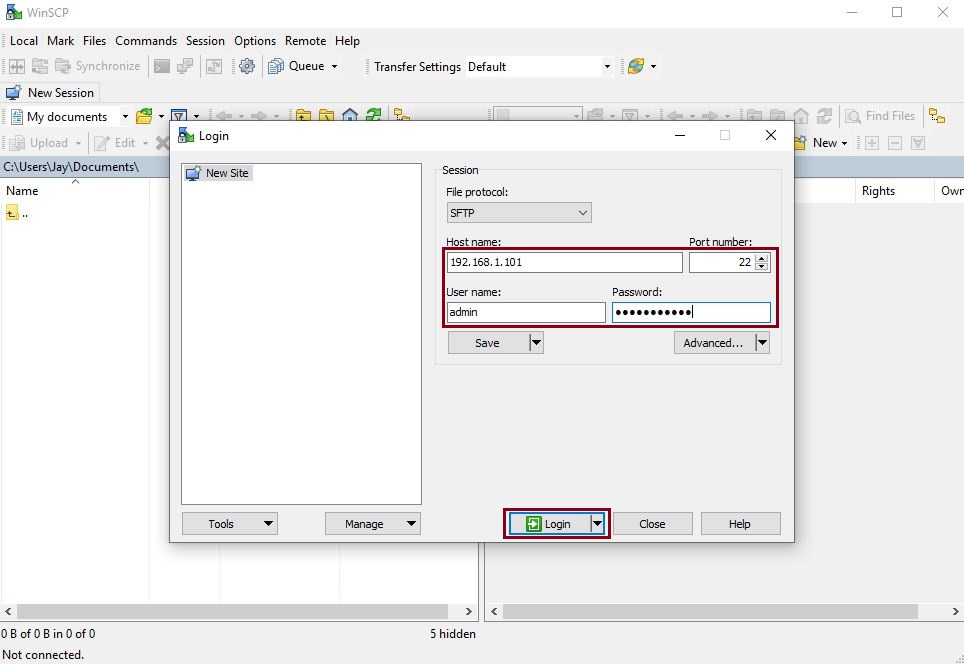
Step 2. Run WINSCP, specify the IP address of the GAIA Management Server, specify the username, password and click “Login”
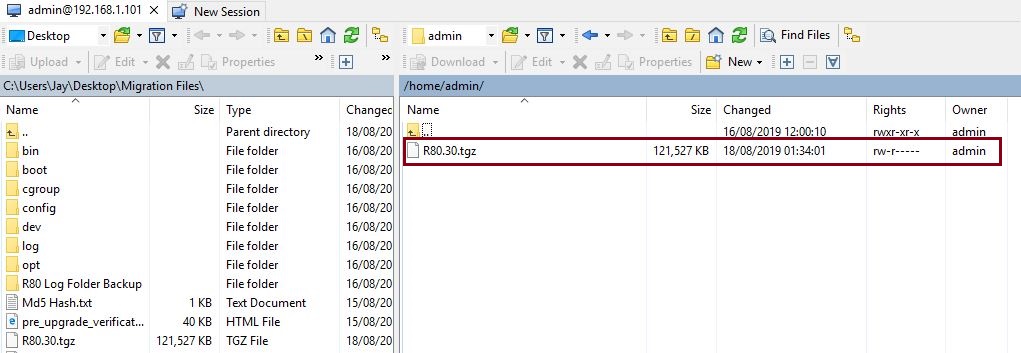
Step 3. From the left hand window, navigate and locate the exported database, on the right hand window locate the directory to copy the database to, in this case we will use /home/admin/
Drag the file from the source directory into the destination directory to begin uploading
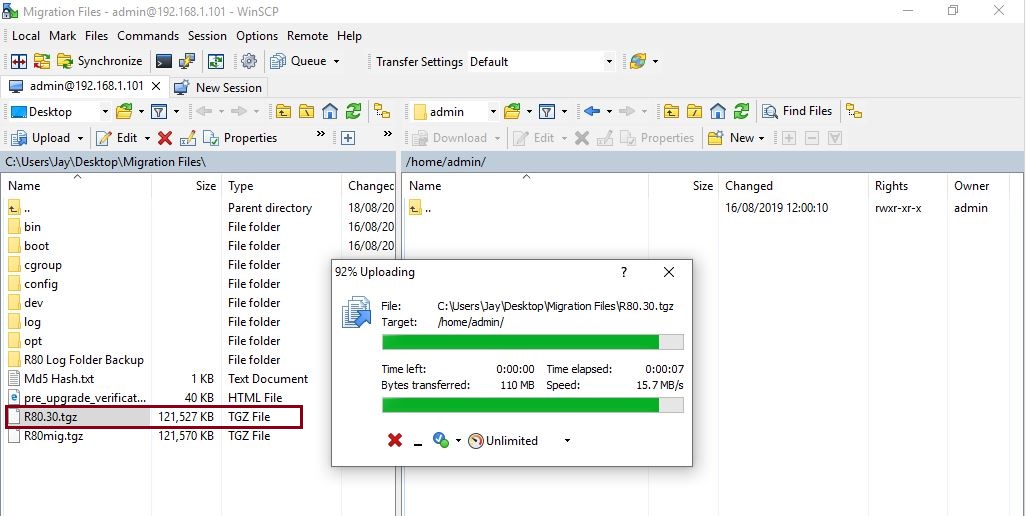
Verify the file has completed the transfer, it should be visible in the target directory.
Step 4. The shell can now be turned back from bash to clish
#chsh -s /etc /etc/cli.sh admin

Lets now compare the MD5 hash of the transferred file against the exported file hash, this way we can verify the transfer process was successful and the integrity of the file is still intact. The GAIA management server has this tool integrated therefore we can simply run the check using the following:
#md5 /home/admin/R80.30.tgz

If we now compare the output against our previously exported has, this should match – if there is any inconsistency between the two, repeat the above steps

Step 5. Once the file integrity has been verified, we can begin the import process of the database. The migration tools already exist as part of the software; therefore, we do not need to download/install these. If we change our directory as below, we can run the application.
#cd $FWDIR/bin/upgrade_tools/ – change to the directory to run the migration tools
#unset TMOUT – do not timeout the connection during the import process
#./migrate import /home/admin/R80.30.tgz – import the database, filename is R80.30.tgz
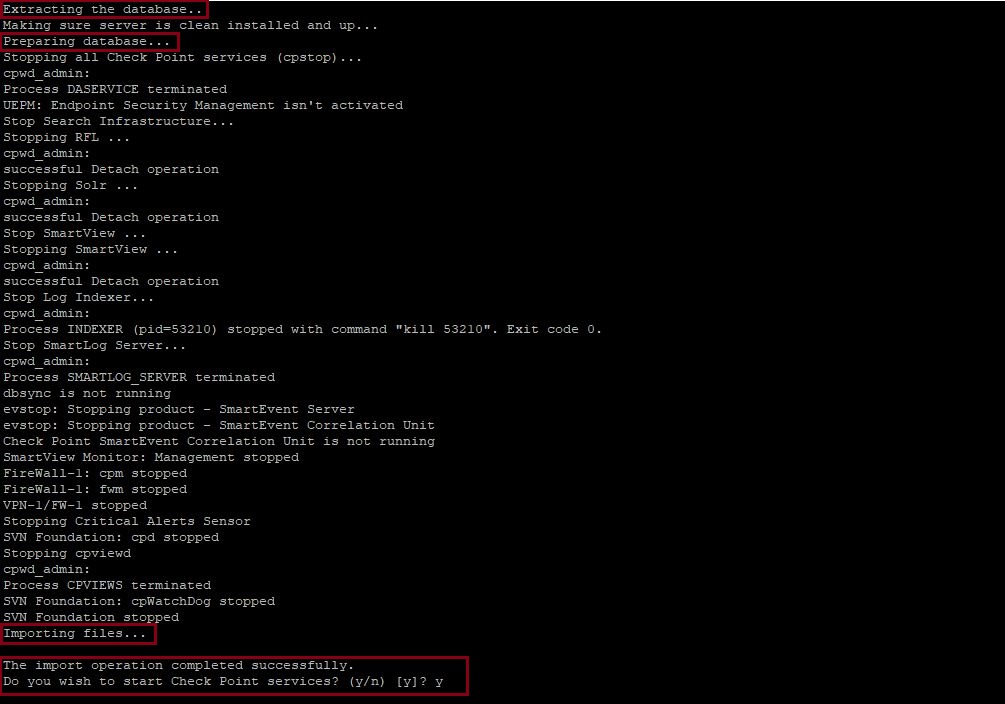
At the prompt to stop all Checkpoint services, select “Y”

The database will begin extracting and the importing process will begin. This can take a long time so if there is no activity for long periods its best to keep waiting until confirmation is displayed.
Once the import process is successful, at the prompt select “Y” to restart the Checkpoint services.
Step 6. The services can take some time to come back up therefore it’s a good idea to check the status using the below
#$MDS_FWDIR/scripts/cpm_status.sh
#$MDS_FWDIR/scripts/server_status.sh

Step 7. Launch “Smart Console” from the Windows client machine and connect to the new GAIA management server, note that the fingerprint has now changed, before clicking proceed again its best to verify the certificate fingerprint one more time.
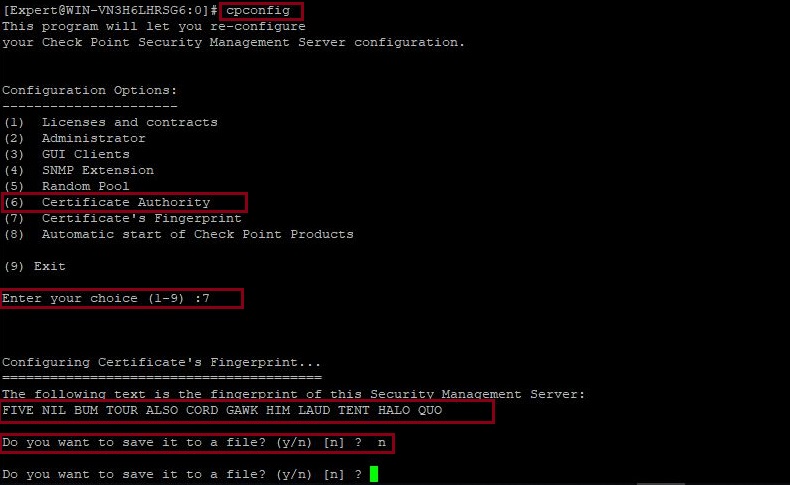
#cpconfig
Select option “(7) Certificate’s Fingerprint” from the menu and compare with the smart console warning message.
At the prompt “Do you want to save it to a file?” Select “n”
Select option “(9) Exit”
Step 8. Click “Proceed” at the fingerprint warning message and connect to the GAIA management server
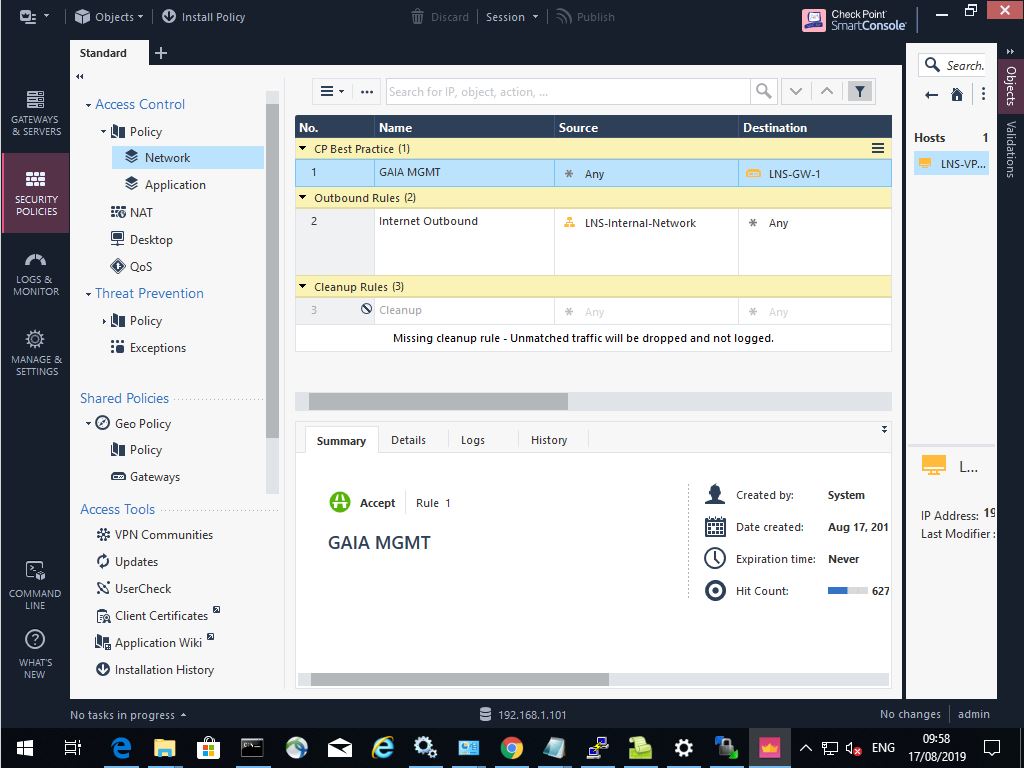
From the console we can see that our rules have been successfully migrated.
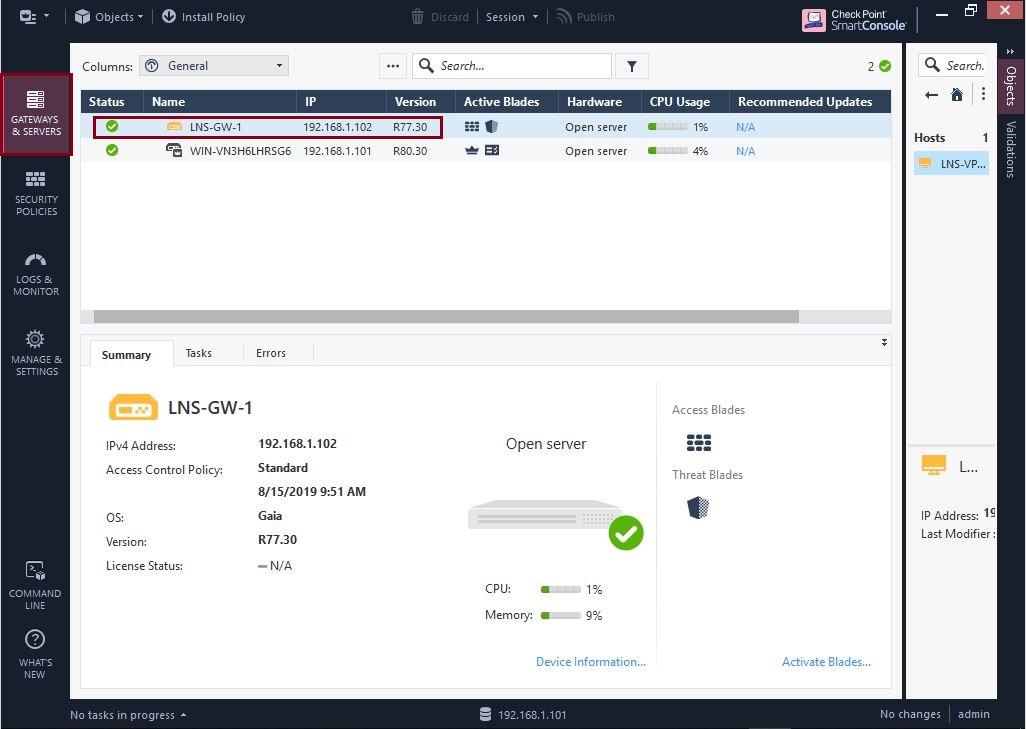
If we navigate the “GATEWAYS & SERVERS” tab we can see that our gateway is now present, SIC did not require re-establishment the original connection was maintained as part of the migration. You may notice that the GAIA management servers is running R80.30 however the gateway is still running R77.30, this is not a problem and the gateways will continue to work with the management server although this is of a higher software version. However we will look at upgrading the gateway too.
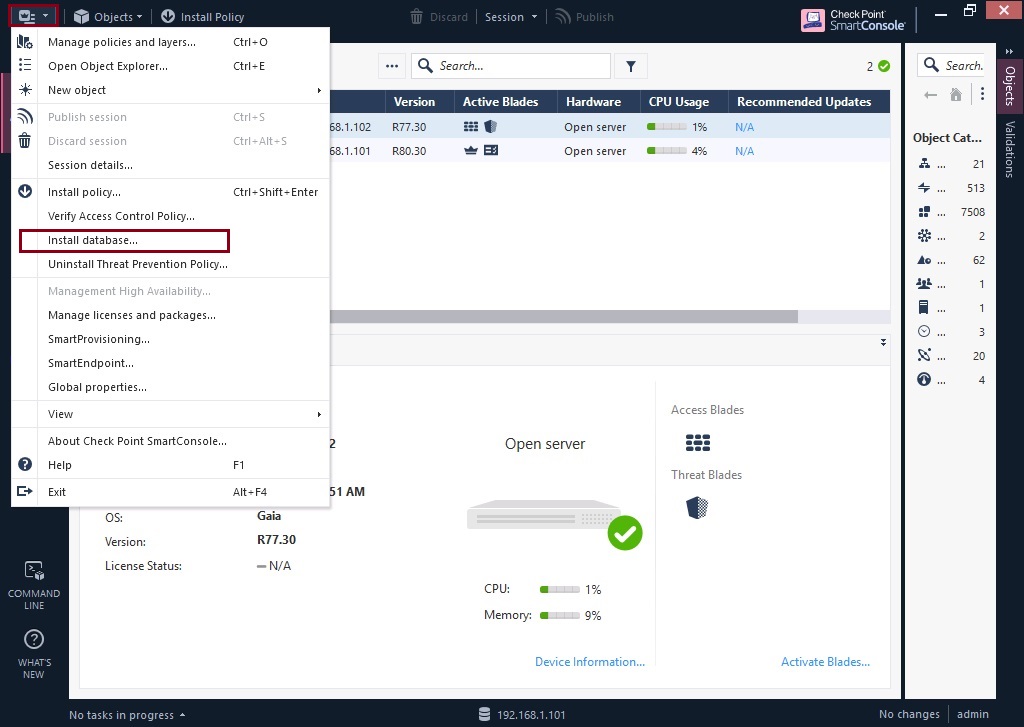
Step 9. From the menu, select “Install database”
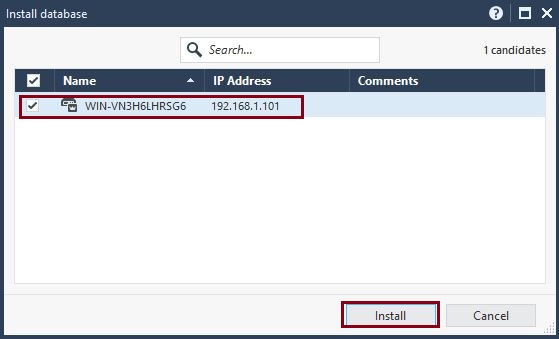
Select the gateway and click “Install”
You can monitor the task at the bottom left hand pane, this should install successfully

If we click “Details” we can see the full window and further details, click “Close”
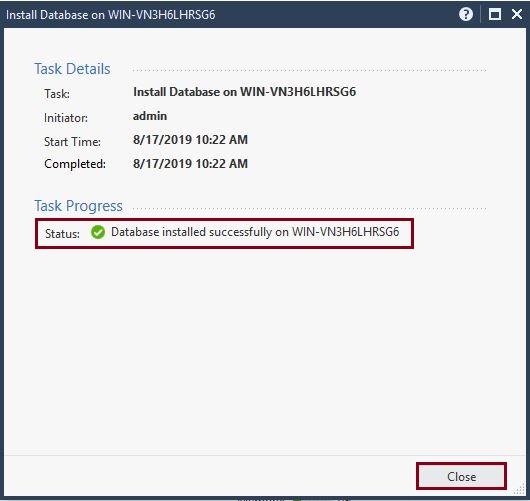
Step 10. Lets now install a policy and verify this is successful, click the “Install Policy”

Select “Access Control” and “Threat Prevention” (Although Threat Prevention will only install if it is enabled and the gateway is running R80.x) Click “Install”

From the “Recent Tasks” pane click “Details”
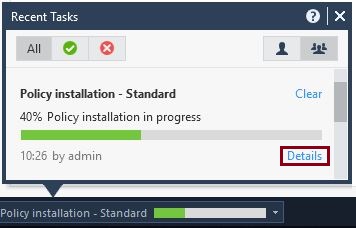
The access policy installation should be successful, this indicates the GAIA management server is able to communicate with the gateway correctly and that policies can be applied successfully.
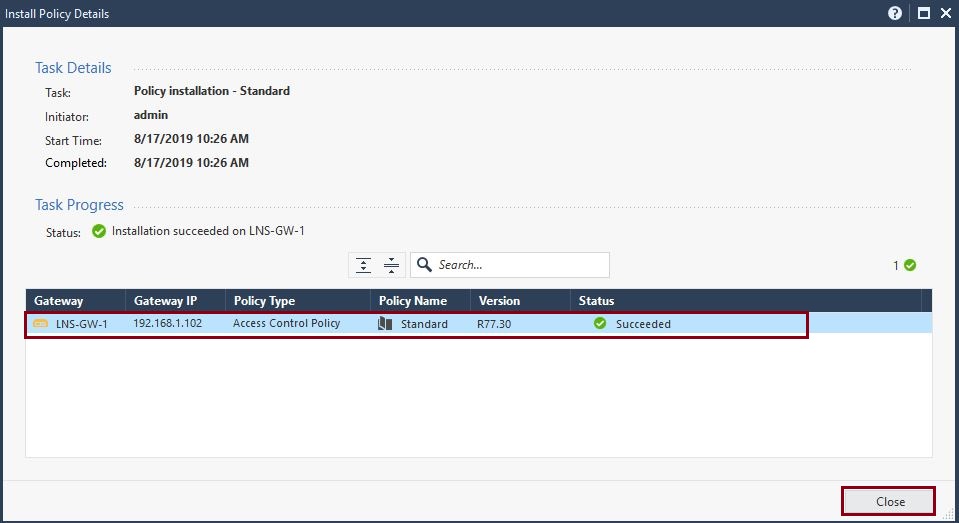
Step 11. If we take a look on the gateway, we can verify the policy installation was successful
#fw stat

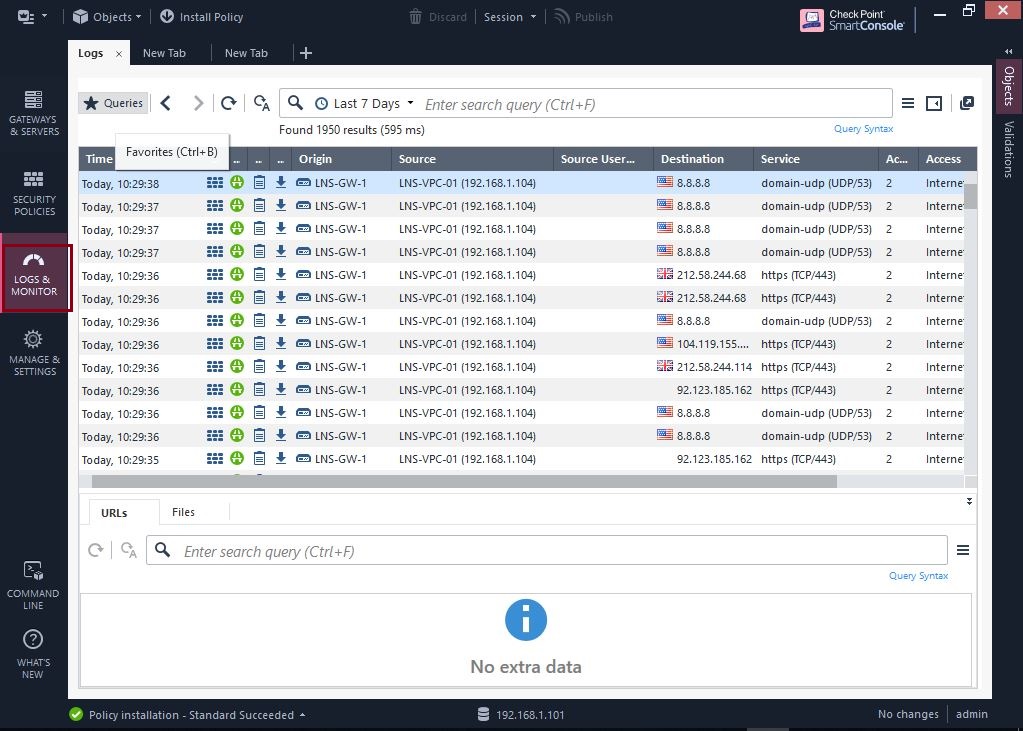
Now that the policy is installed the new GAIA management server will start capturing the logs for the traffic identified under each access rule. We can see these flowing in
Upgrading the gateway
There are two ways of upgrading the security gateway devices, whether they are single devices or as part of a cluster you may perform one of the following:
Use CPUSE – Checkpoint Update Service Engine, this is the live method by contacting Checkpoint services online directly from the gateway and obtaining the correct download files and installing them via an interactive session, this can be carried out via the web GUI or CLI. A valid service contract is required for this functionality.
Manually upload the correct upgrade software on to the security gateway and run the installation either via the GUI or CLI using an interactive session.
In this example we will use the CPUSE, we will also jump to R80.20 for the gateway, to ensure we are at least one version behind.
Step 1. Login to the gateway and navigate to “Upgrades (CPUSE)” – “Status and Actions”
From the list we can see that CPUSE has made contact with the checkpoint servers and is able to provide a list of recommended upgrades, this includes minor versions and major versions.

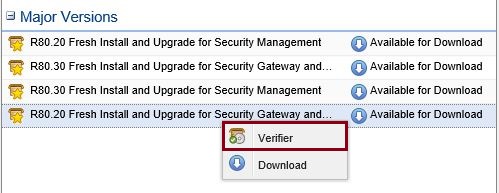
Select and highlight the correct version, “R80.20 Fresh Install and Upgrade for Security Gateways and Standalone”, right click and select “Verifier” to ensure upgrade is possible.
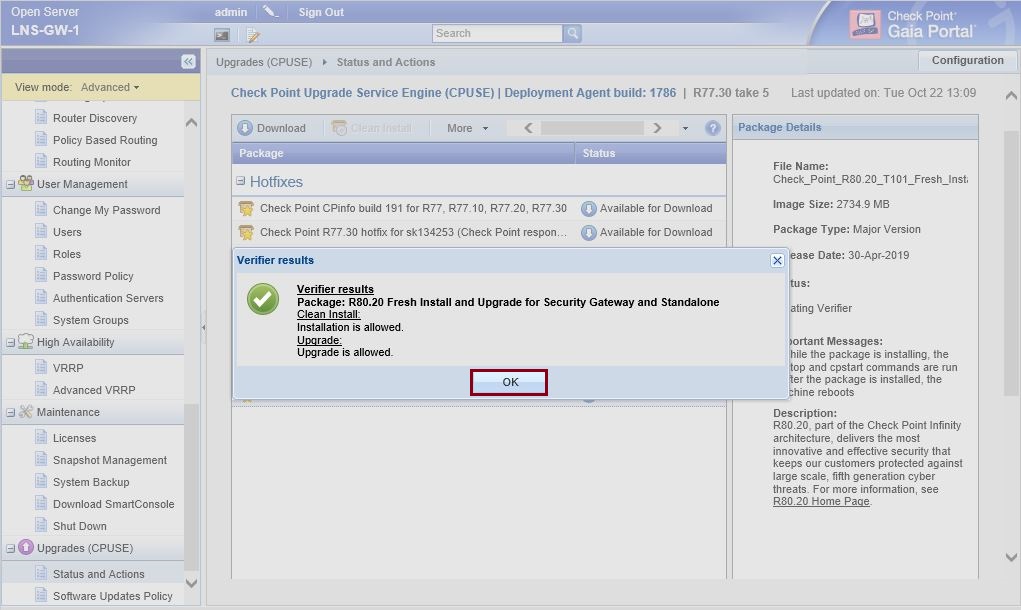
Once the tool provides verification that the installation is allowed, select “OK”
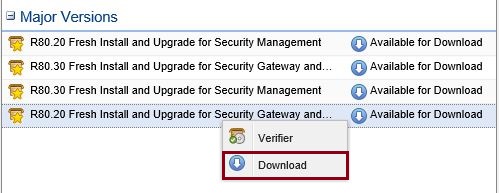
Step 2. Right click the version again and select “Download”
The download process should begin, this may take some time depending on the bandwidth available, the file is is above 2GB
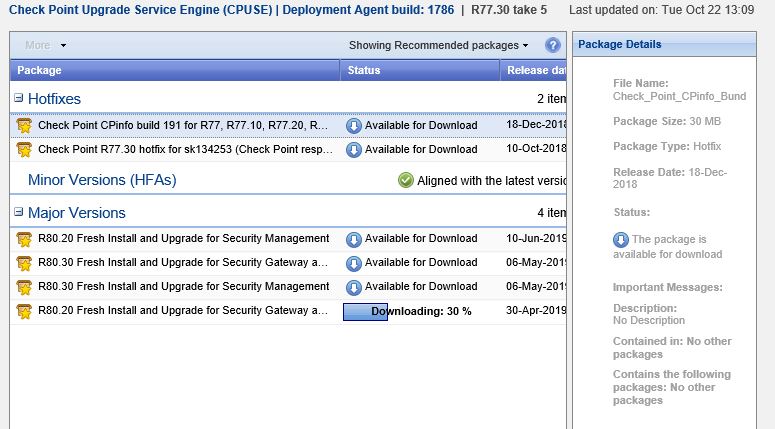
Once the download has completed successfully, this will be displayed under the status for the file.
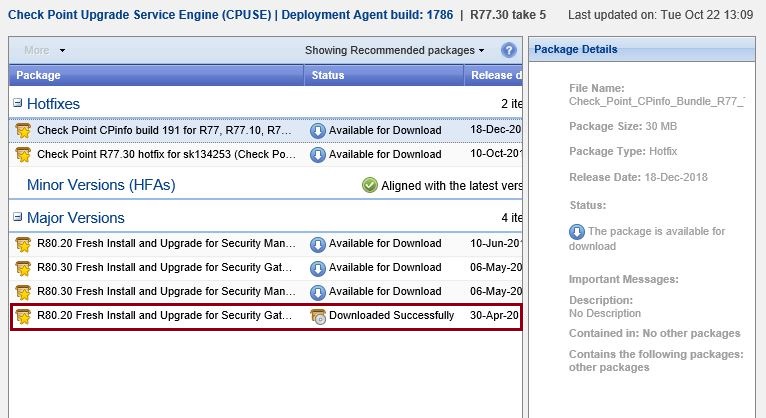
Step 3. Right click the file once again and select “Upgrade” to begin upgrading the gateway.

At the warning prompt notification, select “OK” the device will automatically reboot once the installation is complete.

The installation will run, and the progress can be tracked on the same page, if the device times out and logs out, simply log back in and navigate back. This may be required multiple times.

Once the installation is complete, the system will go down for a reboot, from the right hand pane we can see that the package installation is complete.
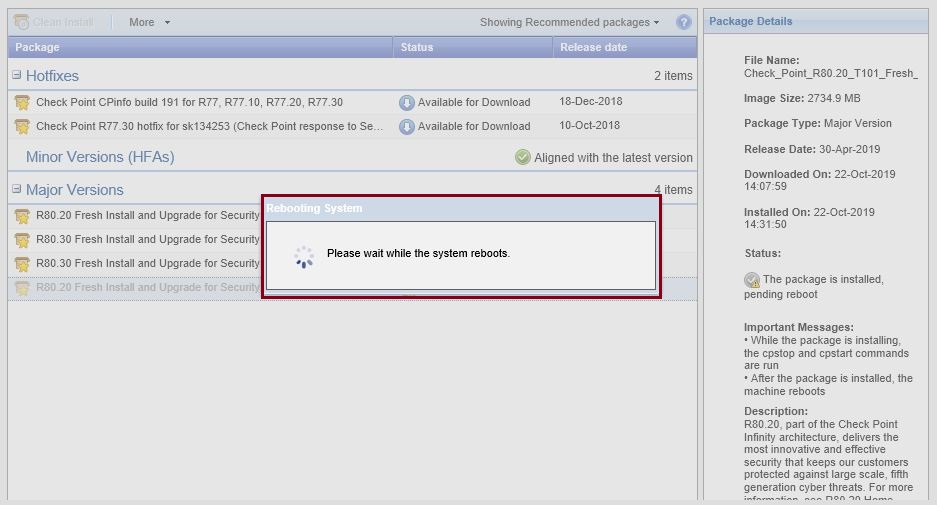
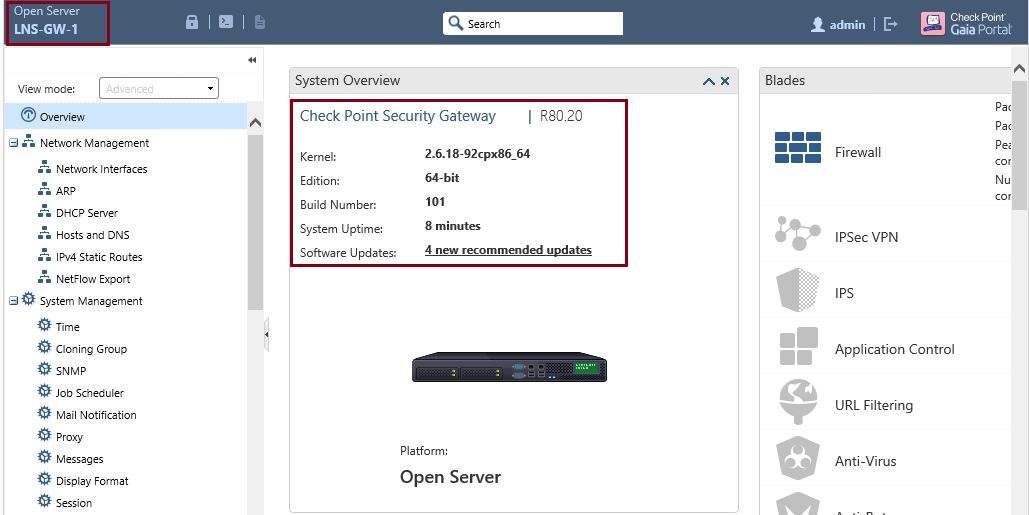
Once the gateway is back up, login to the new version of the gateway

On the main page, we can the device now is running R80.20 and the interfaces has changed to the new version.
Step 4. If we navigate to the smart console and take a look at the gateway, its still displayed as R77.30, to update this, we need to right click the gateway and select “Edit”
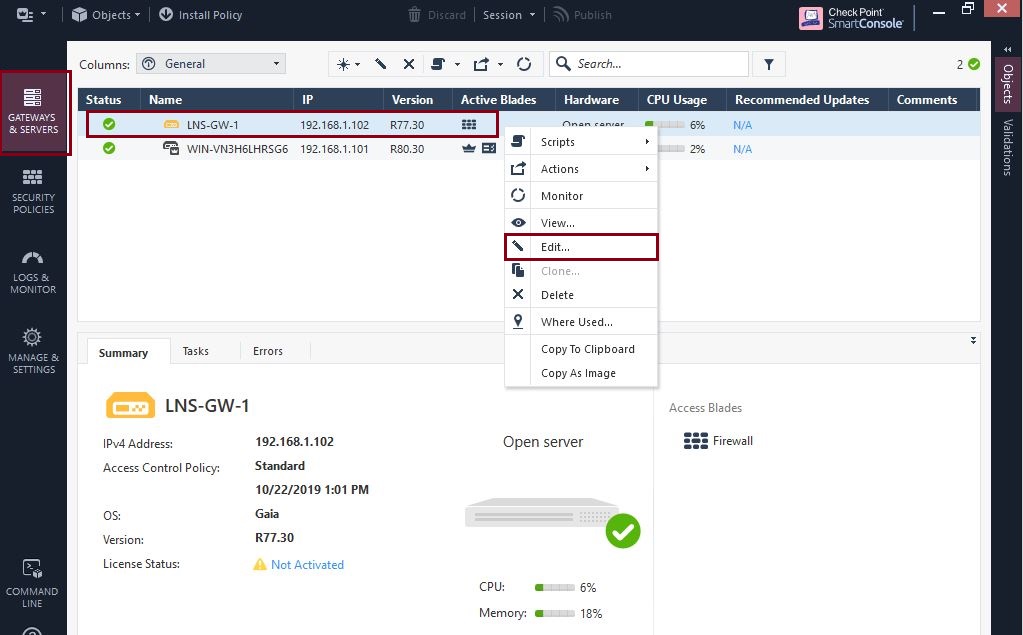
At this point the smart console should detect the new version of the gateway, if it does not we can simply click “Get”
Click “OK” on both windows and close them

At the gateway information this should now display the correct version, select “Install Policy” to install this and verify policy installation is still working after upgrading.

At the window, select “Publish & Install”
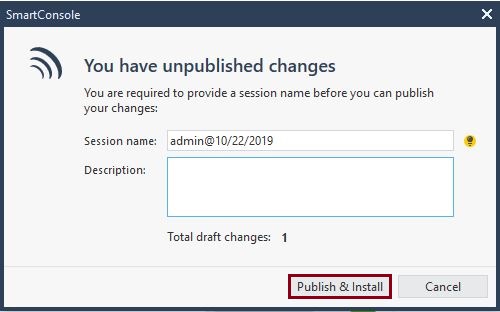
Click “Install”

The installation should be successful, click “Close”

