ICMP Inspection on the ASA
This is a very common question that comes up when engineers are deploying a new ASA in an environment, “why can’t I ping outbound from the inside network?” although this is something all experienced engineers may already know, I think it’s time to demonstrate this for people that do not know and would like to understand this behaviour.
By default, the ASA inspects TCP UDP traffic therefore the reply traffic is able to come back as part of its state full filtering (remembering) feature, however the ASA out of the box will not inspect ICMP traffic. To allow ping to work outbound we need to enable inspection for ICMP, this can be done by simply editing the default global policy and specifying that we want to inspect ICMP traffic.
Example
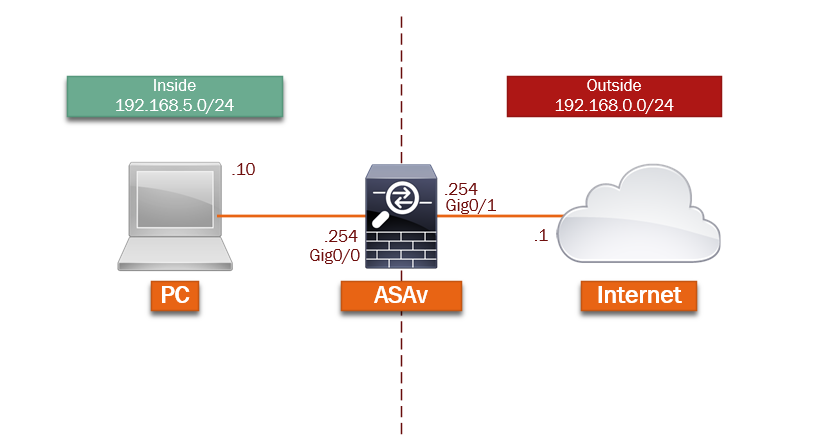
The basic topology below has been setup in GNS3. In the steps below we will take a look at the default behaviour, and how to configure ICMP inspection both via the GUI and CLI.

Assuming the topology is functioning and has the basics (Inside/Outside Zones/NAT) in place and the inside hosts are able to get out, if we ping from the inside network, outbound, the ping should not be successful.
Let’s take a look at this:
Step 1: On the ASA setup debugging so that when we test ping we can see what the firewall is doing.
#debug icmp trace
![]()
Step 2: From PC 1 ping 8.8.8.8, this should fail.

Step 3: On the ASA lets take a look at the output.

From the output above, we can see that the ICMP “echo request” is going through the “Inside” interface and out the “Outside” interface at which point NAT is doing its job and translating the source IP address. However, we cannot see any “echo reply”
As the ICMP traffic leaving the firewall is not inspected, the firewall will not remember the route the return traffic needs to take in order to get back to the host. Also the firewall will see the return traffic as coming inbound on the outside interface solo from 8.8.8.8 and as there are no ACLs in place to allow this traffic the firewall drops it.

Let’s enable ICMP inspection,
GUI example using ASDM:
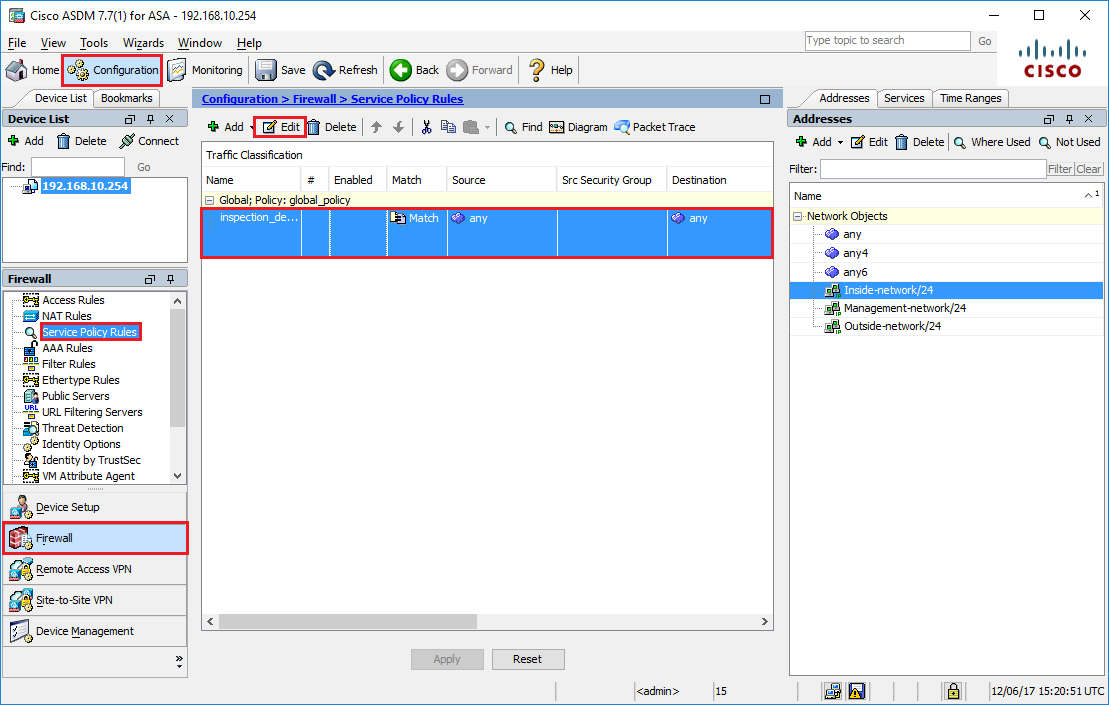
Step 4: Click on the “Configuration-Firewall-Service Policy Rules” select the default policy and click “Edit”

Step 5: Click on the “Rule Actions” tab and tick “ICMP”, click “OK”

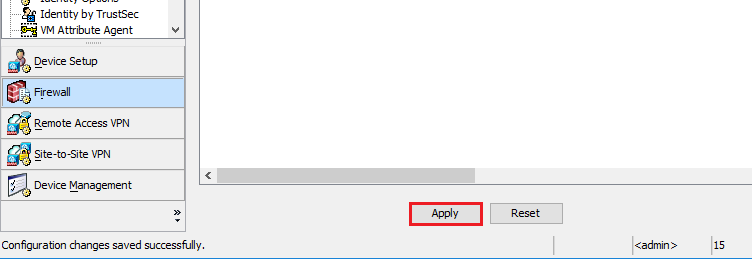
Step 6: Click “Apply” to send the configuration to the ASA

Step 7: From the PC ping outbound to 8.8.8.8, as we can see this time round the ping is successful.

Step 8: Looking at the debug messages, we can now see “echo request” leaving the ASA and “echo reply” coming back into the ASA. this time round the ASA inspects the ICMP traffic leaving the firewall therefore it is able to allow the return traffic dynamically due to state full filtering.

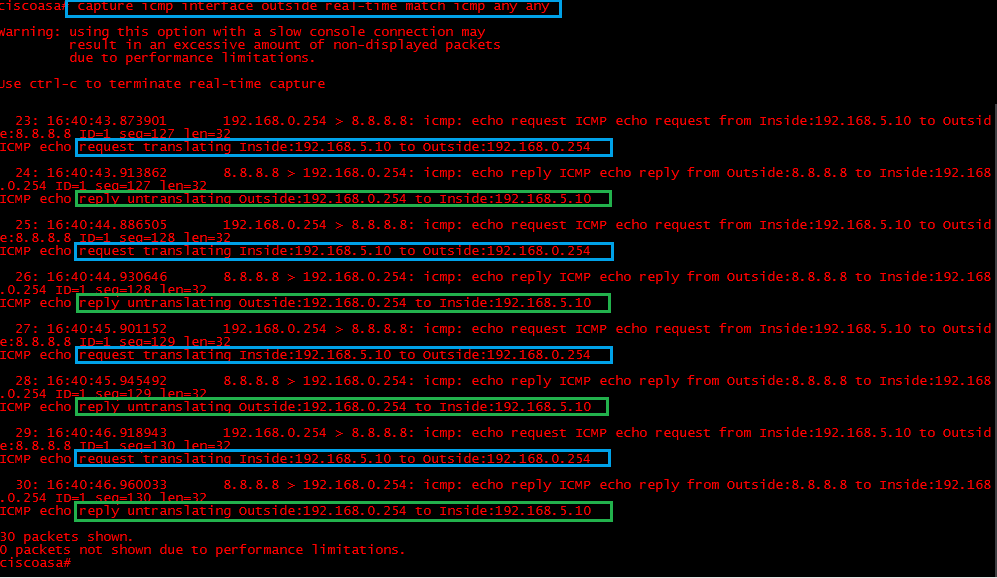
If we dig a bit deeper by doing a capture for ICMP traffic in real-time on the outside interface, we should see more detail. Setup the capture and ping 8.8.8.8 from the PC once again.
#capture icmp interface outside real-time match icmp any
We can see the forward traffic (in blue) translating, and then the return traffic (in green) un-translating. This is the ASA inspecting the traffic and remembering.

CLI example:
Step 1: to configure ICMP inspection via CLI, we simply amend the default policy to inspect ICMP using the following commands:
#conf t
#policy-map global_policy
#class inspection_default
#inspect icmp


