Deploying EAP-TLS Wireless Solution in an Enterprise Environment
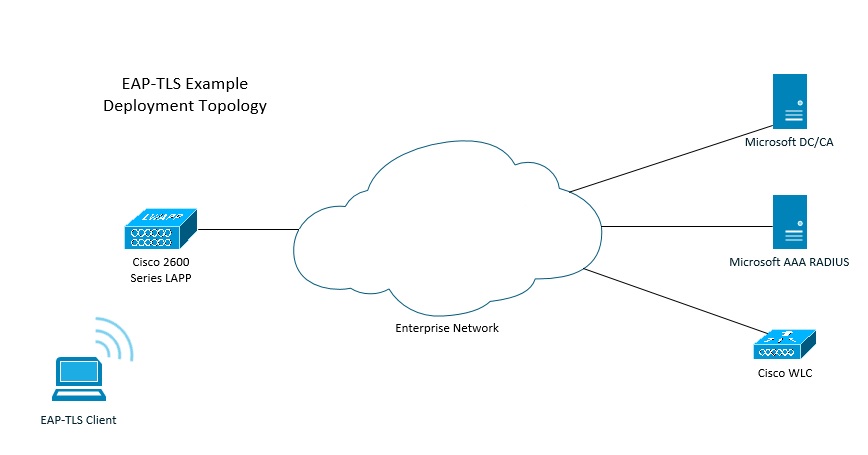
EAP TLS is one of the most secure methods of deploying wireless solutions in an organisation. It uses certificate based authentication both on the server side and client side to authenticate each other, the internal CA is responsible for issuing certificates to the users and computers. There are a number of ways to deploy EAP-TLS, using a combination of computer certificates, user certificates, different types of AAA servers, and different WLC vendors, however the same methods and process will take place in the background. In a typical deployment, you would use a Certification Authority server to issue/manage certificates, one or several AAA server as the RADIUS server, one or multiple WLC’s to manage the WLAN/s and forward the authentication requests, and finally clients to connect to the infrastructure network.
Wireless Terminology
Supplicant = Client/User
Authenticator = AP
Authentication Server = AAA RADIUS Server
What happens in the background?
During association the client initiates a connection to the authenticator, the authenticator seeks the requirements of the connection and forwards the request to the WLC who then forwards it to the authentication server. The authentication server sends its certificate to the supplicant, including a request for the supplicant to provide its certificate back. At this time the authenticator places a block for that supplicant until successful authentication can take place. During authentication the client validates the server certificate and responds with an EAP response message containing its certificate. The server validates the clients certificate and refers to the network policies to authenticate the supplicant. Once authentication is successful the server responds with specification for the session, at this time the block is removed by the authenticator and the supplicant is allowed on to the network.
What will be doing in this Step-byStep guide?
In this step-by-step guide we will deploy EAP-TLS for our wireless network infrastructure, in micro steps we will configure the following:
Windows Server 2012 R2: This will act as the Domain Controller as well as the Certification Authority to issue and manage our certificates. We will be using user certificates which is the preferred option in this type of deployment. User certificates have an additional layer of security over computer certificates, this is because only the user that has a valid certificate will be able to authenticate whereas a computer certificate authenticates the device regardless of the user that is logged on to that machine. We will create AD users and security groups to control access via our NPS Server. We will also deploy Group Policy settings from our DC to push out auto enrollment for our user certificates, and our SSID profiles.
Windows Server 2012 R2: The second box will be setup as the NPS RADIUS server, this server will be used to create our network policies for access control, we will identify the AD security groups that will be allowed to authenticate as well as the type of connections allowed. We will also define the method of authentication we will be using and allocate a valid server certificate for the process. Although the NPS role can be installed on the DC, I have specifically decided to keep it separate. Installing the NPS role on a DC would require a “Domain Controller” certificate instead of the “Computer Certificate” that we will be using. This I found can have a mixture of effects where the clients are unable to authenticate due to a “user credentials mismatch”, this I suspect is a certificate issue due to new certificates being generated automatically by the DC for the purpose of “Kerberos Authentication”, “Domain Controller Authentication” and “Directory Email Replication”.
Cisco vWLC: This will be a WLAN controller that will forward all RADIUS authentication requests to the NPS server, we will also set-up the WLAN profiles and manage the SSIDs
Windows 7 client: This client machine will be domain bound, primarily we will use this device to connect to the wireless infrastructure and validate our configuration.
Please note: In order to carry out this lab you must have a functioning domain with ADDS, DNS, DHCP and networking, you will also need the additional roles installed mentioned above on the relevant servers.
Anchor links
Request a Computer Certificate for the NPS Server
Configure Auto Enrollment to issue User Certificates
Create AD Security Groups and assign users
Configure RADIUS and Create the Network Access Policies
Configure the WLC for RADIUS and setup the WLAN
Configure the Client Network settings via GPO
Validating the deployment & Testing
Lets Get Started!
Request a Computer Certificate for the NPS Server
In order to set-up our network policy server for EAP authentication we need to request a computer certificate so that when clients attempt to authenticate the NPS server is able to present its certificate to verify its identity is legitimate. You must have a CA Server Installed and configured in order to request a certificate, please refer to “Install Certification Authority on Server 2012 R2”.
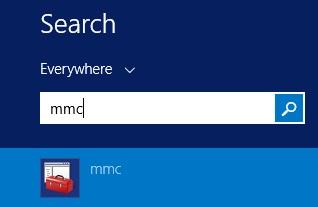
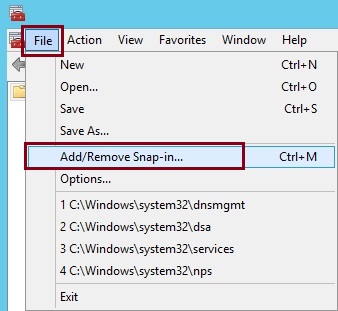
1. Logon to the NPS Server and Click “Start” type “MMC”
2. at the Window click “File”– “Add/Remove Snap-in”
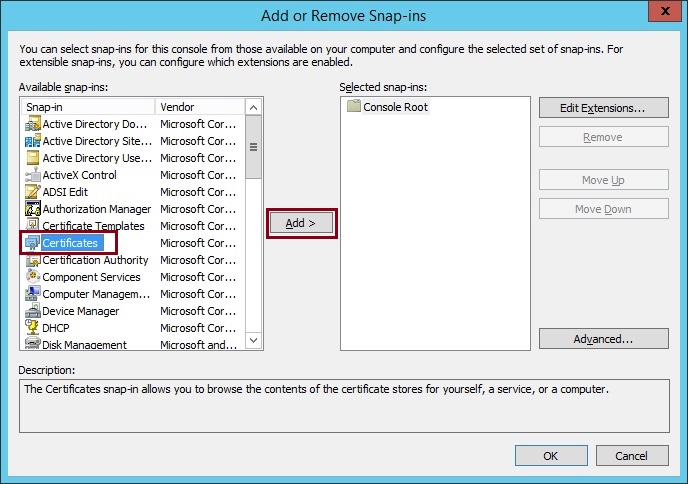
3. from the left hand pane select “Certificates” and hit the “Add” button
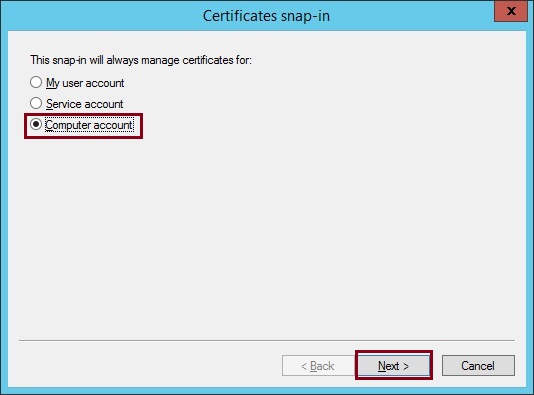
4. Select “Computer account” and click “Next”
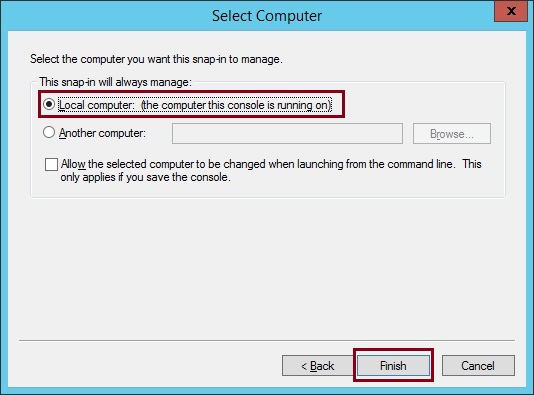
5. Select “Local computer” and click “Finish”
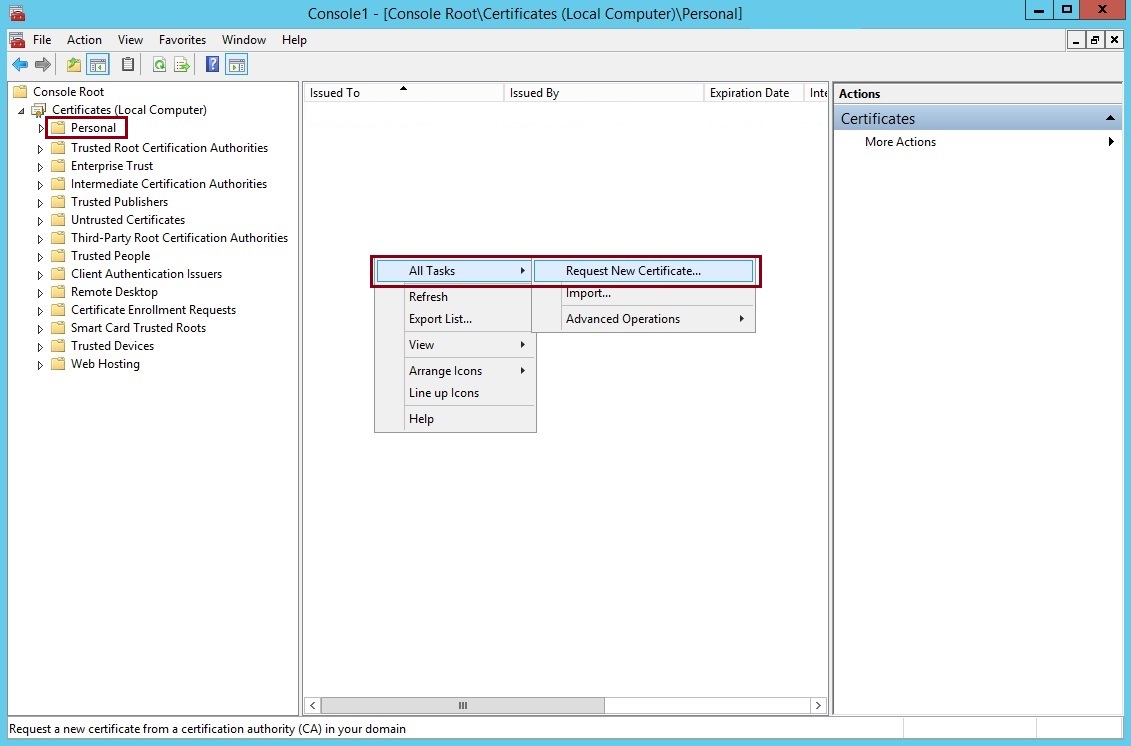
6. Expand “Certificates” – “Personal” Right click and select “All Tasks” – “Request New Certificate”
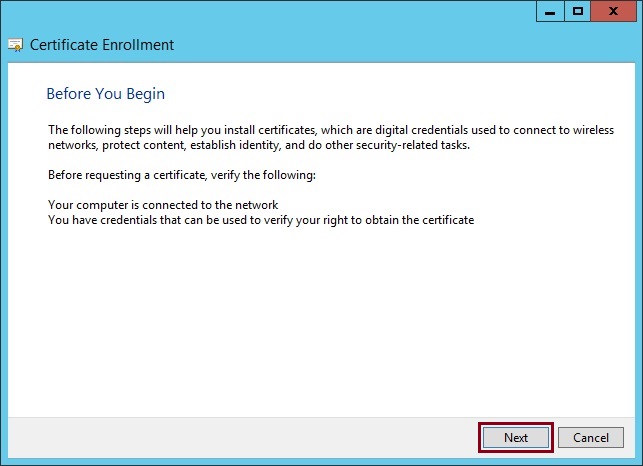
7. Click “Next”
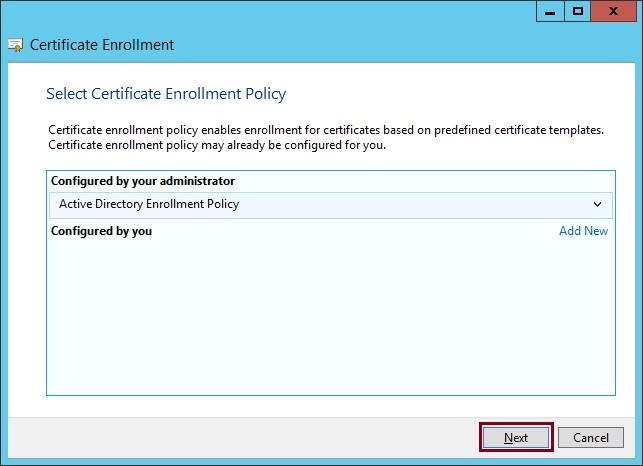
8. Click “Next”
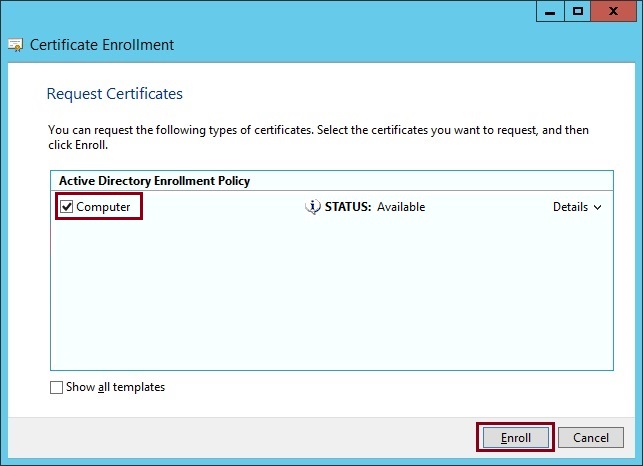
9. Select “Computer” and click “Enroll”
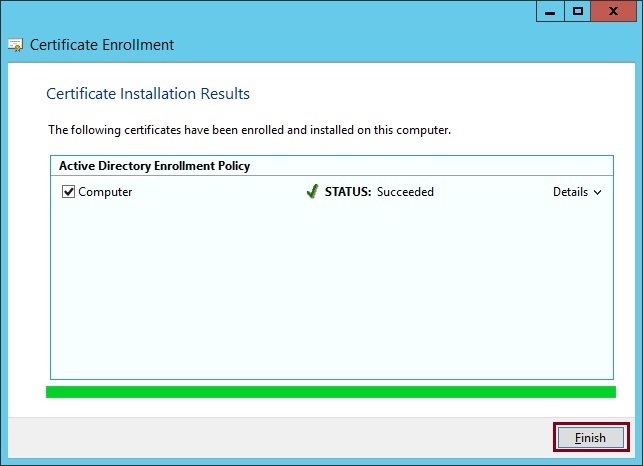
10. Once the certificate has enrolled and installed click “Finish”
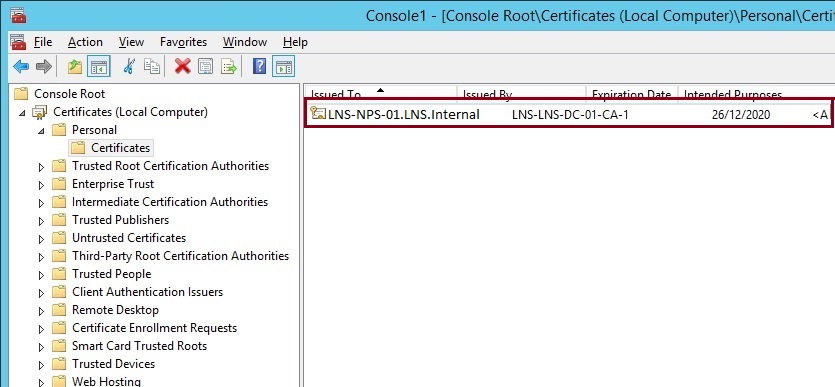
The new generated certificate for the server signed by the CA will now be visible in the certificates MMC
Configure Auto Enrollment to issue User Certificates
We need to create a template for our requirements of the certificates that we want to issue our users, then we can use this template and configure auto enrollment for our domain users. This way the deployment of certificates is automated and users do not have to manually request one. We can then push out the policy using GPO.
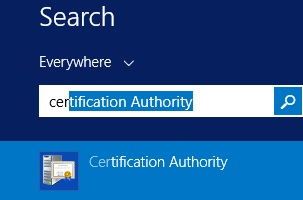
1. Login to the CA Server, click “Start” type “Certification Authority”
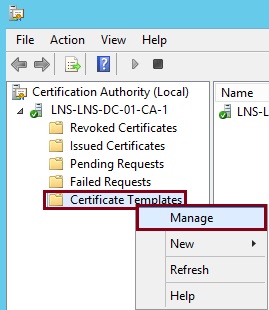
2. Expand “Server Name” right click Certificate Templates” and select “Manage”
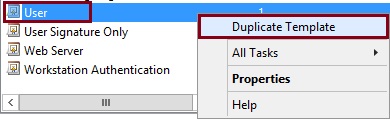
3. From the “Certificates Templates console” scroll down, right click “User” and select “Duplicate Template”
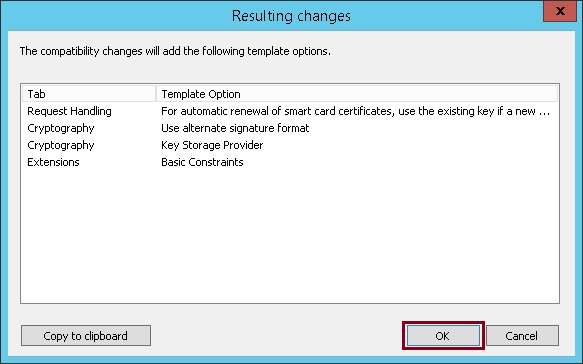
4. From the “Compatibility Settings” select “Windows Server 2012 R2″ as the Certification Authority
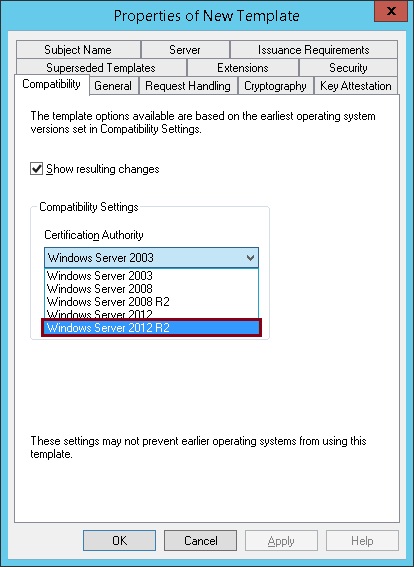
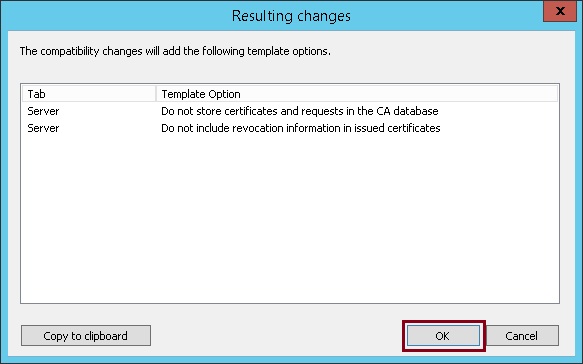
5. At the pop-up prompt click “OK”
6. Select “Windows 7/Server 2008 R2″ as the Certificate recipient
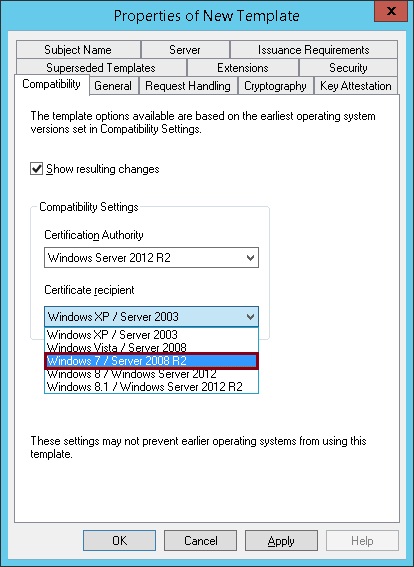
7. At the popup prompt click “OK”
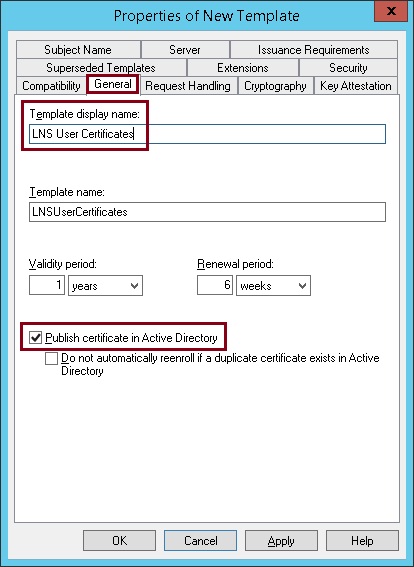
8. Click the “General” tab, give the template a name and tick “Publish certificate in Active Directory”
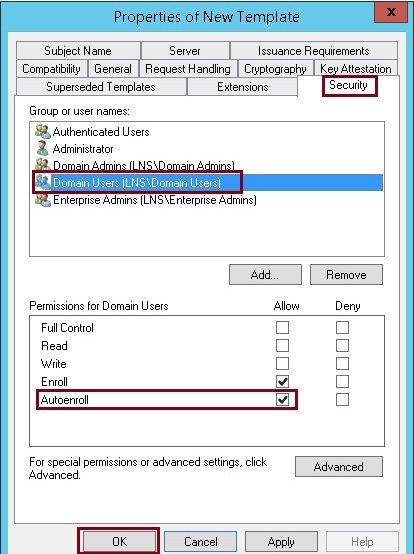
9. Click the “Security” tab, select “Domain Users” tick the“Autoenroll” check box under “Allow” and click “OK”
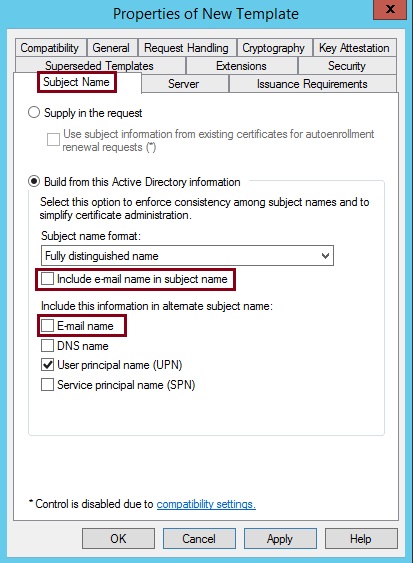
10. Click the “Subject Name” tab and de-select “Include email name in subject name” and “Email Name”, If these boxes are ticked and the users in AD have no email address specified, the certificates will not enroll and continue to fail, this can be left ticked if you have an on premise exchange server.
The template will appear in the list

11. Close the “Certificates Templates Console” back on the “Certification Authority” console right click “Certificate Templates” folder, select “New “and click “Certificate Template to Issue”

12. Select the template created earlier and click “OK”
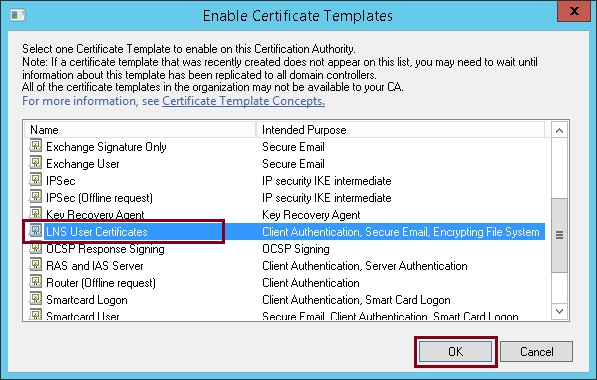
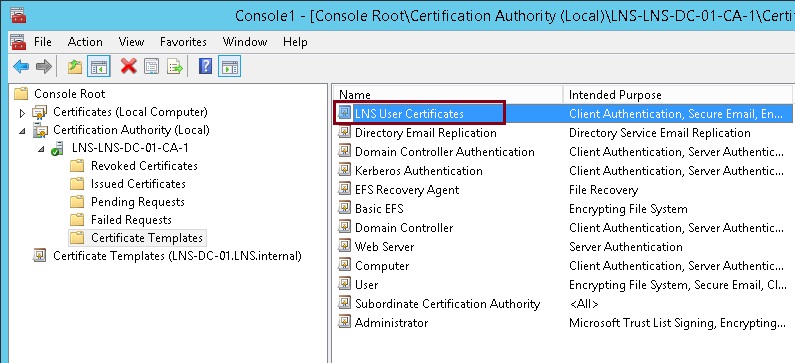
The template will now appear as a valid template that can be issued out.
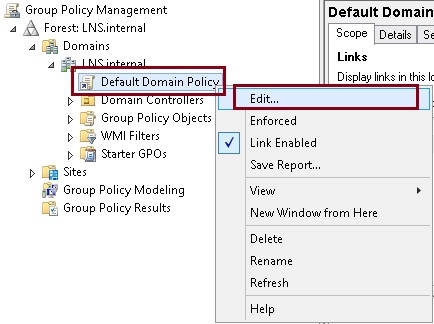
13. Still on the CA/DC click “Start” type “Group Policy Management”

14. Expand “Forest” – “Domain” – right click “Default Domain Policy” and select “Edit”. Any group policy can be used to push out the enrollment settings, you can also create a dedicated GPO linked back to an OU.
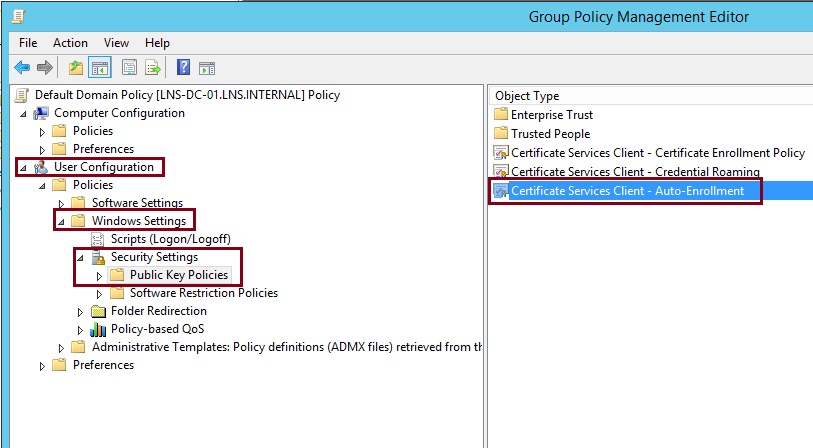
15. Expand “User Configuration” – Windows Settings” – “Security Settings” Select “Public Key Policies” click and open “Certificate Services Client – Auto Enrollment”
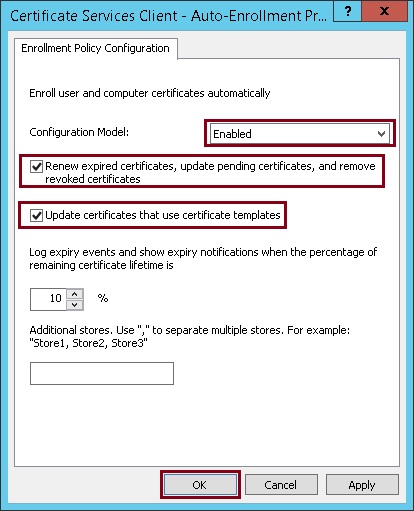
16. Select “Enabled” tick “Renew expired certificates, update pending certificates, and remove revoked certificates”, and “Update certificates that use certificate templates”. Click “OK”
Create AD Security Groups and assign users
In this step we will create a new security group that will be used to control access for our users, for the purpose of this lab we will create a single user and make them a member of that security group so that we can use this user later for validating our deployment.
1. On the DC click “Start” and type “Active Directory Users and Computers”
2. From the “Action” Menu select “New” – “Group”

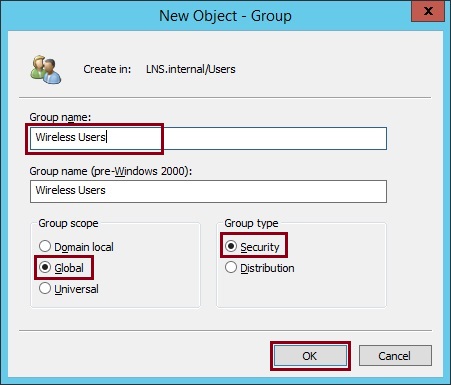
3. Give the group a meaningful name, in this case we have used “Wireless Users”. Make sure “Global” and “Security” is selected. Click “OK”
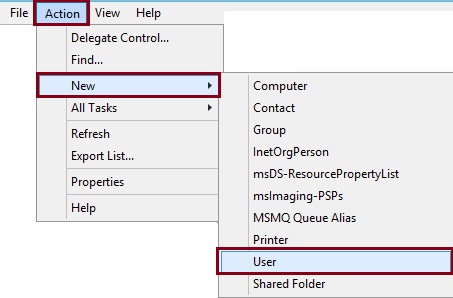
4. From the “Action” Menu select “New” – “User”
5. Give the user a name, in this case we have used “WLANUser” Click “Next”
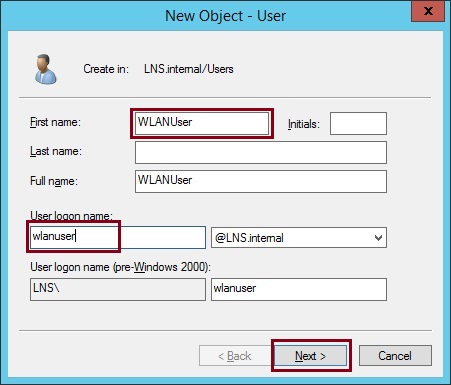
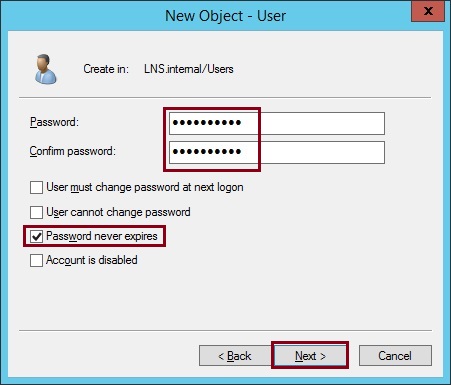
6. Create a password for the user and for this lab environment we can safely select “Password never expires”
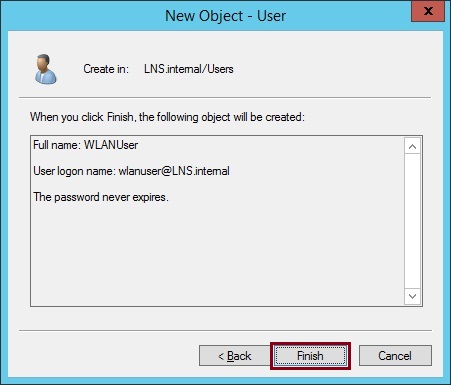
7. Click “Finish”
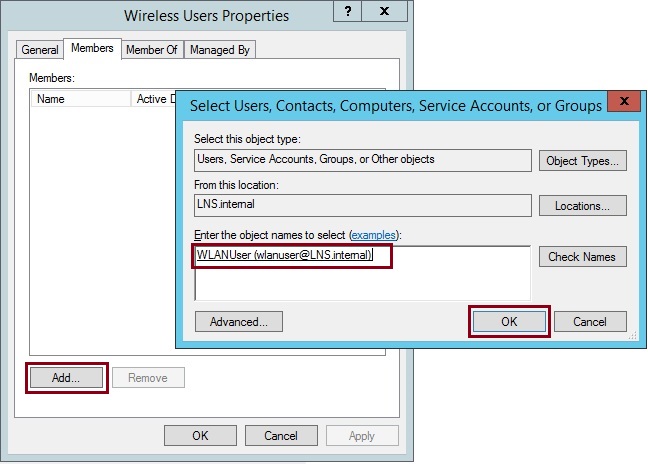
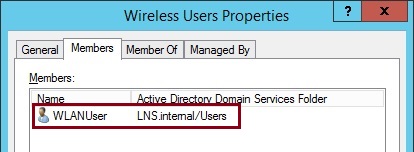
8. Right click the security group “Wireless Users” created earlier select “Properties”, and click the “Members” tab. Click “Add” and add the newly created user “WLANUser” into the security group. Click “OK”
Configure RADIUS and Create the Network Access Policies
In this step we will configure our RADIUS client which will be the WLC, the WLC will be forwarding all the authentication requests to this NPS server. We will create our network connection and network access policies to define the parameters which we want our users to meet in order to successfully authenticate. We will also define within our access policy the method of authentication we want to use, which will be EAP-TLS certificate based. And finally we will specify which certificate the NPS server will use to identify itself.
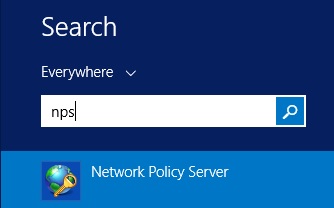
1. On the NPS sevrer Click “Start” and type “NPS” if you haven’t installed the role yet refer to “Install Network Policy Server (NPS) on Server 2012 R2”
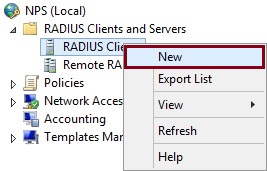
2. Expand “RADIUS Clients and Server” right click “RADIUS Clients” and select “New”
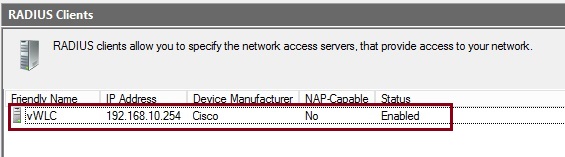
3. Make sure “Enable this RADIUS client” is ticked, give the client a name and input the “IP Address” of the Wireless LAN Controller. Select an existing “Shared Secret Template” or type one in manually at the bottom. Click “OK”
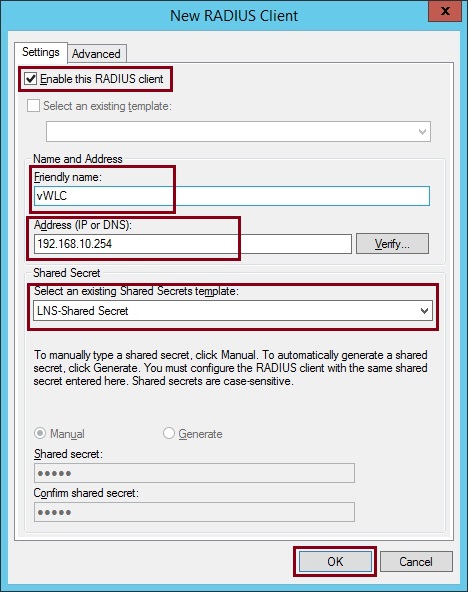
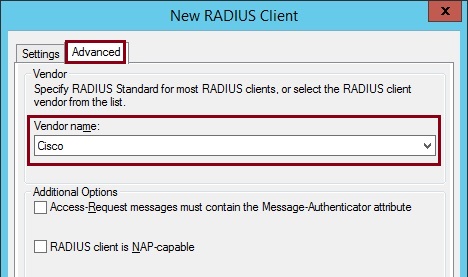
4. Click “Advanced” and select “Cisco” from the “Vendor Name” drop down box
The added client will now be displayed in the client list
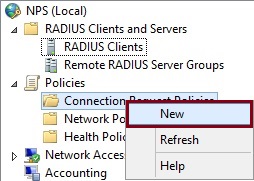
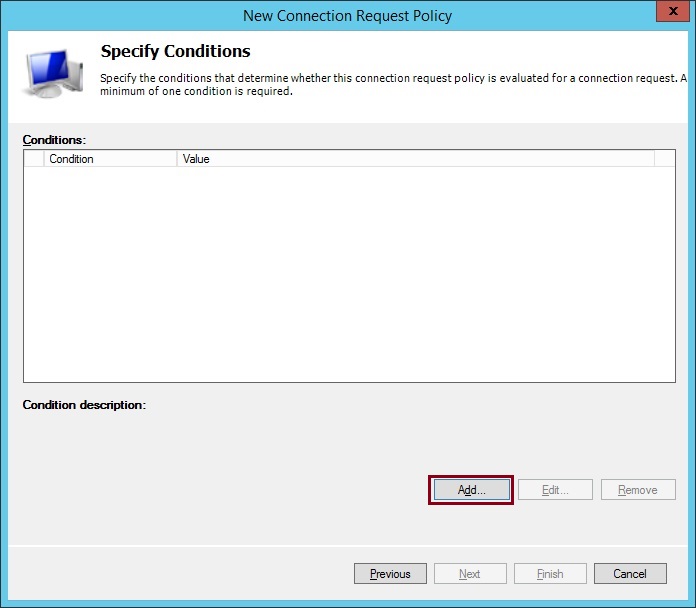
5. Expand “Polices” right click “Connection Request Policies” and select “New”
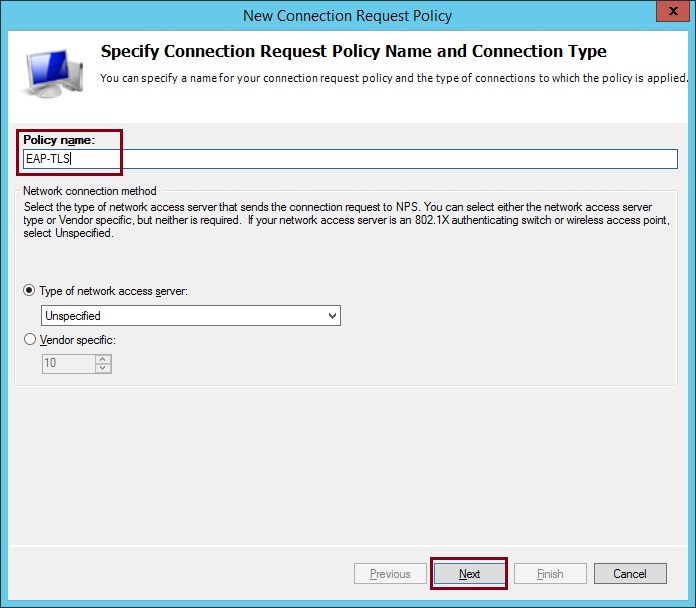
6. Give the policy a name, in this case we used “EAP-TLS” click “Next”
7. Click “Add”
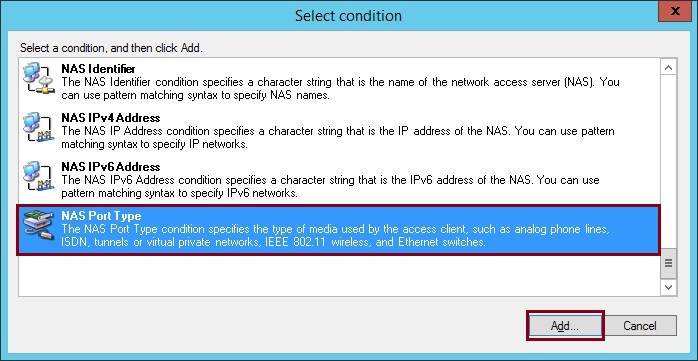
8. Select “NAS Port Type”, click “Add”
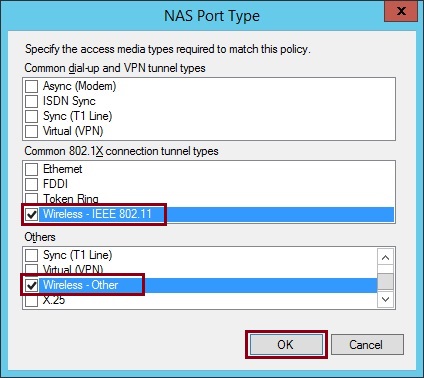
9. Select “Wireless – IEEE 802.11” and Wireless – Other”. Click “OK”
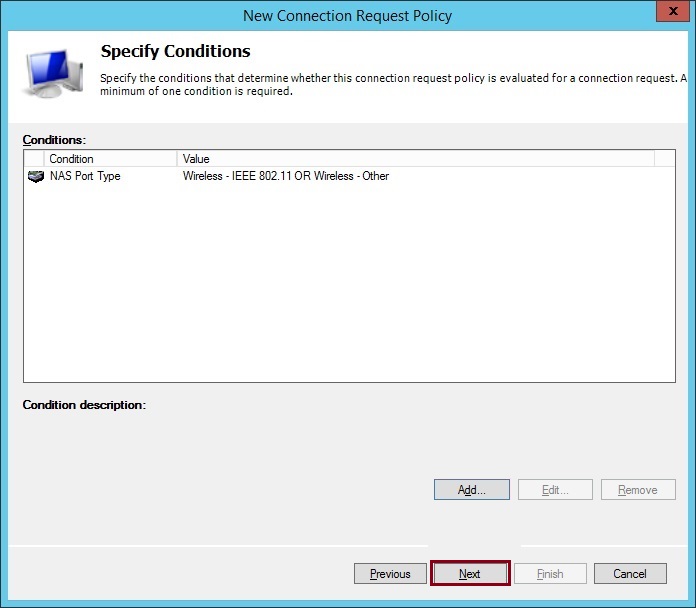
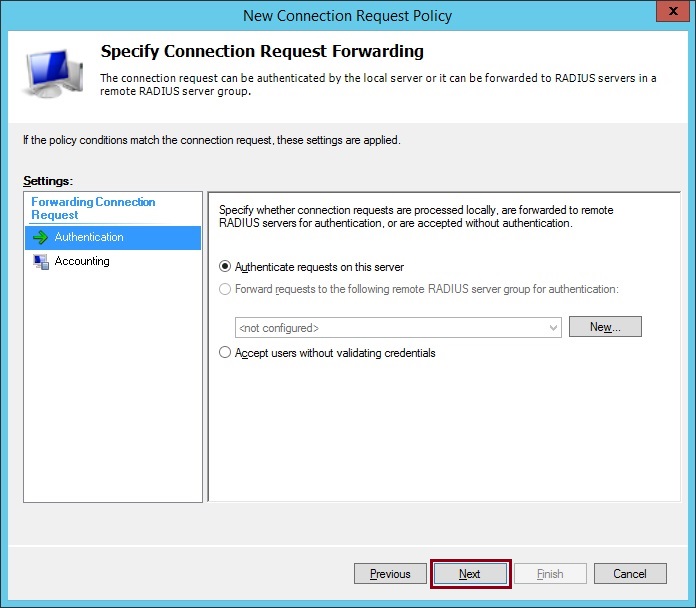
10. Click “Next”
11. Click “Next”
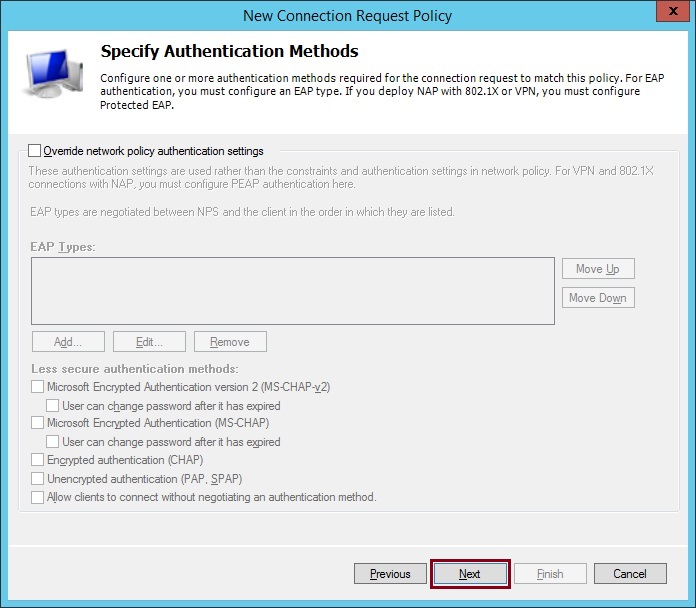
12. Click “Next”
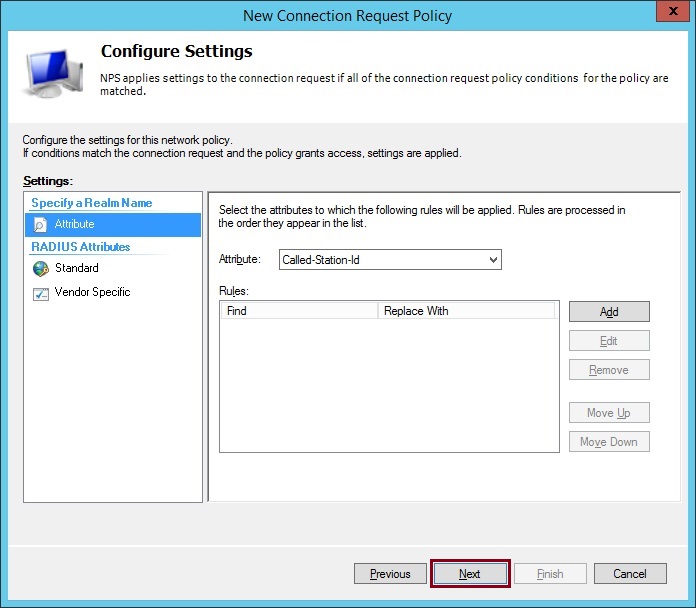
13. Click “Next”
14. Click “Finish”
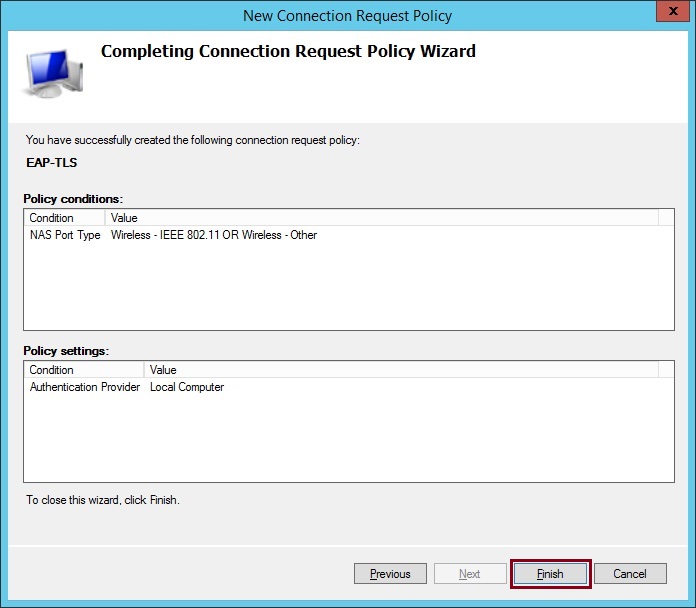
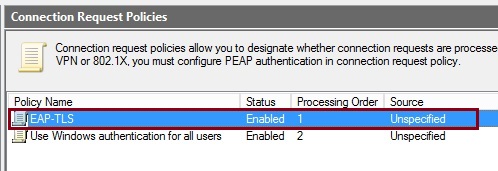
15. The policy will now be visible under the “Connection Request Policies”
16. Expand “Policies” right click “Network Policies” and select “New”
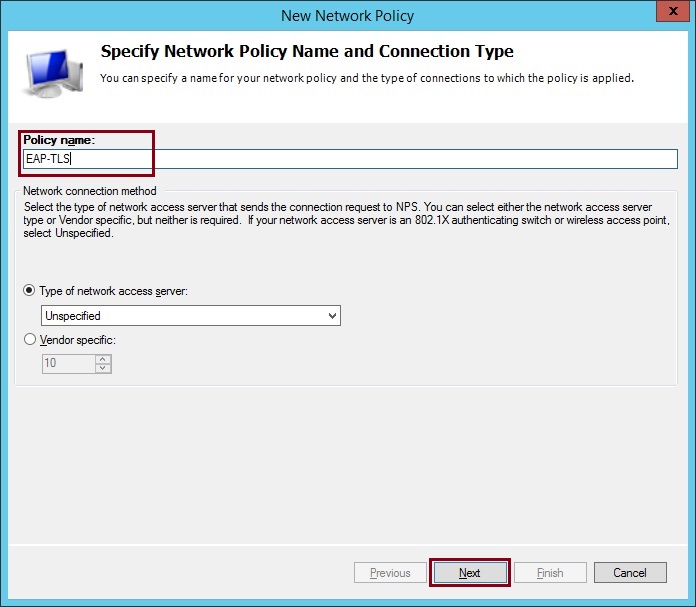
17. Give the network policy a name and click “Next”, in this example the same name as the connection policy is used, so that we can clearly identify what this policy is used for. The names do not have to correspond.
18. Click “Add”

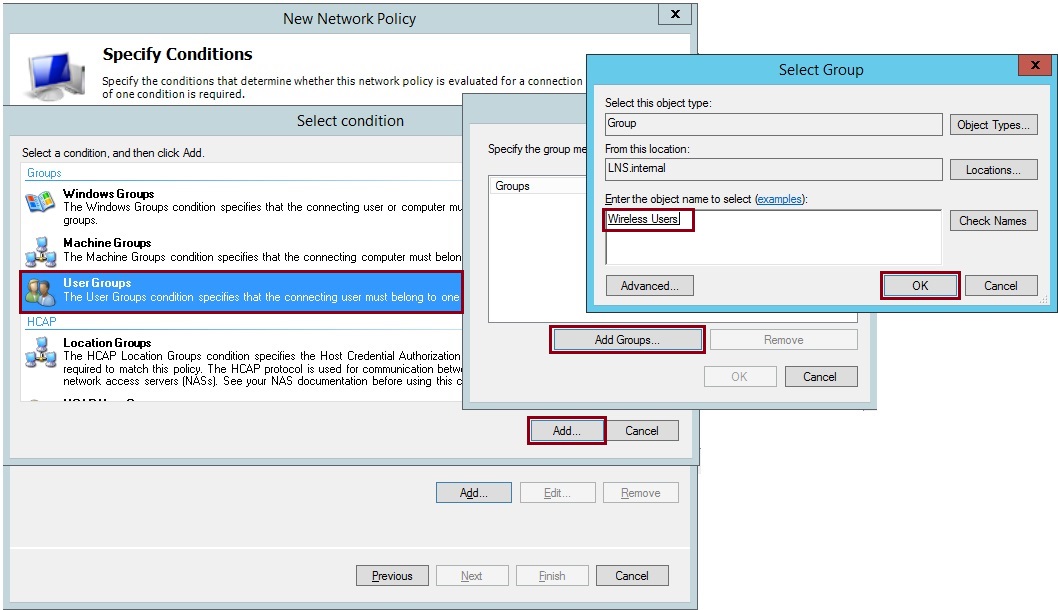
19. Click “Add” select “User Groups” click “Add Groups” and add the AD security group created earlier, in this case its the “Wireless Users” group. Click “OK”
20. Click “Add”
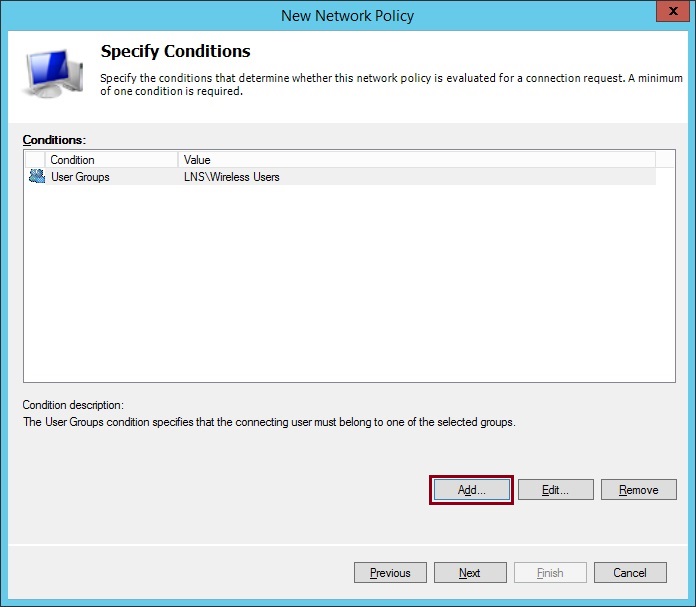
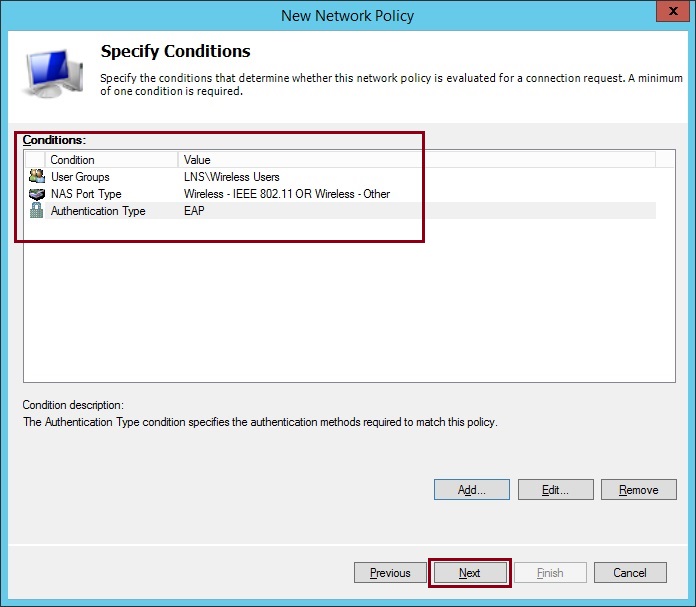
21. Click “Add” select “NAS Port Type” click “Add” select “Wireless – IEEE 802.11” and “Wireless – Other”. Click “OK”

22. Click “Add” select “Authentication Type” click “Add” select “EAP” OK

23. Once all three conditions have been specified, click “Next”
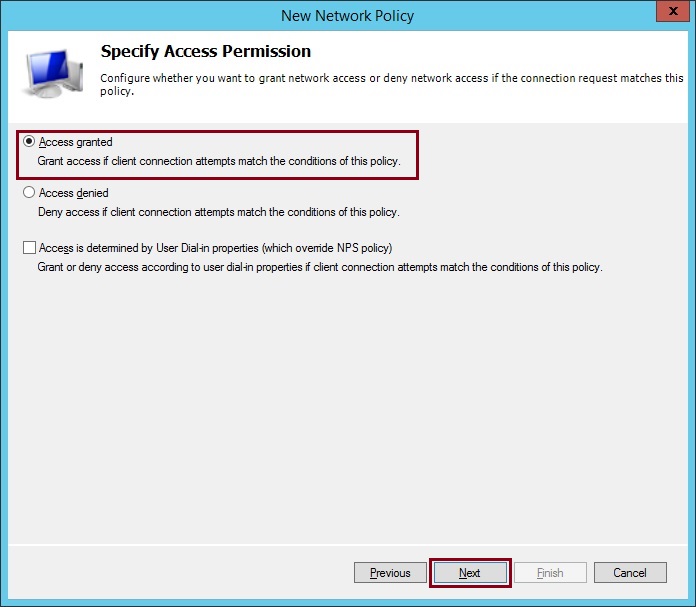
24. Select “Access Granted” click “Next”
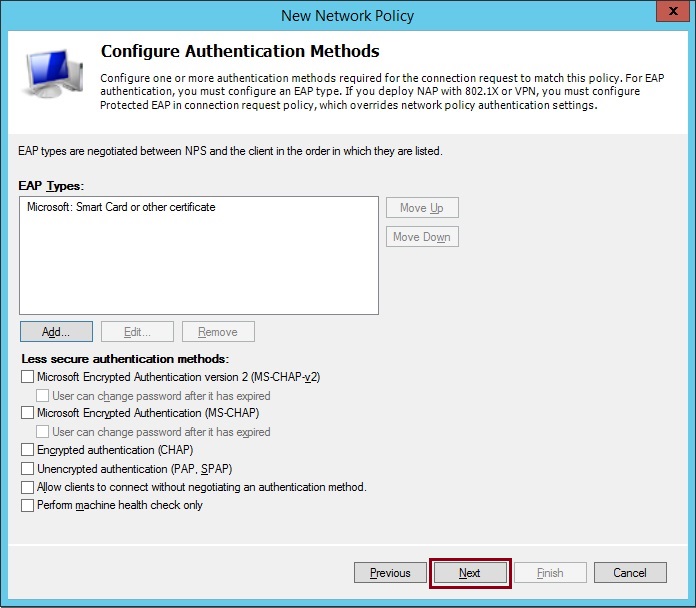
25. Deselect all the “Less secure authentication methods” and click “Add” select “Microsoft: Smart Card or other certificate” click “OK”
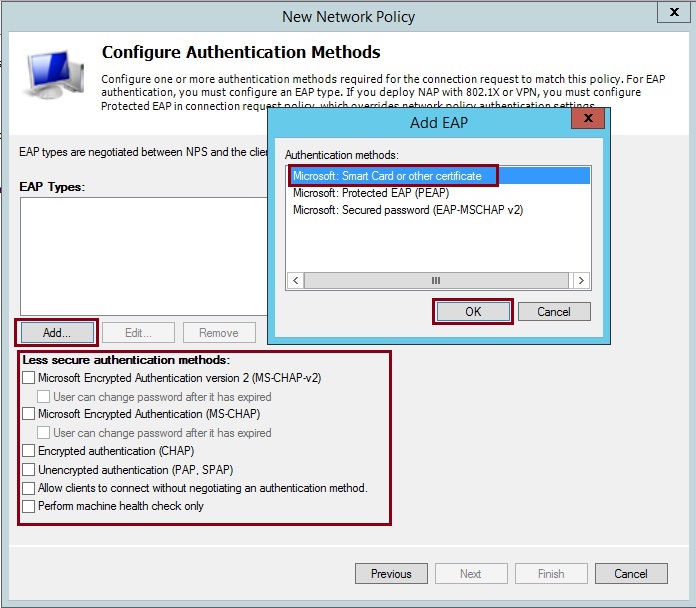
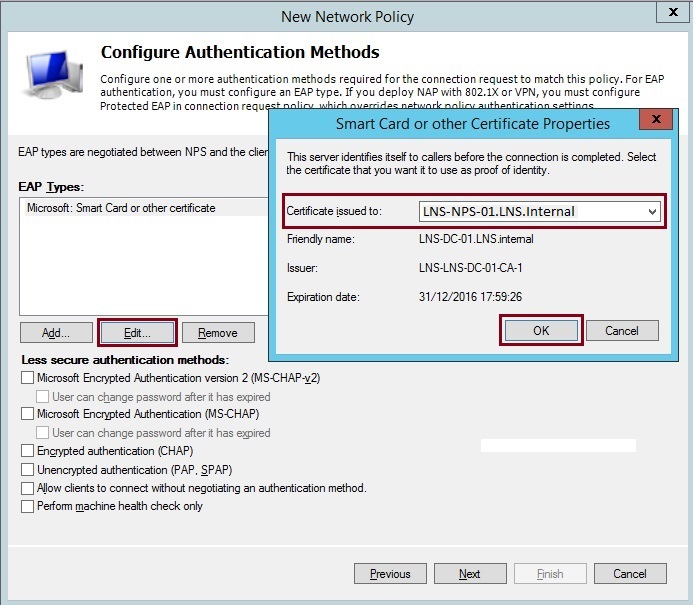
26. Select “Microsoft: Smart Card or other certificate” click “Edit” from the dropdown list select the correct server certficate, in this case its the computer certificate generated earlier – “LNS-NPS-01.LNS.internal”. Click “OK”
27. Click “Next”
28. Click “Next”
29. Click “Next”
30. Click “Finish”
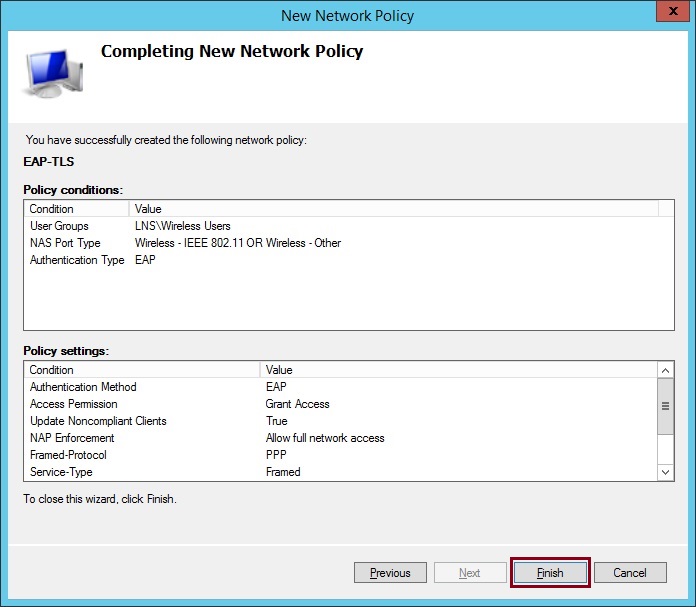
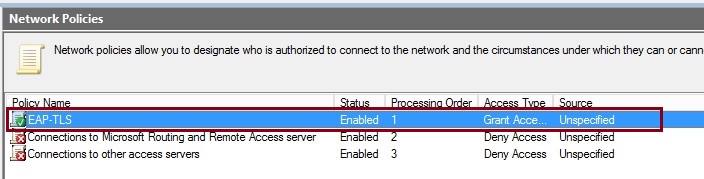
The Network Policy will now be visible in the “Network Polices” list
Configure the WLC for RADIUS and setup the WLAN
In this step we will configure the Wireless LAN Controller with a RADIUS Server, then we will create a new WLAN and define the network parameters and finally point the WLC to send all authentication requests to the NPS server.
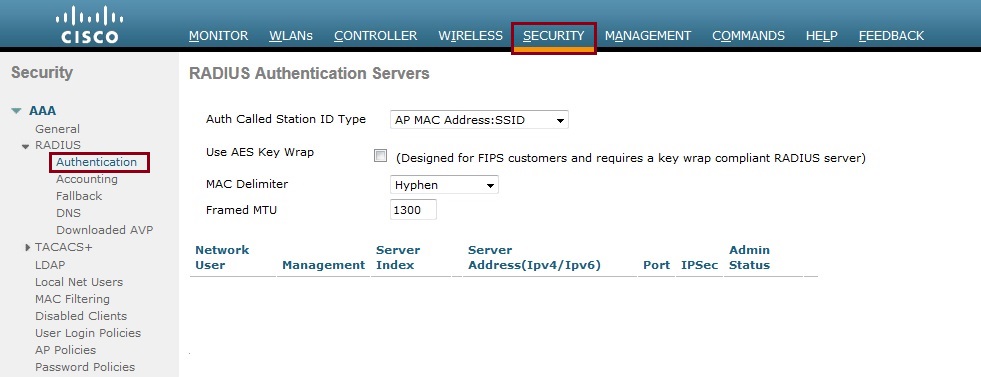
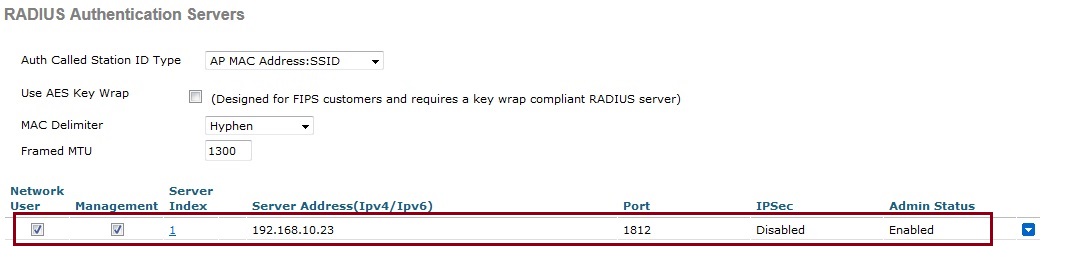
1. Login to the WLC and navigate to “Security” – “AAA” – “RADIUS” – “Authentication” Click “New”
2. Insert the information of the RADIUS server configured earlier, Specify the “Server IP Address” the “Shared Secret” leave the rest as default.
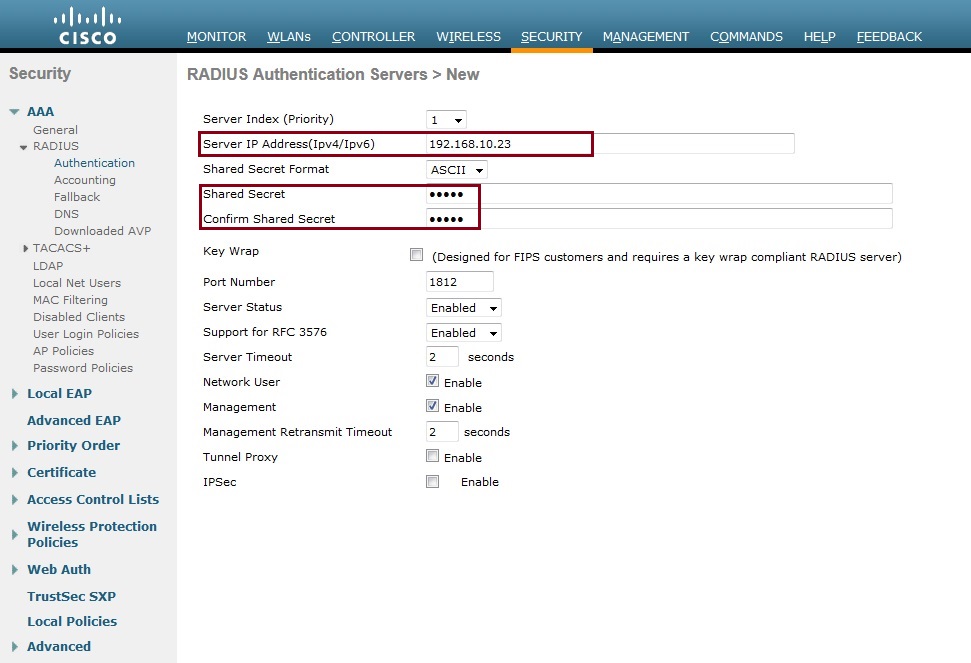
The added RADIUS Server should now appear in the list
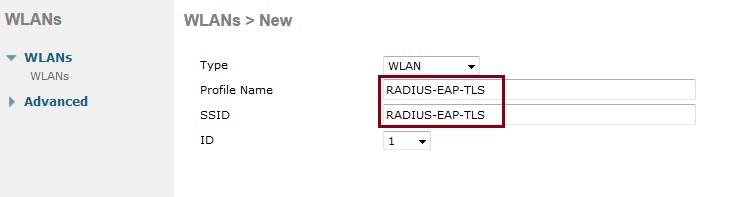
4. Click “WLANs” select “Create New” and click “Go”

5. Give the Profile and SSID a name, click “Apply”
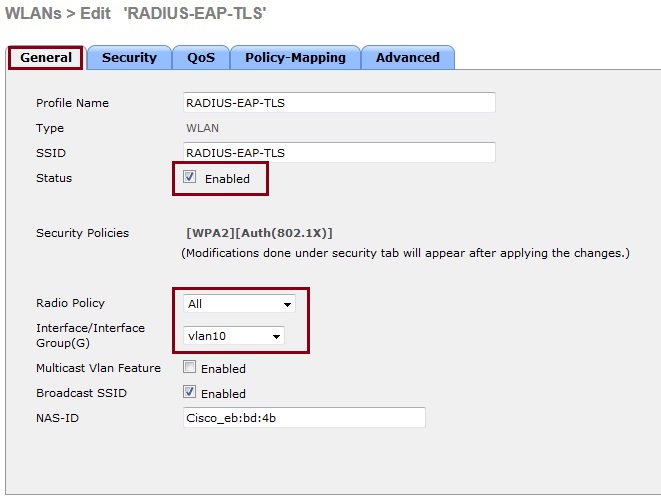
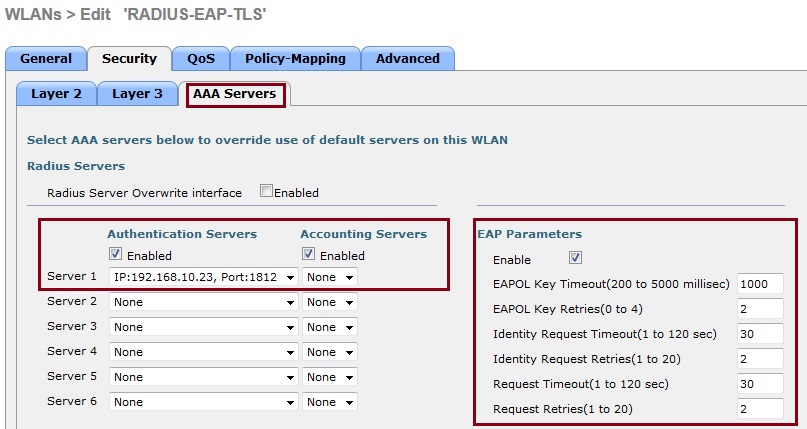
6. From the “General” tab select the “Enabled” tick box and select the “Radio Policy” to use with the profile. From the “Interface Group” drop down list, select the appropriate interface In this example we have used “Vlan10” for more information on how to set-up interface groups for different VLANs and enable switching – check out “Cisco Wireless – Setting up FlexConnect aka “H-REAP” with Local Switching of Multiple VLANs”
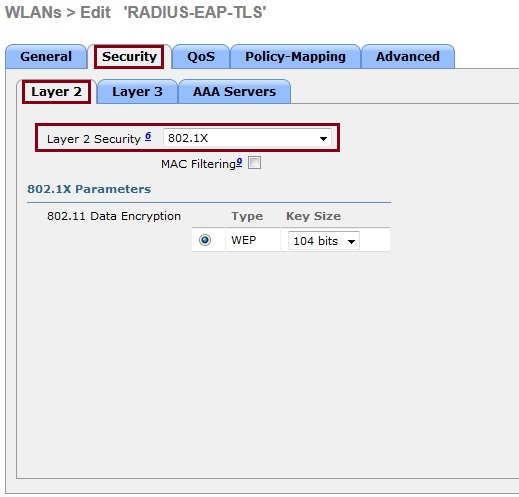
7. Select the “Security” tab click “Layer 2” and select “802.1X” from the drop down list
8. Click “AAA Servers” tab and check the “Enabled” tickbox under “Authentication Servers”. In the “Server 1” field select the IP address of the added RADIUS server from step 2. Tick the “Enable” check box under “EAP Parameters” Hit “Apply”
Configure the Client Network settings via GPO
The client can be configured locally or via group policy to push out the wireless connection settings, we will use the GPO option as this will be the most effective in the domain environment.
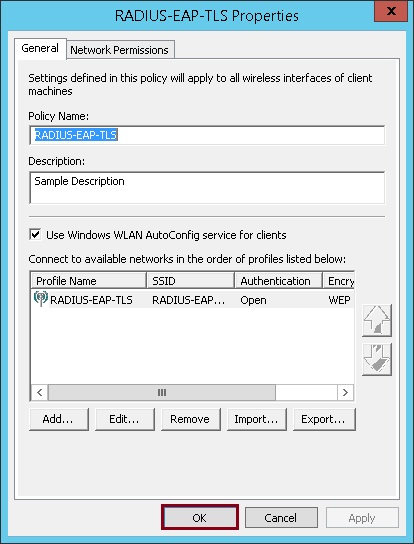
1. Logon to the DC, Click “Start” type “Group Policy Management”
2. Expand “Forest” – “Domain” – right click “Default Domain Policy” and select “Edit”. Any group policy can be used to push out the client wirless network settings, you can also create a dedicated GPO linked back to an OU

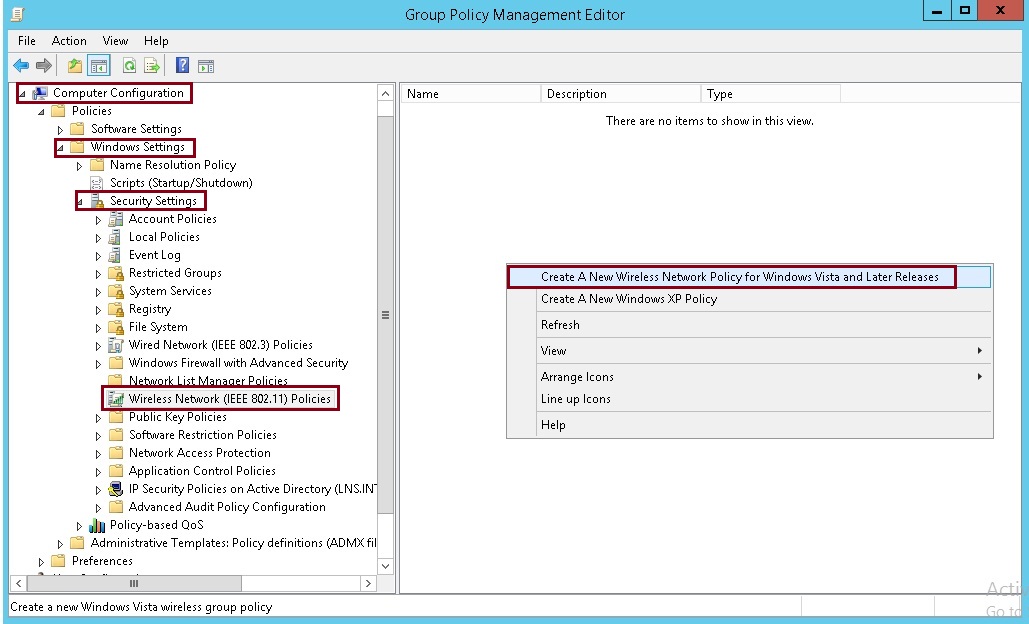
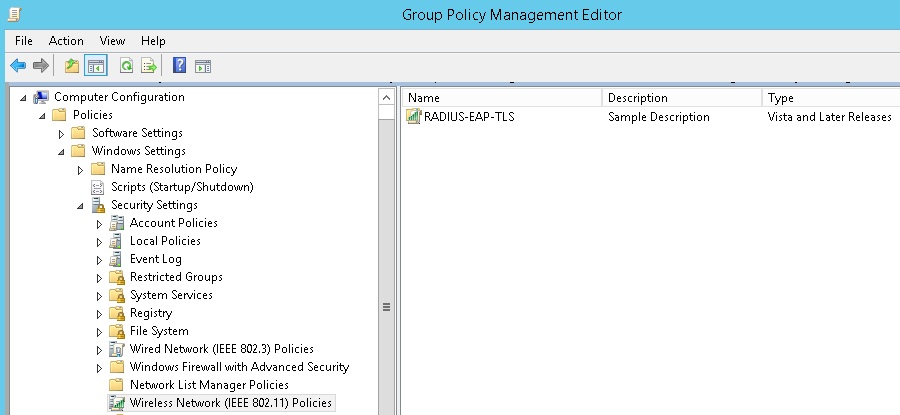
3. Expand “Computer Configuration” – Windows Settings” – “Security Settings” Select “Wireless Network (IEEE 802.11) Policies” right click and select “Create A New Wireless Network Policy for Windows Vista and Later Releases”
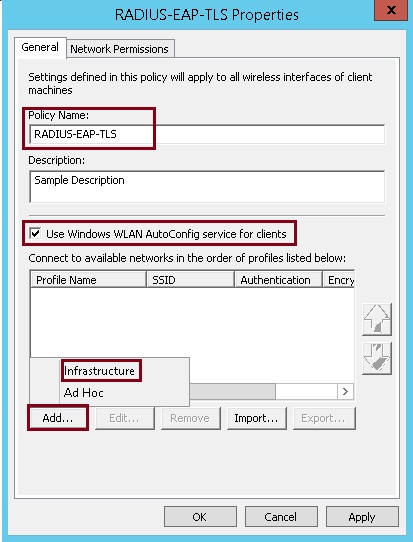
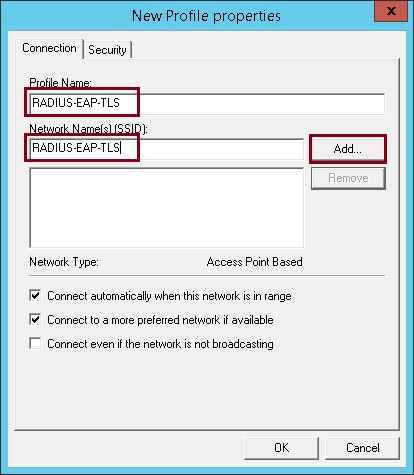
4. Give the policy a name, make sure “Use Windows WLAN AutoConfig service for clients” is ticked. Click “Add” select “Infrastructure”
5. Give the profile a name, input the SSID name under “Network Name(s) (SSID)” this is the name of the WLAN that was created on the vWLC earlier. you can use the available tick boxes to tweak some of the options available to suit your environment.
6. Click the “Security” tab, select “Open with 802.1X” as the authentication, select “User Authentication” as the authentication mode and select “Microsoft: Smart Card or other certificate” as the network authentication method, click “Properties”

7. Under “When connecting” select “Use a certificate on this computer” tick “Use a simple certificate selection (Recommended)” and tick “Verify the servers identity by validating the certificate”
From the “Trusted Root Certification Authorities” select the root certificate of your root CA, this is the certificate that is issued to the CA server by the CA.
Finally tick “use a different username for the connection” and click “OK”

8. Click “OK”
Validating the Deployment & Testing
Now that all the configurations are complete, we need to validate our wireless network is working correctly, using the domain bound client we will login and make the necessary checks.
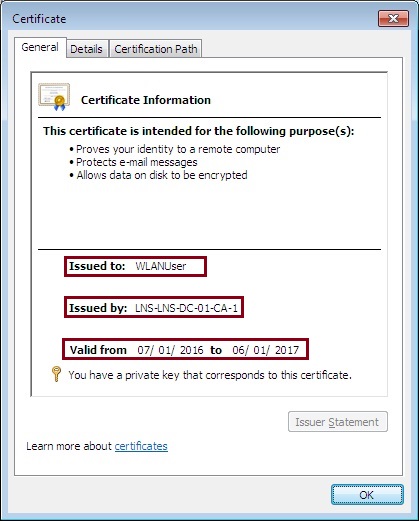
1. On the client machine login using the domain user credentials, in this case its the “WLANUser” created earlier, as the client will not have a valid wireless connection to the domain we will need to plug directly on to the network so that: 1. we can login and 2. the group policies can be applied along with the user certificate auto enrolment.
2. Launch “MMC”, add the “Certificates” snap in, expand “Certificates” – “Personal” – “Certificates” and verify the user certificate has been issued. If the user certificate is not present, try to do a “gpupdate /force” or go back and look for misconfiguration during the templates set-up or group policy steps earlier.

3. Click and open the certificate, make sure all the information is valid and that the right certificate has been issued.
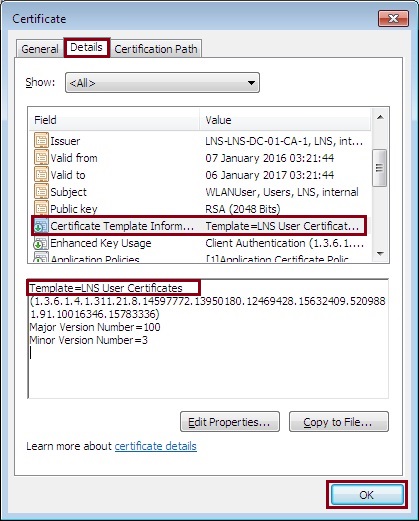
4. Click the “Details” tab and click “Certificate Template Information”. Verify the template used is the template created earlier, this will give us a clear indication that our CA is working correctly and is able to auto enroll and issue our domain users with a valid certificate.
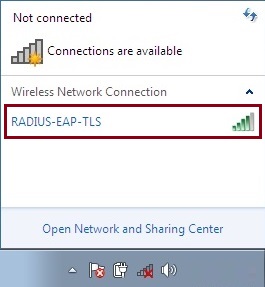
5. Navigate to “Control Panel – “Network and Internet” – “Manage Wireless Networks” verify the network profile created via group policy is available, this network will not be editable by the user as the settings are centrally managed via GPO. if the network is not visible issue a “gpupdate /force” or troubleshoot the GPO settings.

6. Click the wireless icon and verify the SSID is being broadcast
Click “Connect”
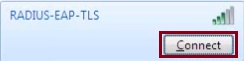
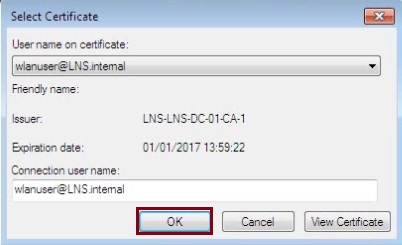
7. The user will be prompted with a window displaying the username which is on the user certificate, the connection username will also include the same username. This prompt is asking the user to select the certificate in which they would like to use to connect. In a domain environment the logged on user will only be able to see their own certificate. Click “View Certificate” to see the details of the cert, then click “OK” to connect. The prompt only appears the first time the user connects, subsequent connections take place automatically in the background.

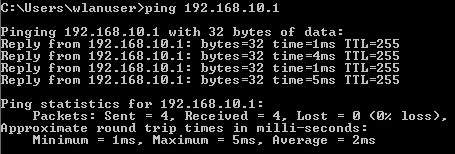
8. Launch CMD type “IPconfig”and verify DHCP has issued a correct IP address within the VLAN specified in the WLC. In this case we have an IP from VLAN10 which is on the 192.168.10.0 network.

9. Ping the default gateway and verify connectivity
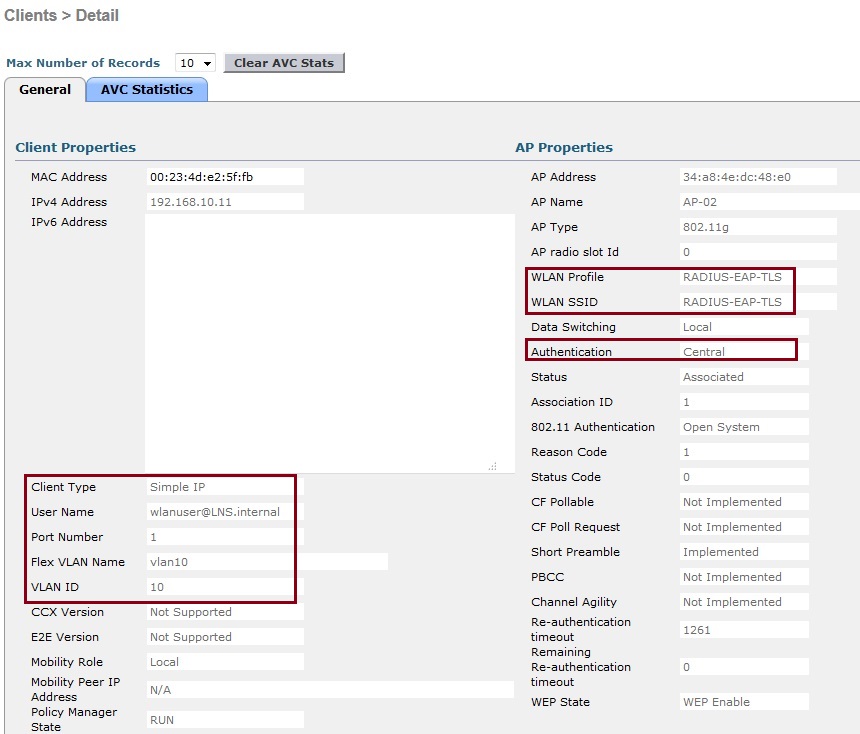
10. On the WLC click “Monitor” – “Clients” Verify the client is visible on the list as a connected client. Click the MAC address of the client for more detail. 
11. From the client properties we can see that the WLAN profile and SSID the client is using is “RADIUS-EAP-TLS” the authentication is “Central” which is our Microsoft RADIUS server. the username is “[email protected]” and the VLAN id is “10”.
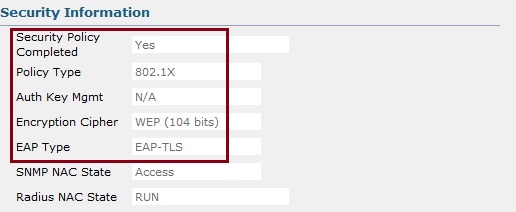
12. if we scroll down to the “Security Information” We can verify that we are using “802.1X” and the EAP Type is “EAP-TLS”
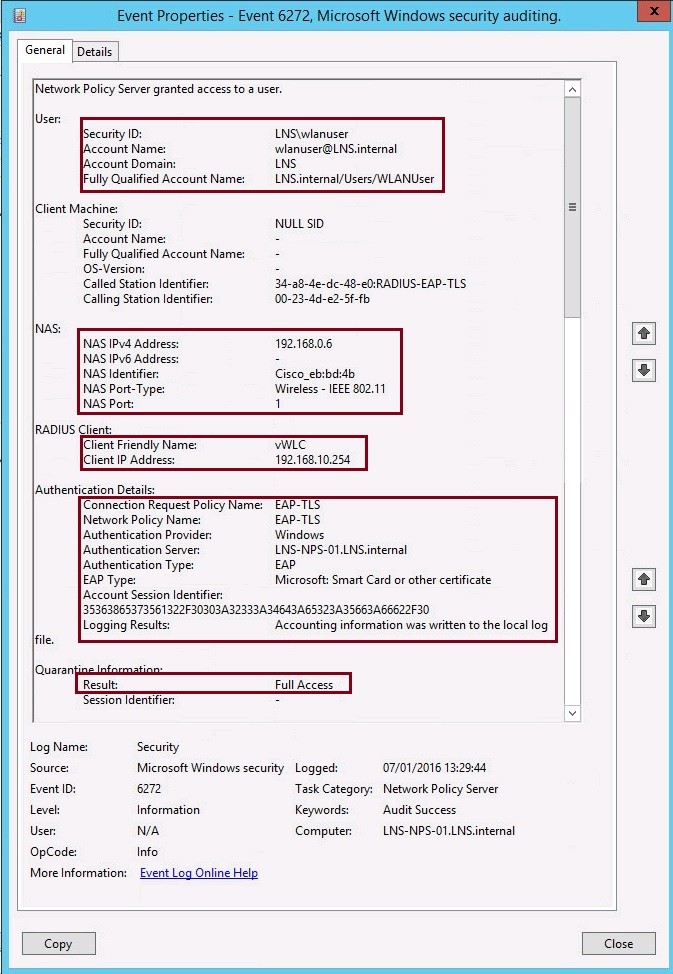
13. Finally if we hop onto the NPS Server, launch “Event Viewer”, expand “Custom View” – “Server Roles” – “Network Policy and Access Server” we can see the log of the client attempting to authenticate to the RADIUS server and the server allowing the access based on its network access policies.
The user attempting to authenticate is “WLANUser”, the RADIUS Cleint forwarding the request is the “Cisco vWLC” the authentication policies defined within NPS are checked against the user for a match. The result shows the user is allowed “Full Access” based on the policy.