Cisco Wireless- Setting up Central Authentication using LEAP with the vWLC as the AAA server
EAP is the Extensible Authentication Protocol which can be setup on the Cisco WLC for authenticating users centrally. in 802.1x when a user connects to an AP, the AP doesnt move any data traffic for the user until it can prove who the user is, the user normally supplies a set of credentials to validate who they are.
The user also known as the “supplicant” (supplier of the credentials) sends the login details to the AP “the Authenticator” who then sends the information back to an authentication server for approval, the authentication server is a AAA server which does the Authentication, Authorization and Accounting. The protocol used when the Authenticator (AP)and Authentication server (AAA Server) talk is called “RADIUS”
There are four types of EAP supported by the Cisco WLC, these are:
LEAP – Lightweight Extensible Authentication Protocol
Easy to set-up – no certificates, set-up at the user and the server. User and server has mutual authentication – they authenticate each other, this can avoid users being sucked into a rogue AP as it has direct communication with a AAA server.
FAST – Flexible Authentication via Secure Tunnelling
Uses mathematical algorithms, creates a tunnel between the user and AAA server. Uses PAC – Protected Access Credentials as part of the algorithm, clients must support this in order to be compatible. FAST does not require certificates
PEAP – Protected EAP
Uses a certificate on the server side, which we validate – this must be from a valid CA on our PKI, Uses a username and pw for the AAA to validate the user. Also uses mutual authentication
EAP-TLS – Transport Layer Security
Requires certificates on both the users side and server side, this has to be issued by a trusted CA to authenticate and validate each other.
In this Step-by-Step guide we will set-up central authentication on the vWLC using LEAP, the WLC will act as the AAA Server, we will create a local EAP profile to authenticate a local user. Lets get started!
Configure the networking
Make sure all the networking in the background is working, the vWLC management interface and the AP must be connected to a trunk port on the switch, this is to support VLANs. Also a DHCP Server must be available to service clients with IP addresses from the relevant VLANs.
Create a Local EAP profile for LEAP
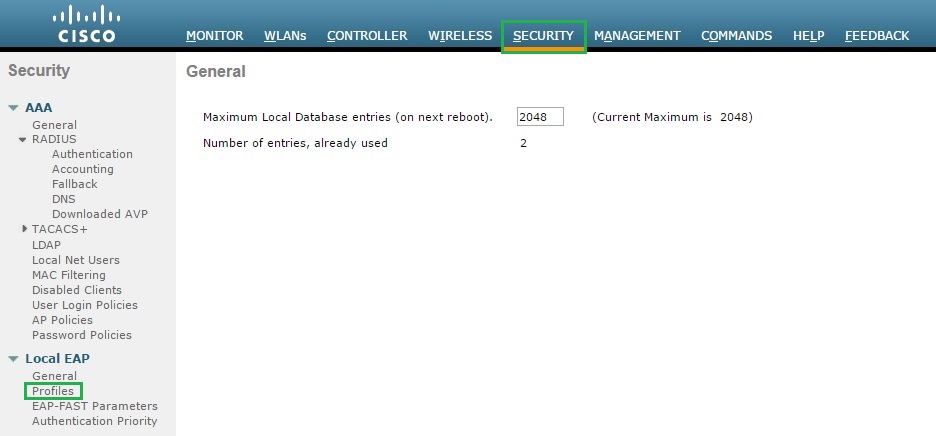
1. Login to the Wireless LAN Controller, and click “Security” – “Local EAP” – “Profiles” – “New”
2. Give the new profile a name and click “Apply”, in this example we have used “Local-LEAP”

3. Tick the “LEAP” box to allow the profile to use LEAP as its authentication method, and click “Apply”

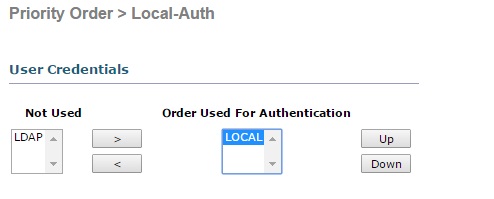
4. From the left hand menu select “Authentication Priority” and verify “LOCAL” is selected in the “Order used for Authentication” box.
Create a local user
1. Under “Security” – “AAA” select “Local Net Users” and click “New”. Create a new user for authentication and click “Apply”.
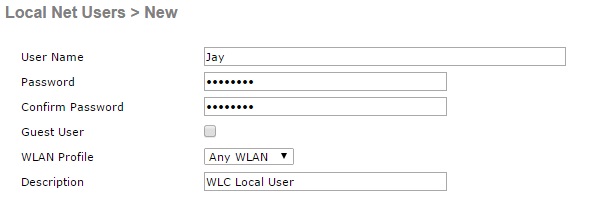

Create the WLAN
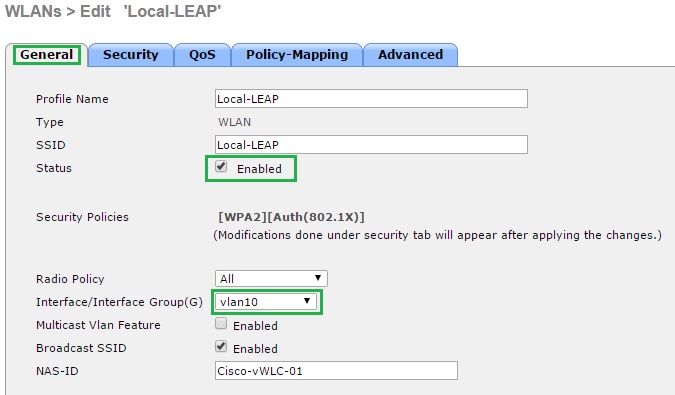
1. Navigate to “WLANs” select “Create New” and hit “Go”. Give the profile and SSID a name. in this example we have used “Local-LEAP” the profile name & SSID can be anything you like. Click “Apply”

2. From the “General” tab enable the WLAN and select an interface to map to the SSID, this can be any available VLAN on the network which we want users to be connected to upon successful authentication, DHCP will also issue an IP address from this range so the interface must be correctly configured.
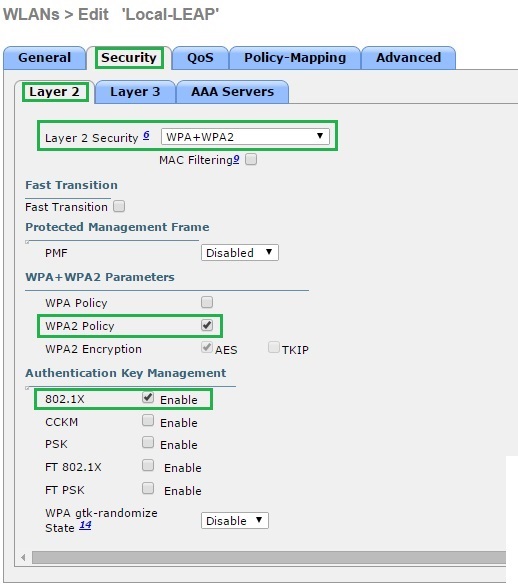
3. Click the “Security” tab and verify that under layer 2 we have the following selected “WPA+WPA2”, “WPA2 Policy” and “802.1X”
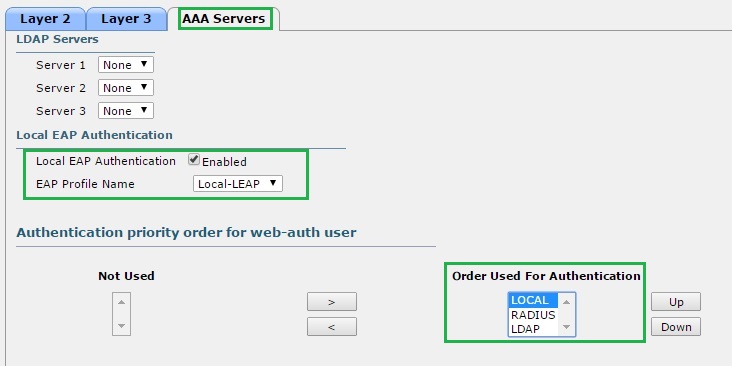
4. Click the “AAA Servers” tab, scroll down and tick the “Local EAP Authentication” enabled tick box. From the drop down menu select the profile we created earlier “Local LEAP” and make sure that “LOCAL” is set at the top in the “Order used for Authentication”, finally click “Apply”
Client Testing
Using the client device perform the following tests:
1. Check to make sure the SSID is being broadcast
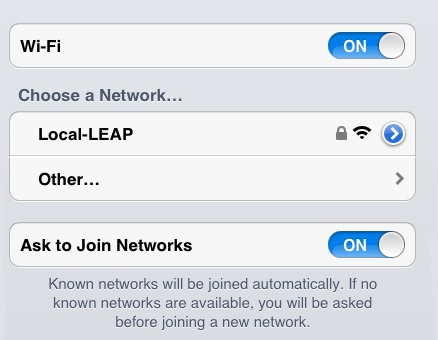
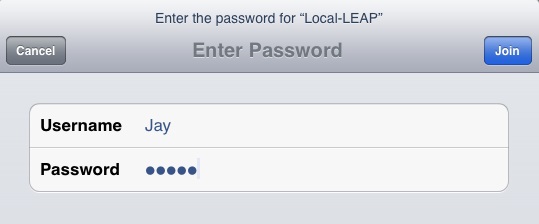
2. Select the SSID and connect to it providing the credentials of the user created earlier.
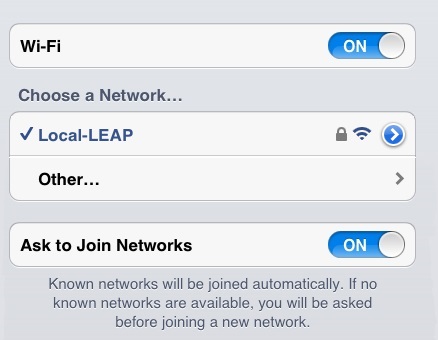
3. Verify the connection is successful
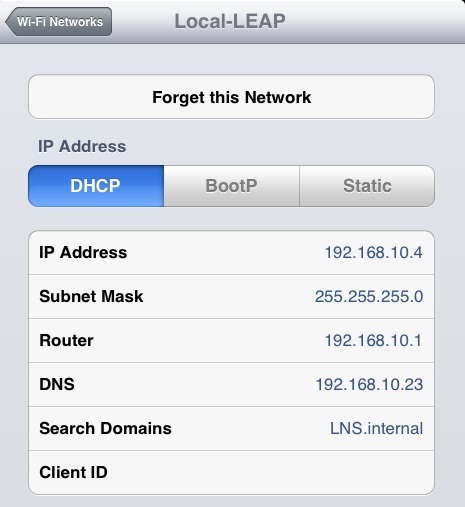
4. Verify the correct IP address is being obtained by the client when connected to the relevant VLAN, in this case we used VLAN 10.
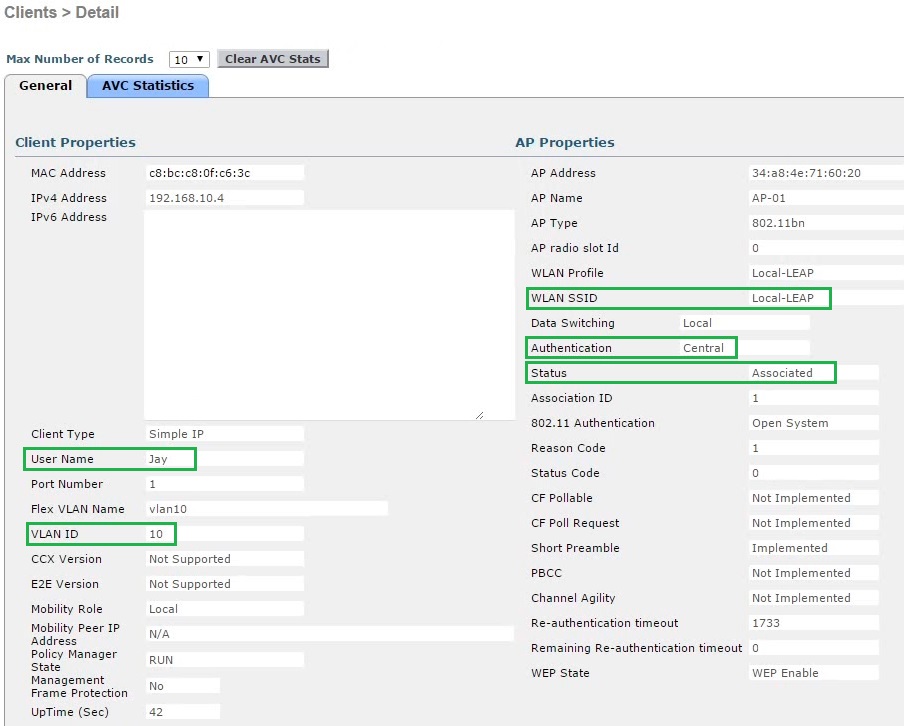
5. On the WLC, verify the connected client is visible and that central authentication is being performed, navigate to “Monitor” – “Clients”

Click on the “Client MAC Addr” and view the details of the client. from the details we can see that the client is connected to the “Local-LEAP” SSID using the local user account “Jay” and the authentication is being handled centrally at the WLC.
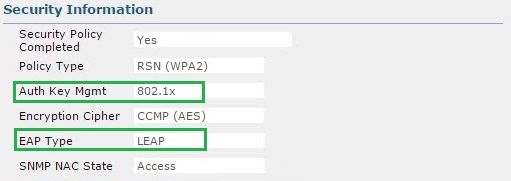
If we scroll down to the “Security Information” we can see that we are using “802.1x” along with “LEAP” as our authentication method.
