Cisco Wireless – Central Authentication using EAP-TLS with vWLC as the AAA Server
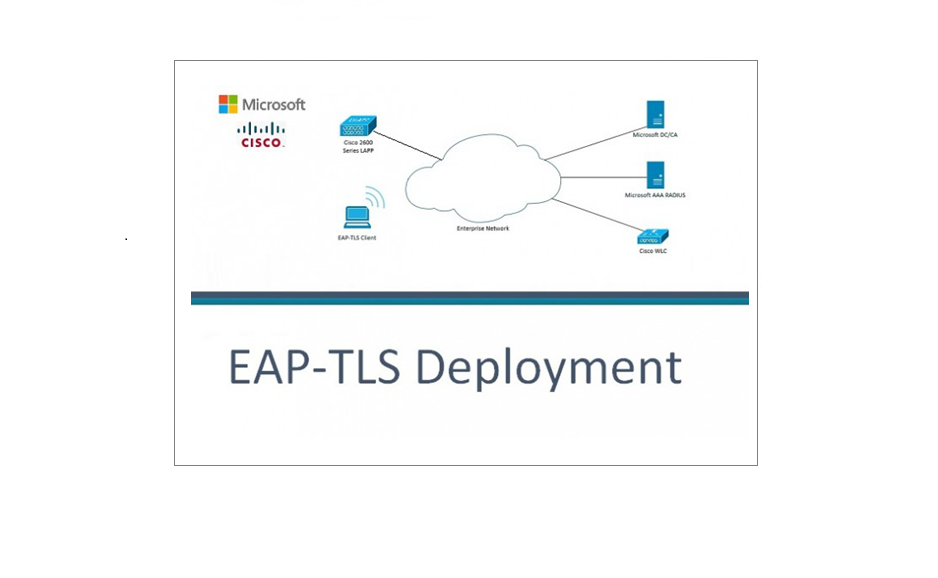
EAP-TLS can be deployed a number of ways in “Deploying EAP-TLS Wireless Solution in an Enterprise Environment” we demonstrated RADIUS authentication using a Microsoft Server 2012 R2 as a AAA server. In this example we will use the WLC to perform the authentication centrally instead of forwarding the requests. Although it is better and more secure to use a AAA server like NPS in terms of being able to define policies and configure additional security options, the WLC is more than capable of performing the authentication itself and in no way does it reduce the security from the EAP-TLS side of things as certificates are still used on both the client and server side. In this example we will use the following:
Windows Server 2012 R2: This will act as the Domain Controller as well as the Certification Authority to issue and manage our certificates. We will be using user certificates, the users will be able to request a certificate directly from the CA. We will create AD users to control access to the network but we will not deploy Group Policy settings from our DC to push out auto enrollment for our user certificates, and our SSID profiles, we will configure these steps manually to demonstrate the difference.
Cisco vWLC: The WLC will act as the AAA Radius Server as well as the Controller to manage the WLAN. We will create a CSR to sign, create and install the EAP Vendor certificate, we will also download the CA certificate to the controller. From the security settings we will create the local EAP profile and set-up central authentication, then finally set-up the WLAN profiles to manage the SSID.
Windows 7 client: This client machine will be domain bound, primarily we will use this device to request a user certificate and create the network profile locally. Then we will connect to the wireless infrastructure and validate our configuration.
Please note: In order to carry out this lab you must have a functioning domain with ADDS, DNS, DHCP and networking, you will also need the additional roles installed mentioned above on the relevant servers.
Anchor links
Prepare the CA and Vendor Certificates required by the WLC
Download the Vendor and CA certificate to the WLC
Create the WLAN and Specify EAP-TLS Parameters
Client configuration, Certificate request and SSID Set-up
Lets get started!
Prepare the CA and Vendor Certificates required by the WLC
For EAP-TLS local authentication to take place on the WLC, we need to create the vendor certificate and then download both the vendor and CA certificate to the WLC. The vendor certificate will serve as the public key to be used by the WLC to present and identify itself to the clients during association, this certificate will be used by the clients to encrypt data back to the WLC. The CA certificate will remain on the WLC for it to compare the client certificate against the trusted CA. Unfortunately Cisco WLC’s does not support .cert files and the certificate signing request (CSR) therefore we will need to use a third party tool to generate the CSR and then use a windows CA to sign and issue a certificate. We will merge the private key with the issued certificate then convert the .cert to a .pem file to download to the Controller.
1. Download OpenSSL for Windows
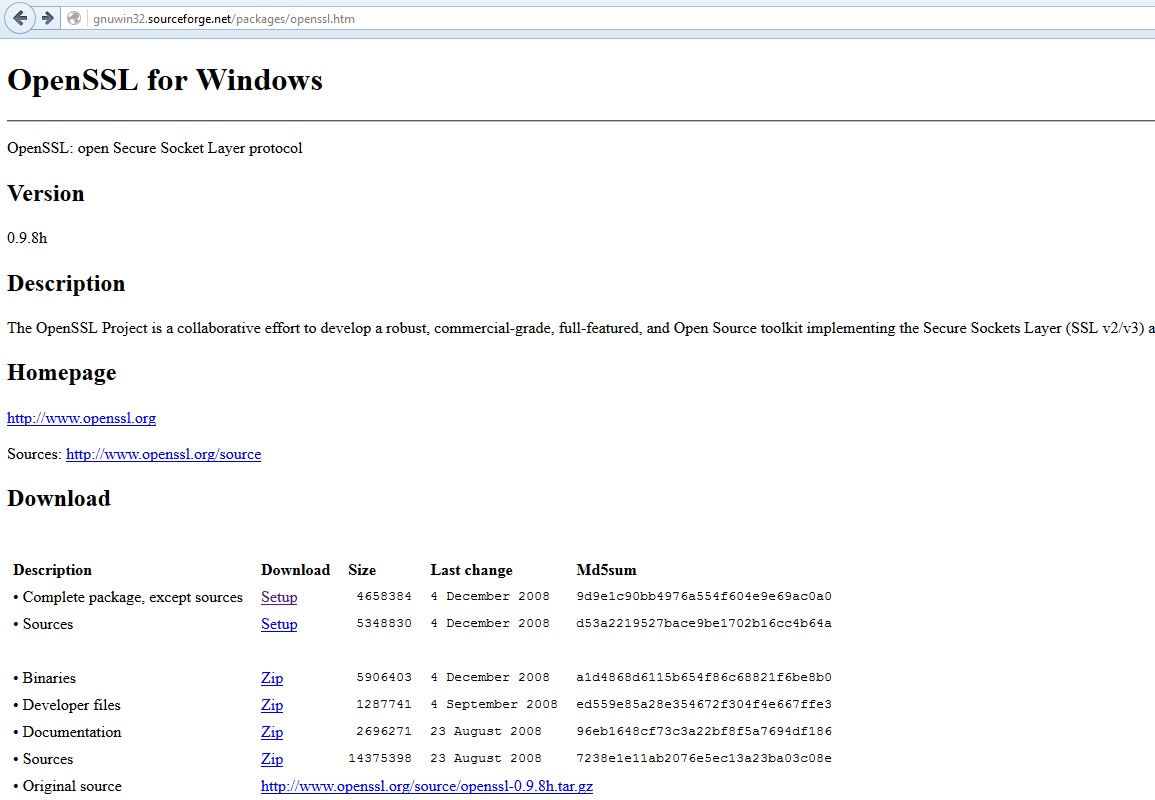

2. Launch the Installation, by double clicking the .exe file. Click “Next”
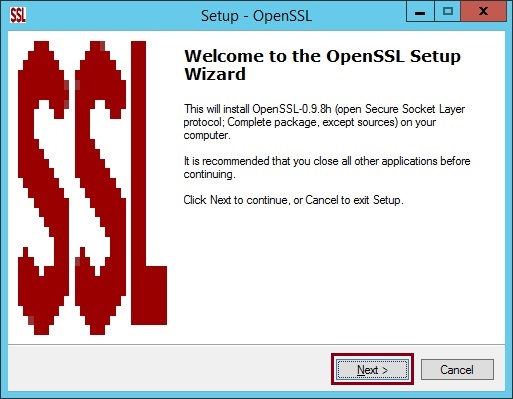
3. Select “I accept the agreement” and click “Next”
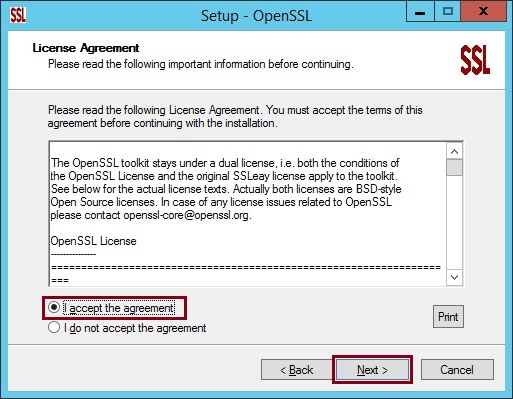
4. Change the destination folder location to “C:\openssl” and click “Next”
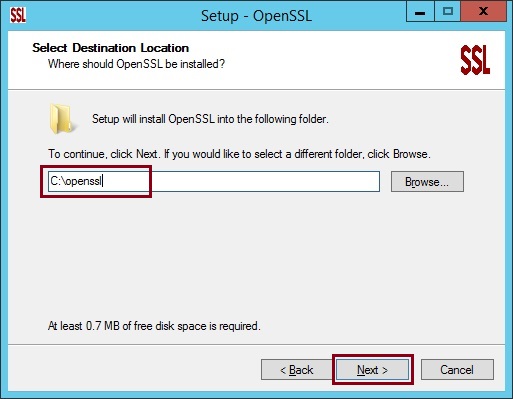
5. Click “Next”
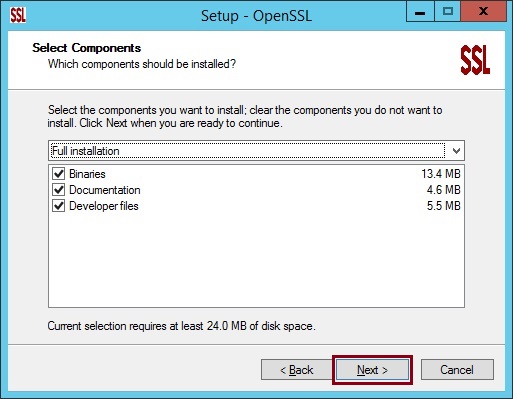
6. Click “Next”
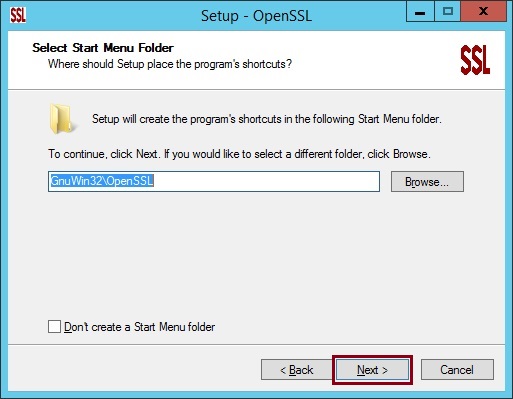
7. Click “Next”
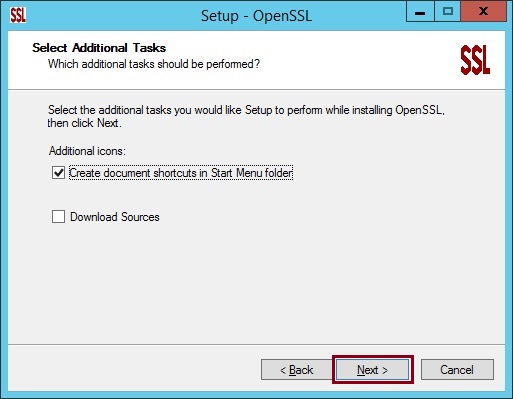
8. Click “Install”
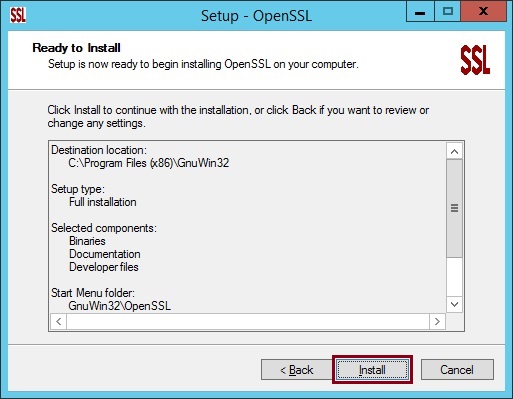
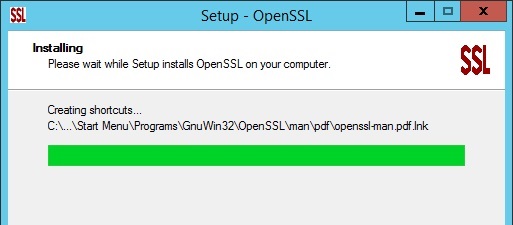
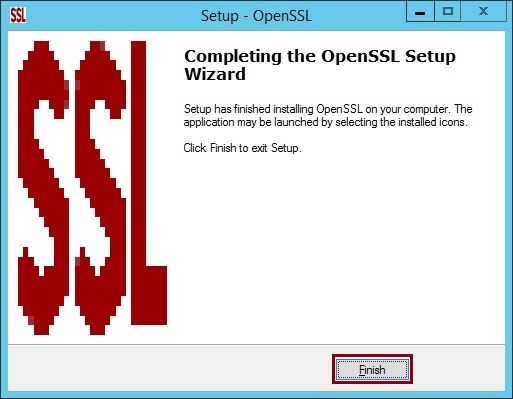
9. Click “Finish”
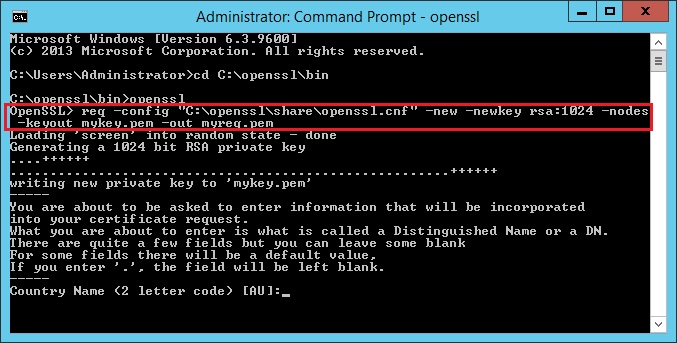
10. Click “Start” and launch “CMD”. type “cd c:\openssl\bin” and press enter. This will change the directory of where we want to run our commands from for the program. type “openssl” and hit enter. the “OpenSSL>” prompt indicates the program is ready to accept commands.

11. Generate pair and request signing key, type “req -config “C:\openssl\share\openssl.cnf” -new -newkey rsa:1024 -nodes -keyout mykey.pem -out myreq.pem” here we are telling openssl that we want to generate a new private key with a certificate signing request for the public key at the length of 1024. “mykey.pem” is the private key, “myreq.pem” is the CSR. The results below indicate that the command was successful, we are now prompted to enter a set of commands for the program to create the signing request.
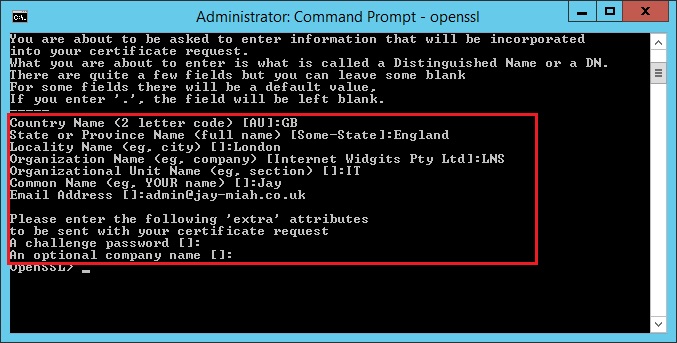
12. Enter the following information requested by the program and hit enter after each,
Country Name (2 letter code) [AU]:GB
State or Province Name (full name) [Some-State]:England
Locality Name (eg, city) []:London
Organization Name (eg, company) [Internet Widgits Pty Ltd]:LNS
Organizational Unit Name (eg, section) []:IT
Common Name (eg, YOUR name) []:Jay
Email Address []:[email protected]
Please enter the following ‘extra’ attributes
to be sent with your certificate request
A challenge password []:
An optional company name []:
At the “extra attributes” for a challenge password, I didn’t enter anything and simply left it blank, the software version “09.8h-l” has a bug which causes the set of commands to fail. its not essential to enter something here.
13. Navigate to the newly generated private key and CSR in the following location “C:\openssl\bin”

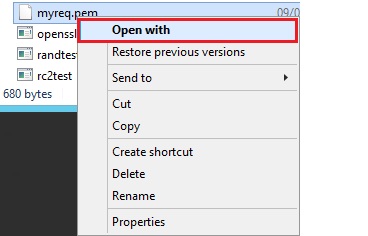
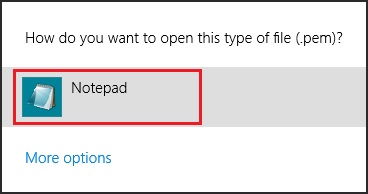
14. Right click “myreq.pem” and select “Open with” select “Notepad”
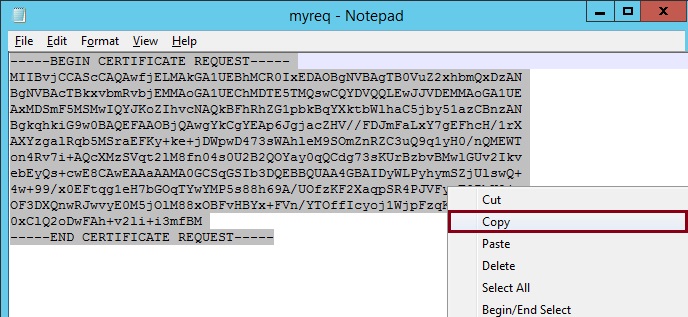
15. Select all the text, right click and select “Copy”
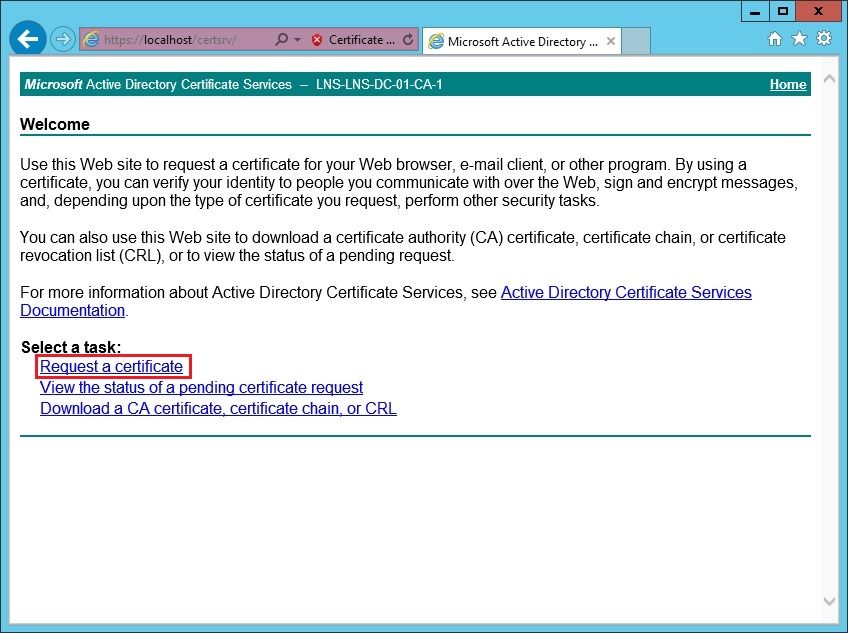
16. Launch a web browser and navigate the CA servers certificate request URL. If on the local machine – “https://localhost/certsrv” or “https://192.168.10.23/Certsrv”
Click “Request a certificate”
17. Click “advanced certificate request”

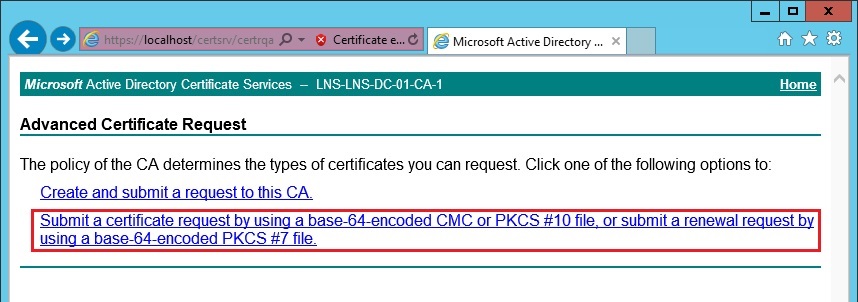
18. Click “Submit a certificate by using a base-64-encoded CMC or PKCS#10 file, or submit a renewal request by using a base-64-encoded PKCS#7 file”
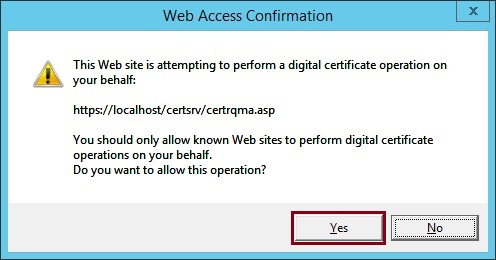
19. If prompted with a warning that the website is attempting digital certificate operation click “Yes”
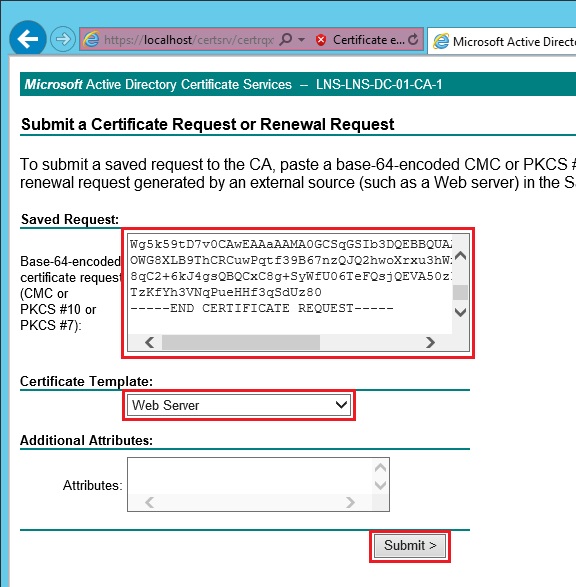
20. inside the “Saved Request” field paste the copied text from the “myreq” CSR. select “Web Server” as the certificate template and click “Submit”
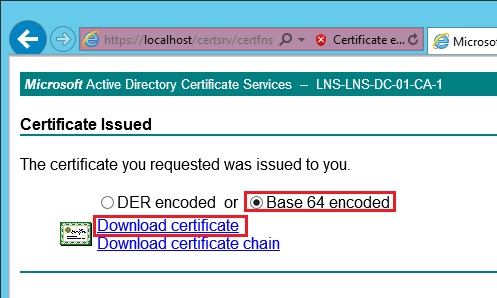
21. Select “Base 64 encoded” and click “Download certificate”
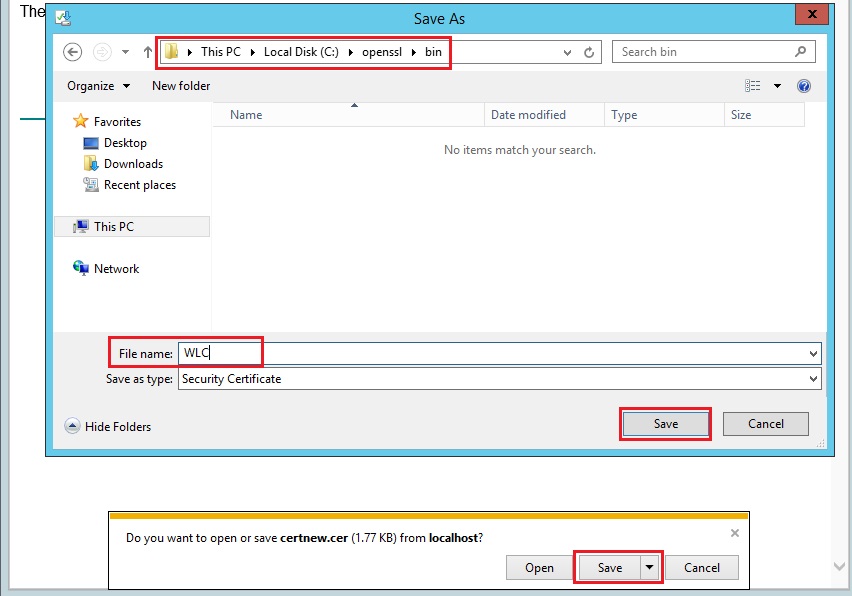
22. Click “Save” Navigate to the installation folder of “OpenSSL” – “C:\openssl\bin” give the file a name and click “Save”
23. Enter the following command – “pkcs12 -export -in WLC.cer -inkey mykey.pem -out finalWLCcert.p12 -clcerts -passin pass:cisco -passout pass:cisco” – Here we are telling openssl to merge the new signed certificate “WLC.cer” with the private key “mykey.pem” and generate one file “finalWLCcert.p12”, and use the password of “cisco” to protect the certificate keys.

24. Now that we have the keys merged we need to convert the “finalWLCcert.p12” to a “.pem” file as the WLC will not recognise the format. Enter “pkcs12 -in finalWLCcert.p12 -out mywlc.pem -passin pass:cisco -passout pass:cisco”

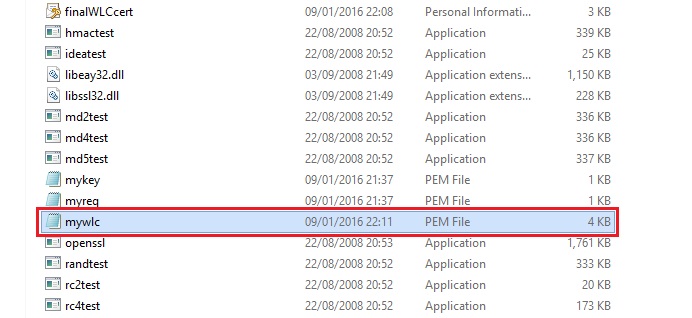
If we navigate to “C:\openssl\bin” we can see the new certificate file has been merged with the .PEM extension
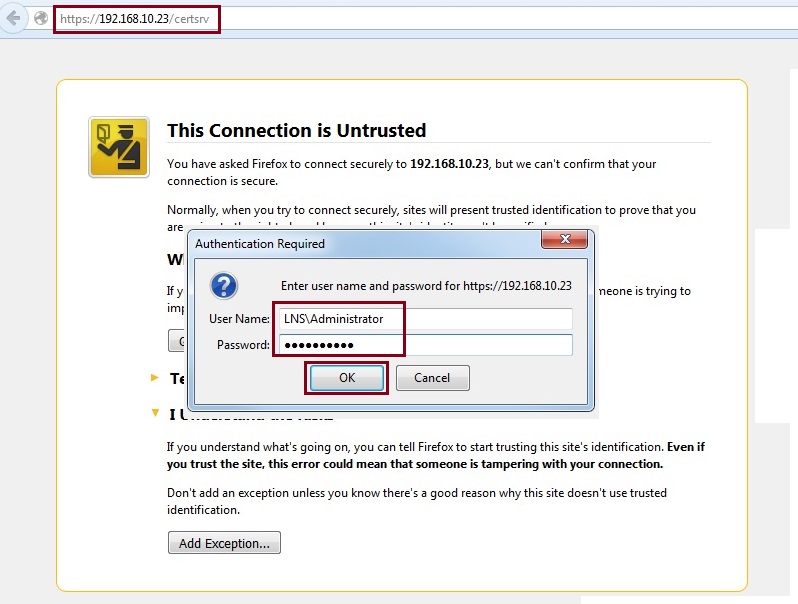
25. We have the vendor certificate, now we need to download and convert the CA certificate to a .PEM file. there is a neat trick that can be used to achieve this very easily using the “Firefox” browser. Launch “Firefox”, this can be done from any machine. navigate to the URL of the CA server – “https://192.168.10.23/certsrv” and login as the administrator or any valid domain user.
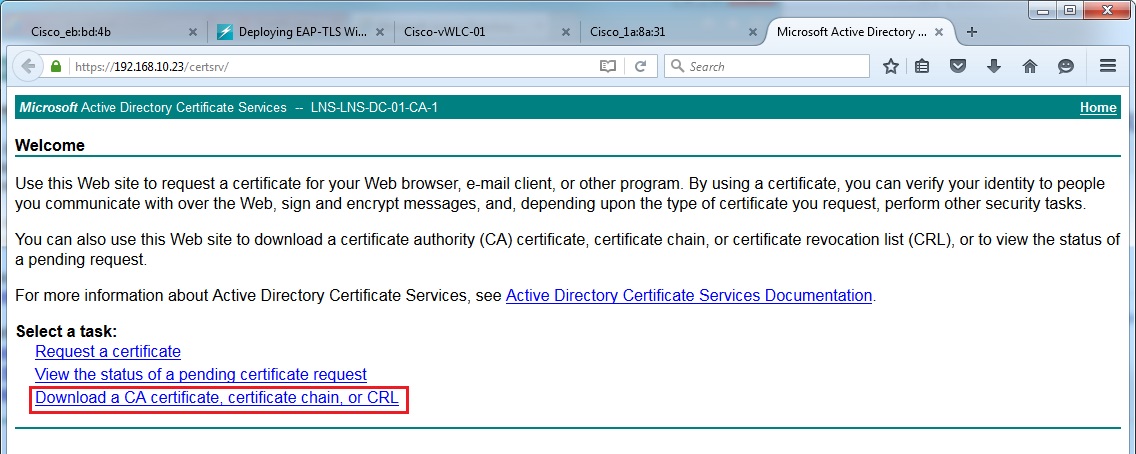
26. Click “Download a CA certificate, certificate chain, or CRL”
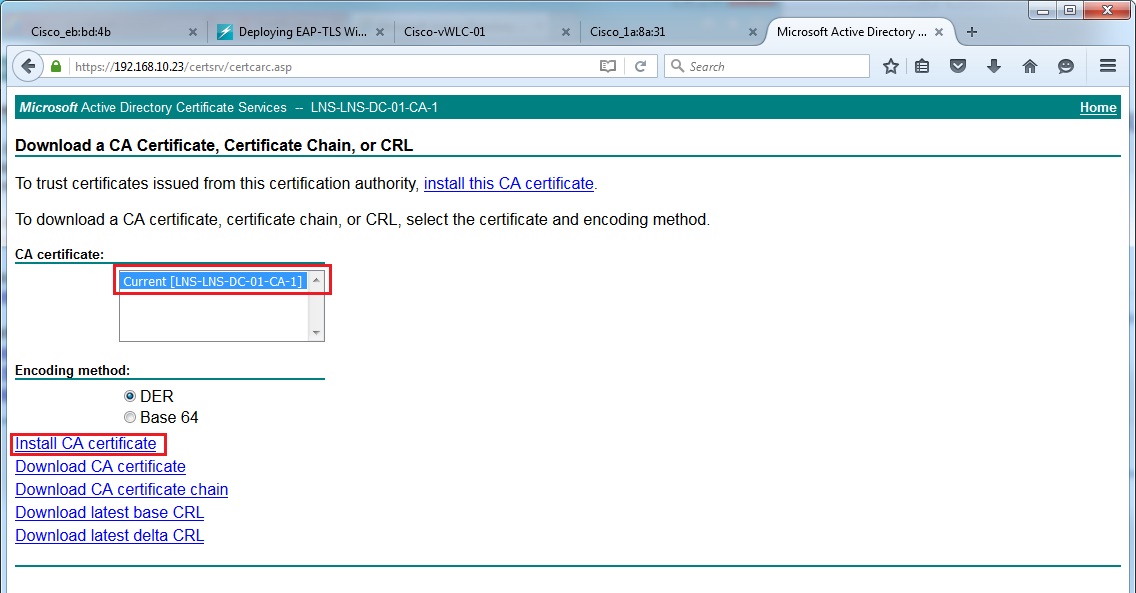
27. Click “Install CA certificate”
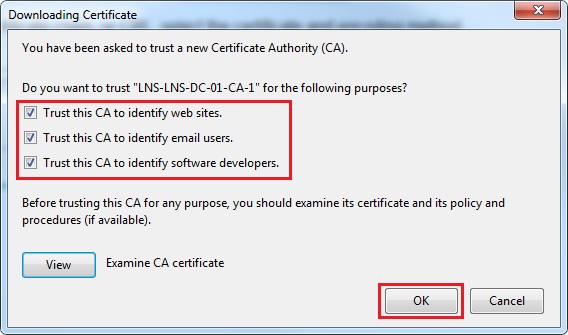
28. Tick all three tick boxes and click “OK” to install the CA certificate on the local machine.
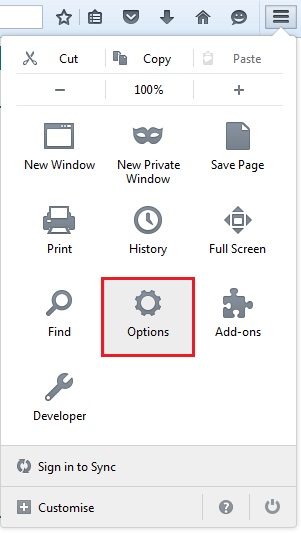
29. From the menu select “Options”
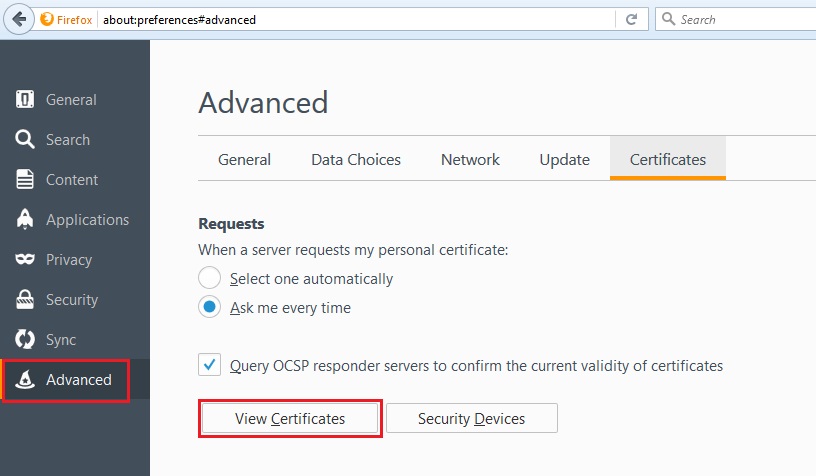
30. Select “Advanced” and “View Certificates”
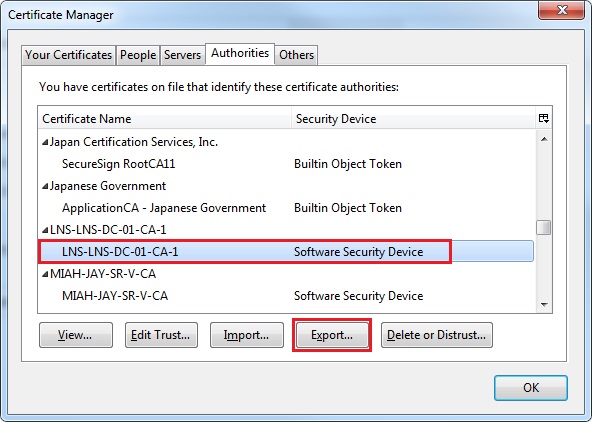
31. Scroll down and find the CA certificate that was just installed, in this case its the “LNS-LNS-DC-01-CA-1” Click the certificate and select “Export”
32. From the “Save as type” dropdown box, select “X.509 Certificate (PEM)(*crt,*pem)” click “Save”
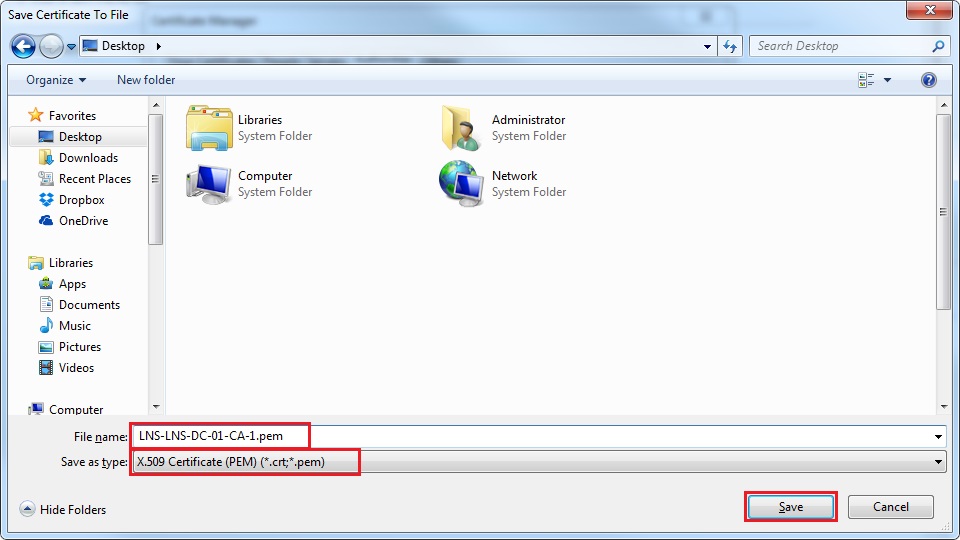
Download the Vendor and CA certificate to the WLC
Using a TFTP server application, we will download both the Vendor and CA certificates to the controller and then verify the certificates have installed correctly. We will then reboot the controller for it to start using the new certificates.
1. Copy both .pem files into the root TFTP location of the TFTP server.

2. Launch the TFTP Server, in this example I am using Solarwinds TFTP Server.
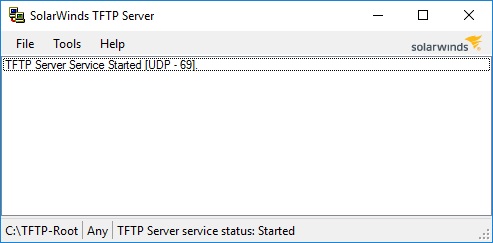
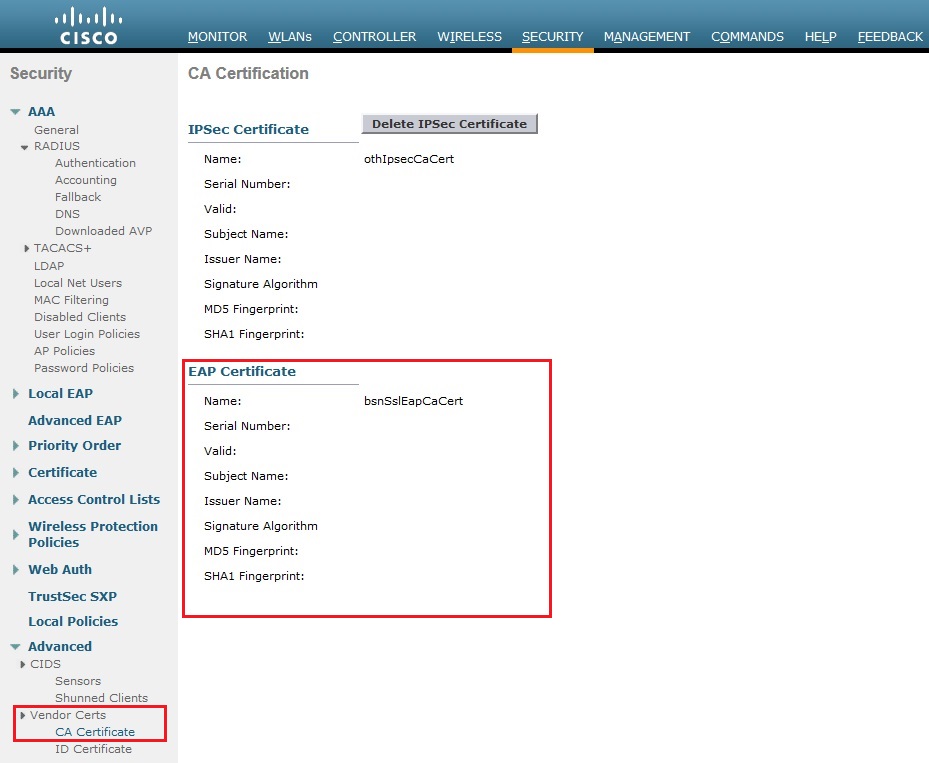
3. login to the WLC and navigate to “Security” – “Vendor Certs” – “CA Certificate” from the output below we can see that the WLC does not have a CA certificate installed for EAP.
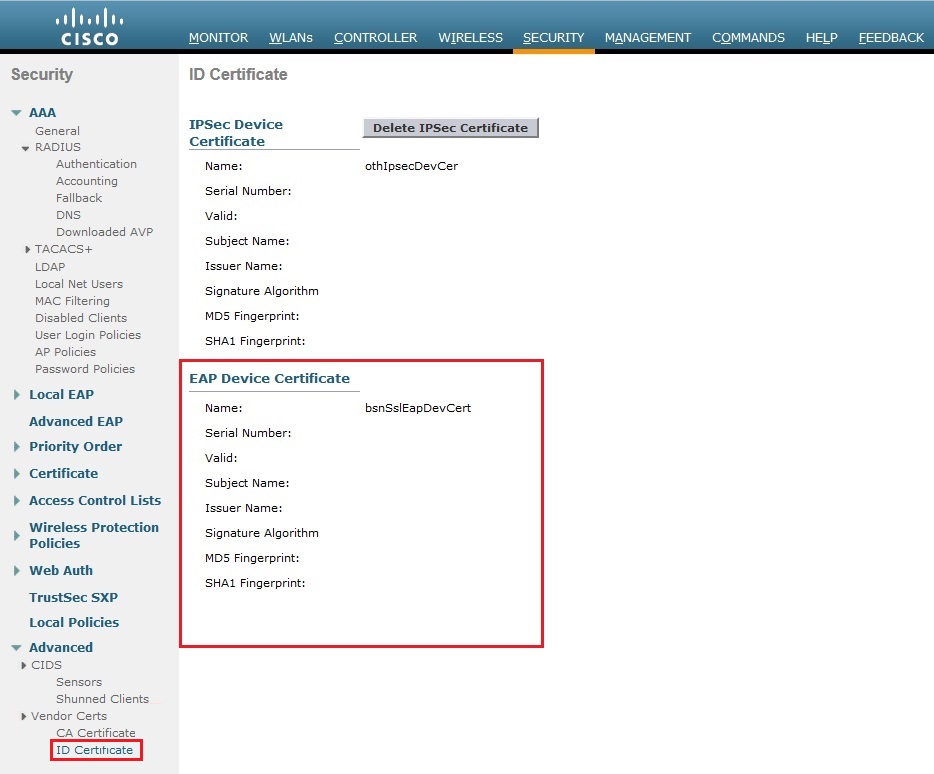
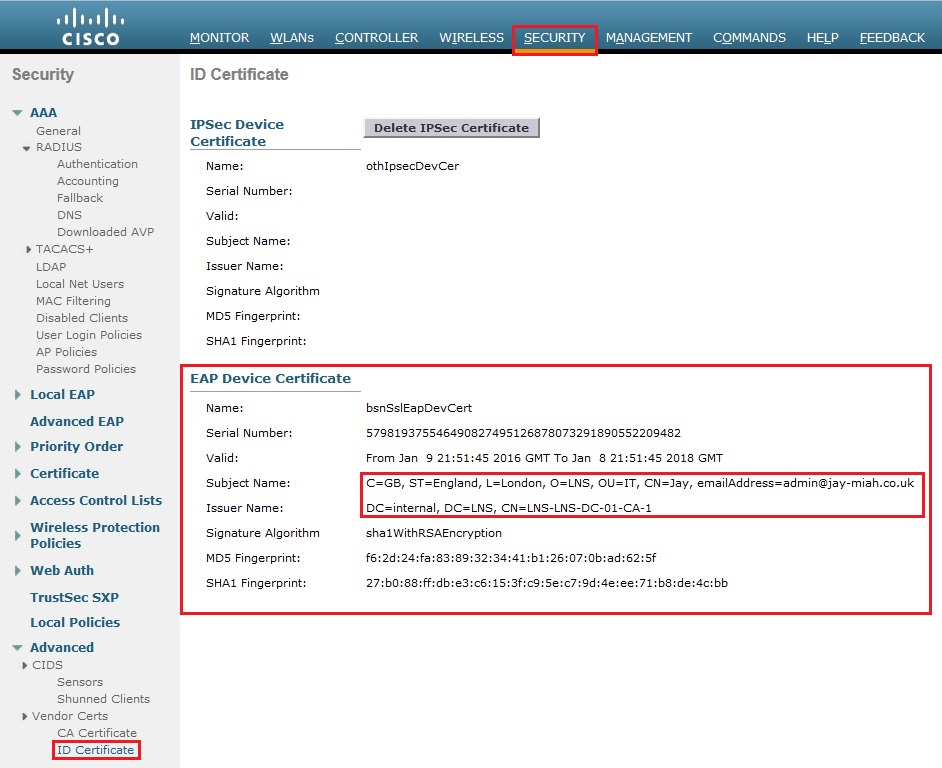
4. Click on “ID Certificate” we can see that there is no vendor certificate installed for EAP devices.
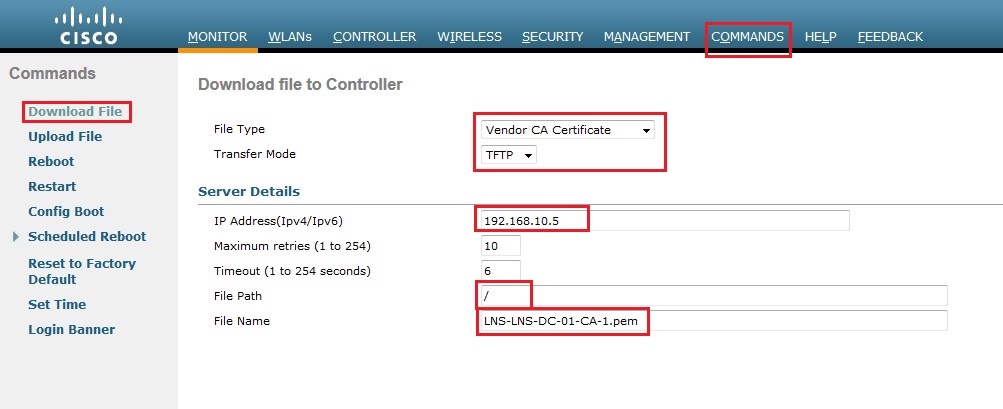
5. Click “Commands” – “Download File” from the dropdown box select “Vendor CA Certificate” select “TFTP” as the transfer mode, input the IP address of the TFTP server and provide the filename of the certificate including the extension name. in this case its the CA certificate so we need to specify “LNS-LNS-DC-01-CA-1.pem” Click “Download”
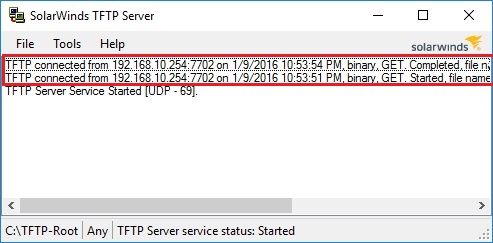
From the TFTP server we can see the transfer has began and completed.
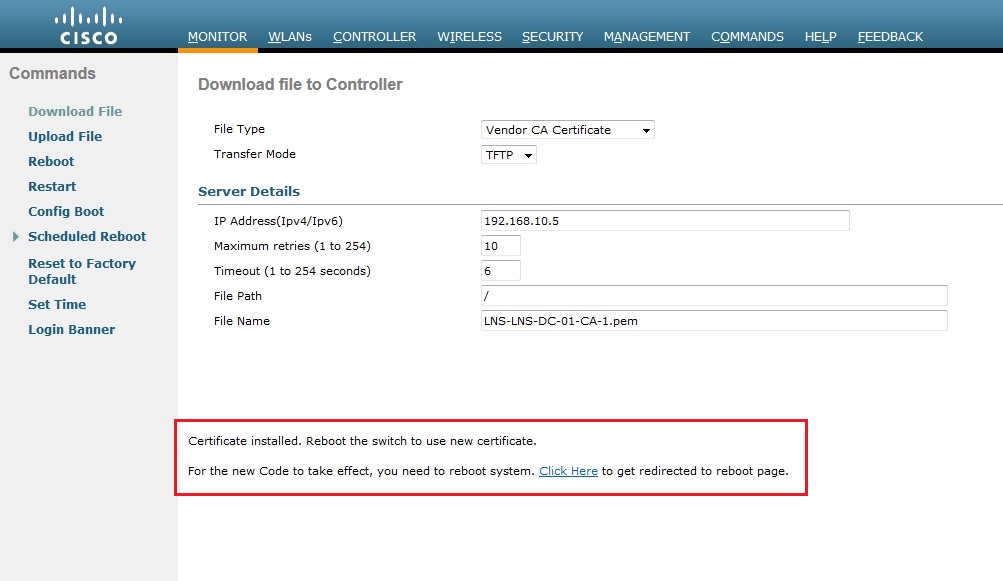
The message on the controller informs us that the Certificate was installed and that the controller needs to be rebooted, in order to start using the new certificate. We wont reboot just yet as we have the vendor certificate to install.
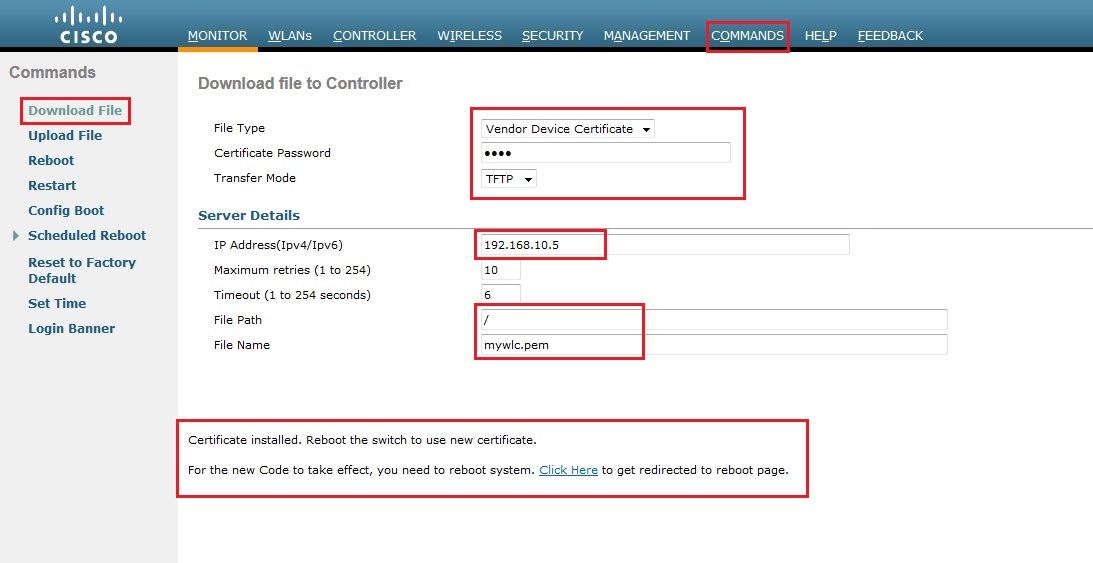
6. From the drop down box select “Vendor Device Certificate” specify the certificate password of “cisco”select “TFTP” as the transfer mode, input the IP address of the TFTP server and provide the filename of the certificate including the extension name. in this case its the device certificate so we need to specify “mywlc.pem” Click “Download”. Again we should see the confirmation message that the certificate was installed and the WLC needs to be rebooted.
7. Still on the “Commands” menu from the left hand pane select “Reboot” click “Save and Reboot”. The device will save the configuration and reboot this can take a few mins to complete.
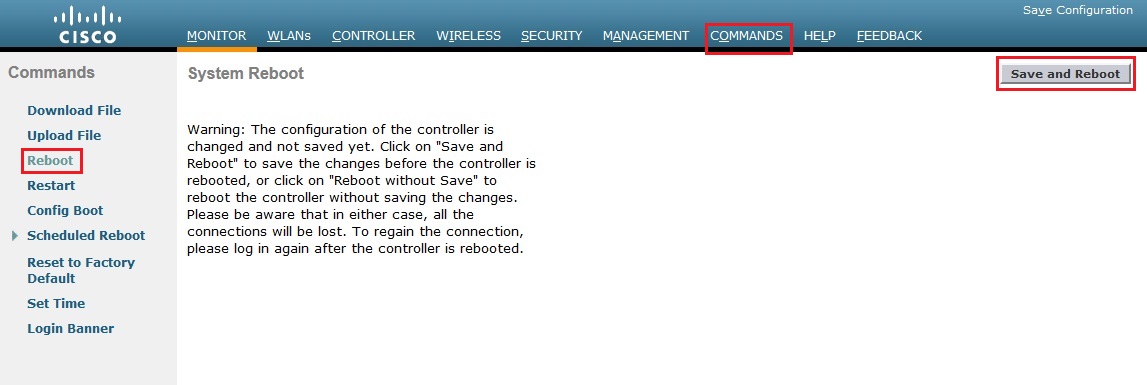
Click “OK” at the warning prompt

8. Once the device has rebooted, login and navigate back to “Security” – “Vendor Certs” – “CA Certificate” verify the new downloaded CA certificate is now in use.
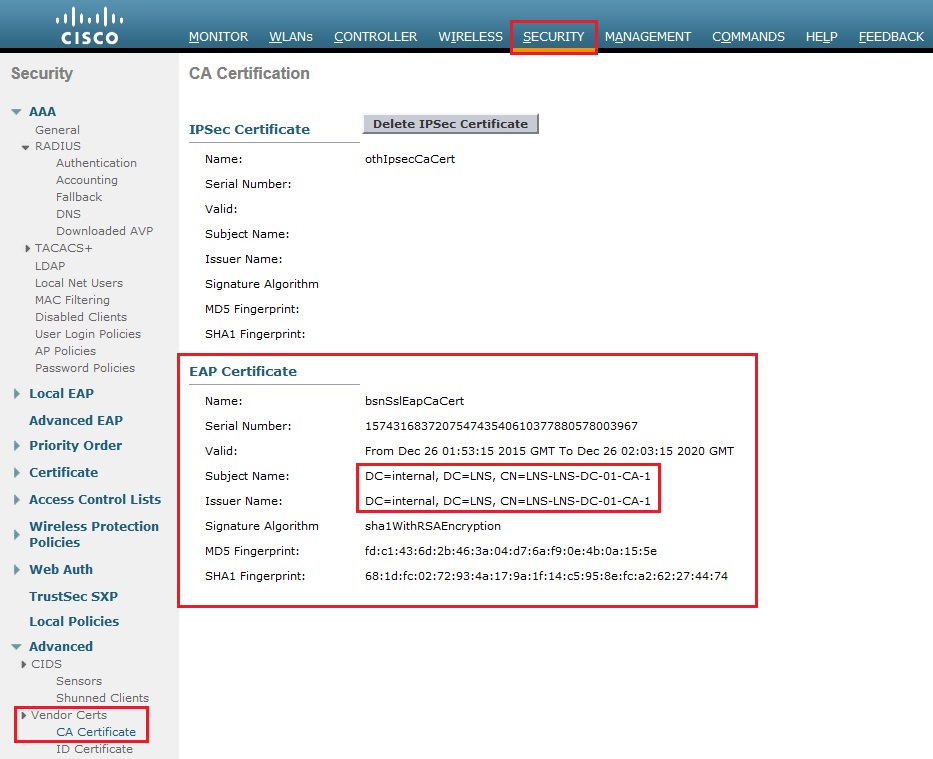
9. Click on ID Certificate and verify the device certificate is in use
Create the WLAN and Specify EAP-TLS Parameters
In this step we will create a local EAP profile to define the requirements of the connection including security, then we will create the WLAN and SSID.
1. Navigate to “Security” Click “Local EAP” – “Profiles” – “New”
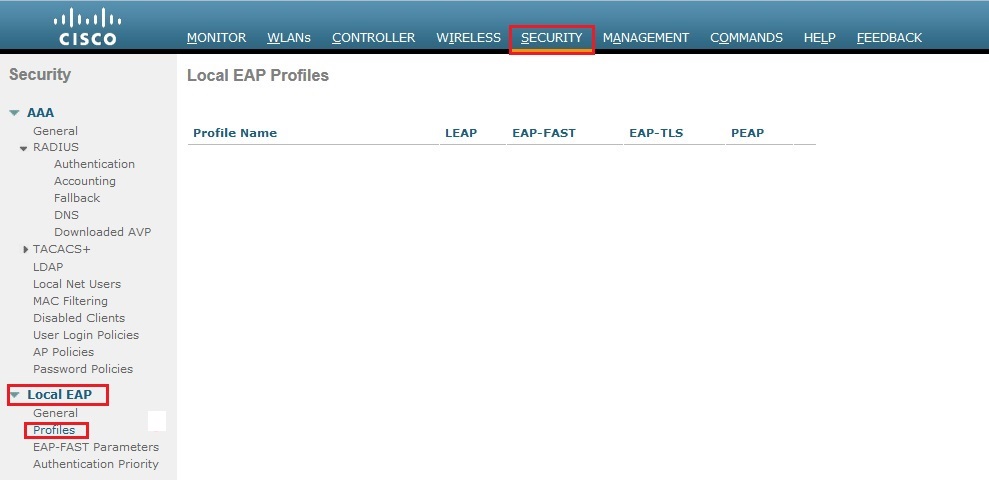
2. Give the profile a name

3. Tick “EAP-TLS”, “Local Certificate Required”, “Client Certificate Required”, Change Certificate Issuer from Cisco to “Vendor” and tick “Check against CA certificates, “Check Certificate Date Validity”
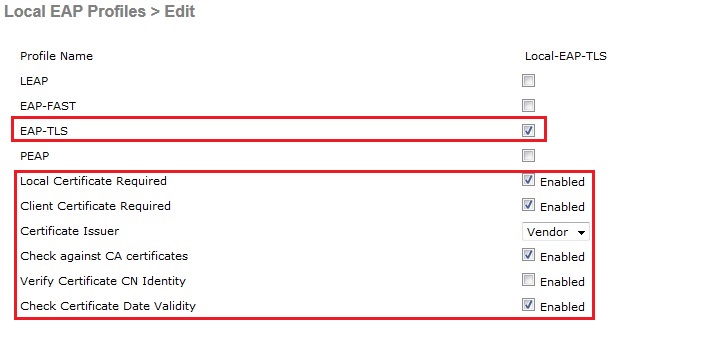
4. Navigate to “WLANs” – “Create New” click “Go”

5. Give the profile and SSID a name, these do not have to match. Click “Apply”
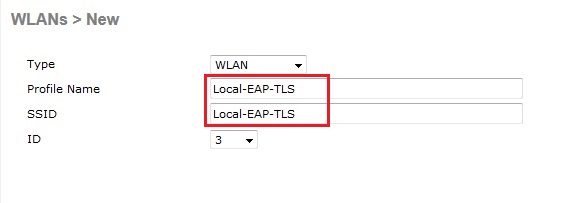
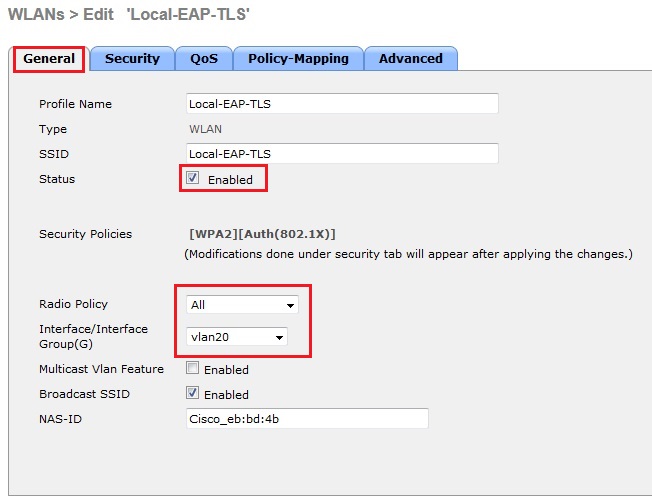
6. Under the “General” tab tick “Enabled”, select the radio policy and the interface group to use with the WLAN.
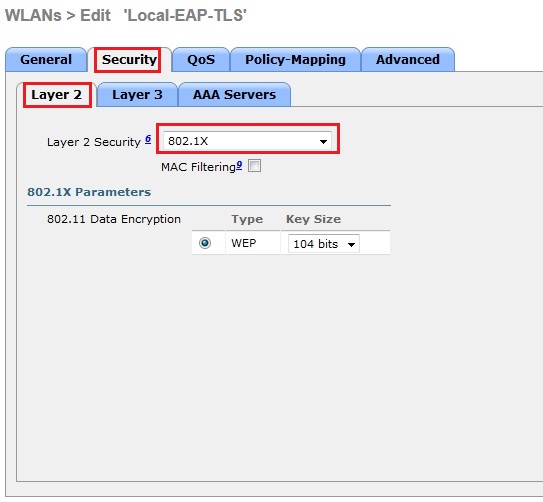
7. Click the “Security” tab, “Layer 2” and select “802.1x” from the drop down list.
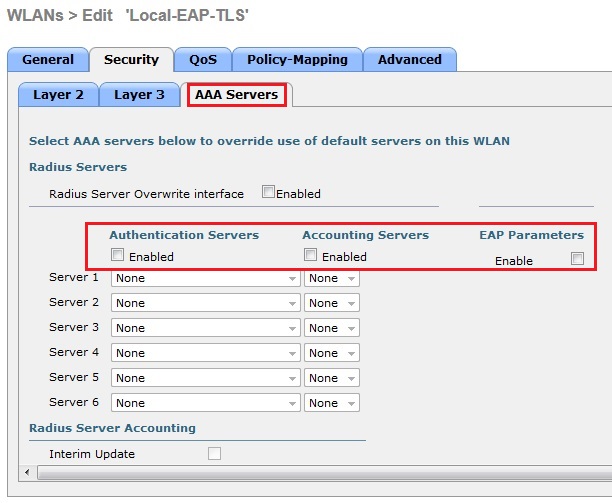
8. Click “AAA Servers” make sure all the boxes are un-ticked under “RADIUS Servers”
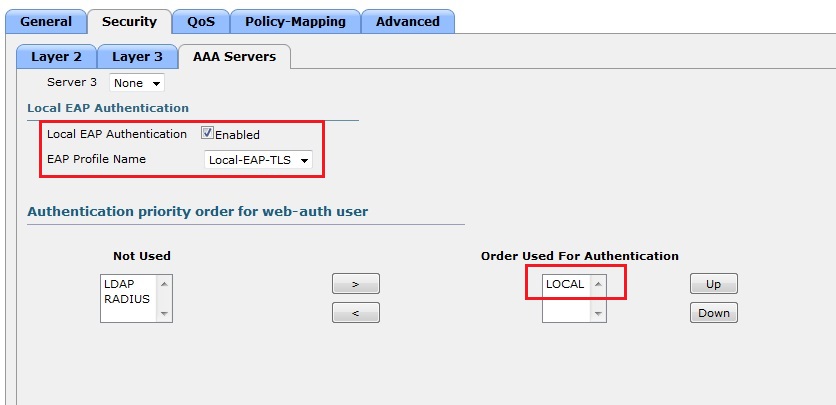
Scroll down and tick “Enabled” in the “Local EAP Authentication” tick box
Create an AD user
We have all the background configuration ready now we need to create our users that will be requesting certificates and connecting to the WLAN. In this example we will create a single user “TLSSuser”
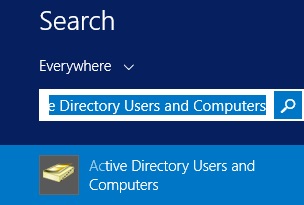
1. On the DC login, Click “Start” and type “Active Directory Users and Computers”
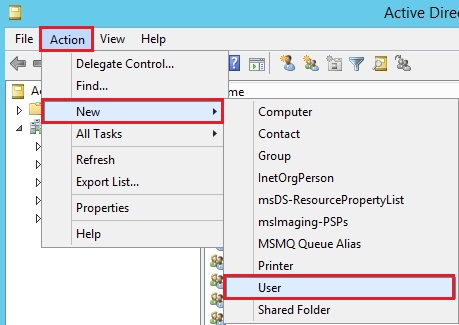
2. Click the “Users” container and from the “Actions” menu select “New” – “User”
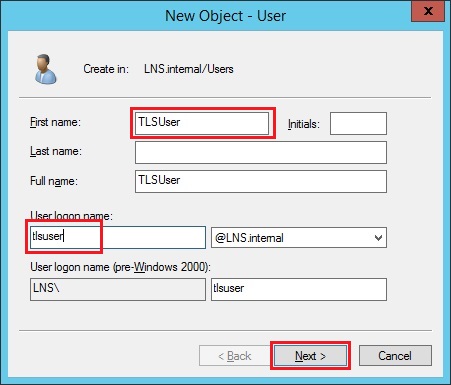
3. Give the user a name, click “Next”
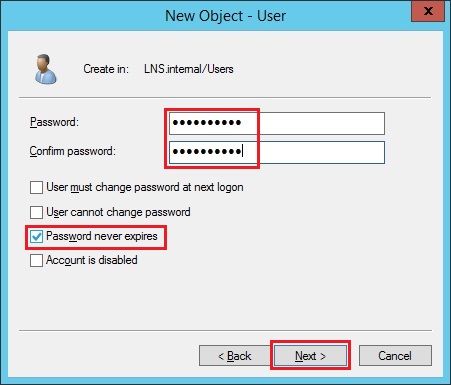
4. Create a password and tick “Password never expires”, click “Next”
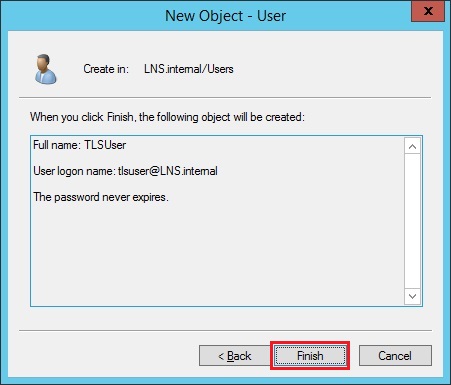
5. Click “Finish”
Client configuration, Certificate request and SSID Set-up
In this client configuration, we will manually login and request a user certificate then we will set-up the SSID on the local machine. Although all this can be achieved via group policy which has been demonstrated in “Deploying EAP-TLS Wireless Solution in an Enterprise Environment” In this example we will see how these tasks can also be done manually.
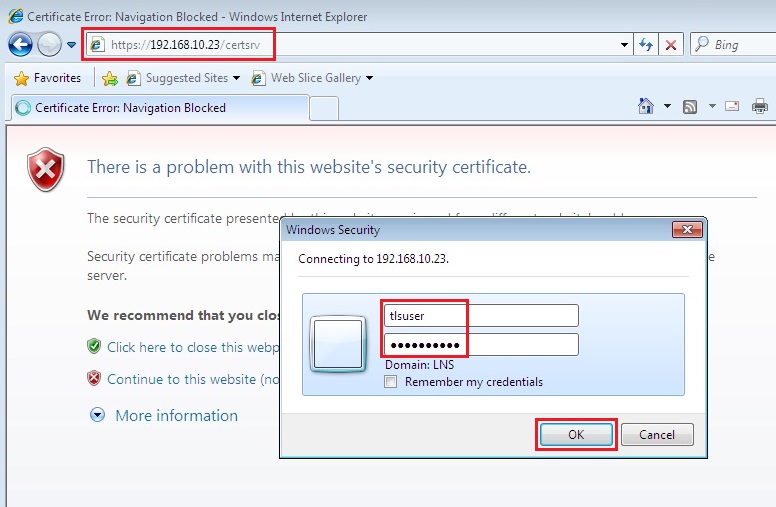
1. Logon to the client machine using the user account created earlier, in this case its “TLSUser”. As the client will not have a valid wireless connection to the domain we will need to plug directly on to the network so that: 1. we can login and 2. we are able to request a user certificate. Launch a browser and navigate to the URL of the CA, i.e “https://192.168.10.23/certsrv” At the Logon prompt Login as the “Domain User”
2. Click “Request a certificate”
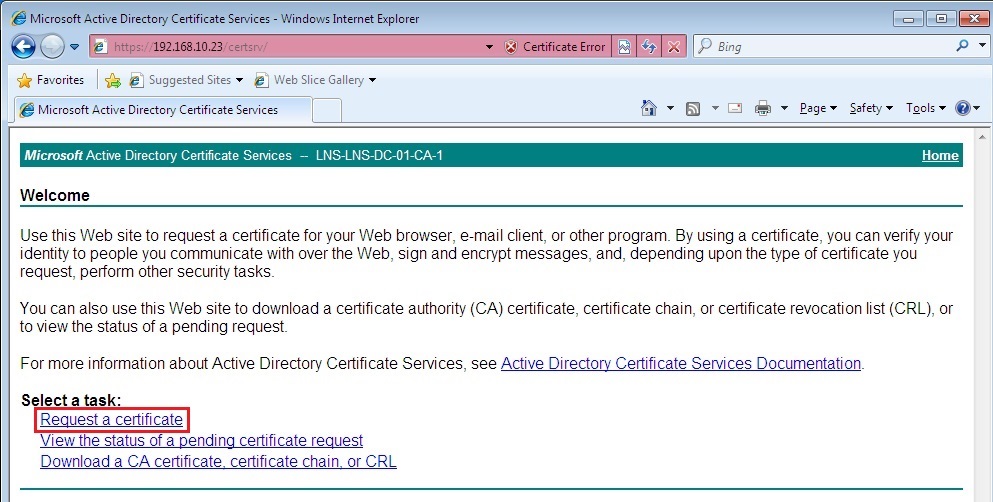
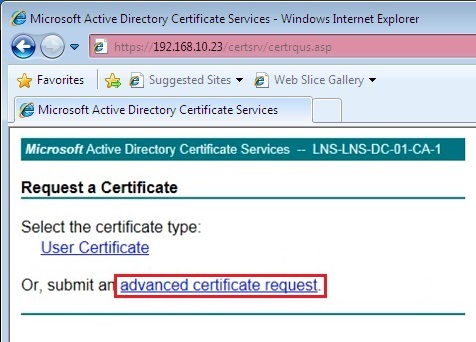
3. Click “advanced certificate request”
4. Select “Create and submit a request to this CA”

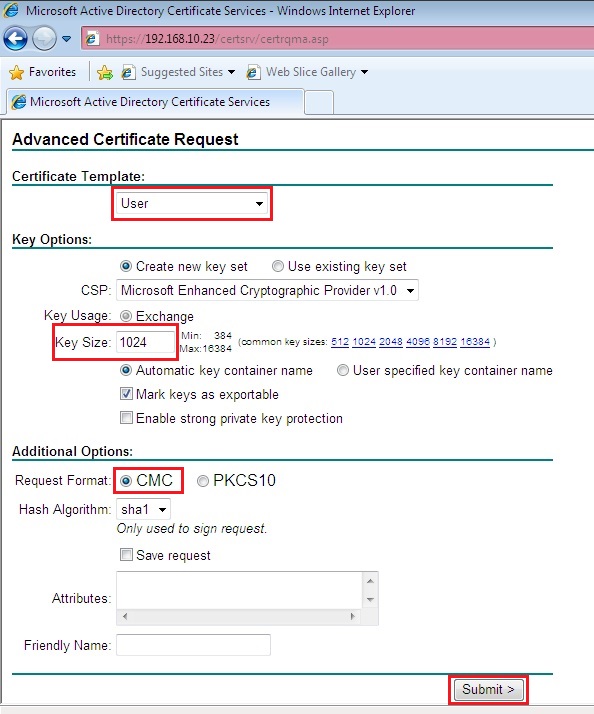
5. From the request options, select “User”, “1024” as the key size and “CMC” as the request format. Click “Submit”
6. Click “Install this Certificate”
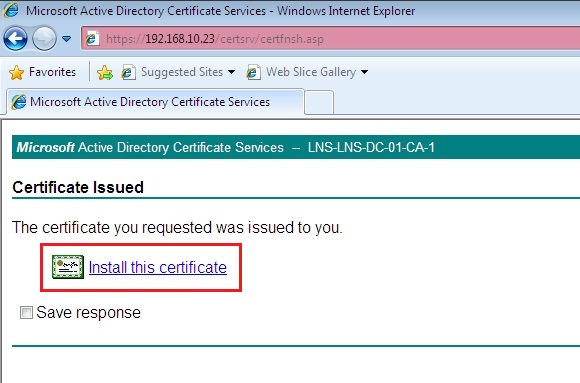
The confirmation message will display that the user certificate has now been installed.
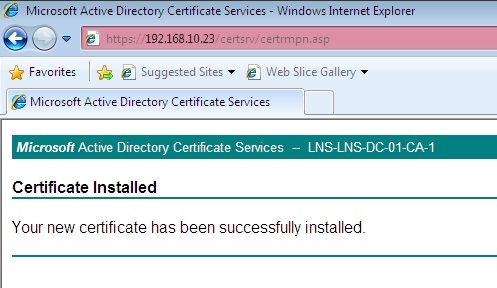
As this is a domain machine, the CA certificate has already been installed as part of the domain join process. however for any reason if you dont have the CA certificate installed on the local machine. you will get a prompt at the install “This CA is not trusted” click “Install this CA certificate” this CA certificate can also be installed by Clicking “Home” and select “Download CA certificate, certificate chain or CRL”

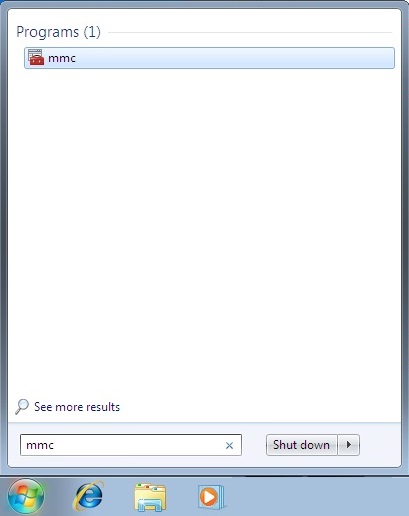
7. Still on the client machine click “Start” and launch “MMC”
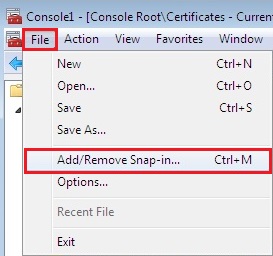
8. Click “File” – “Add/Remove Snap-in”
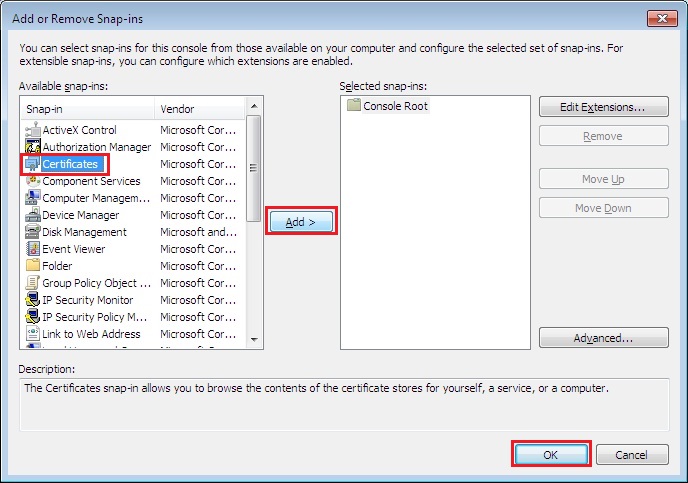
9. Click “Certificates”, click “Add” and click “OK”
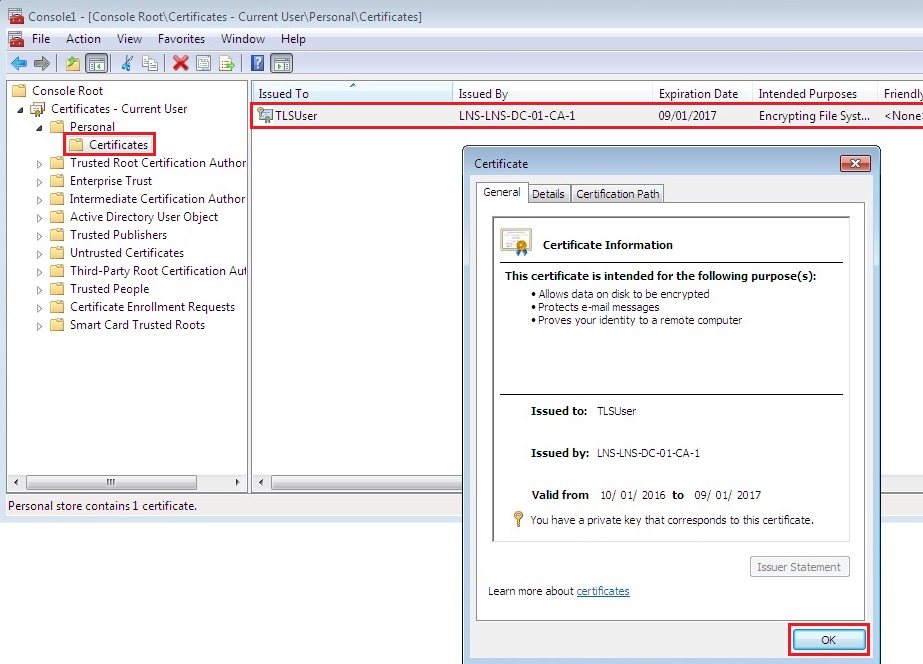
10. Expand “Certificates” – “Personal” – “Certificates” and verify the user certificate is installed, click and open the issued certificate to view the properties.
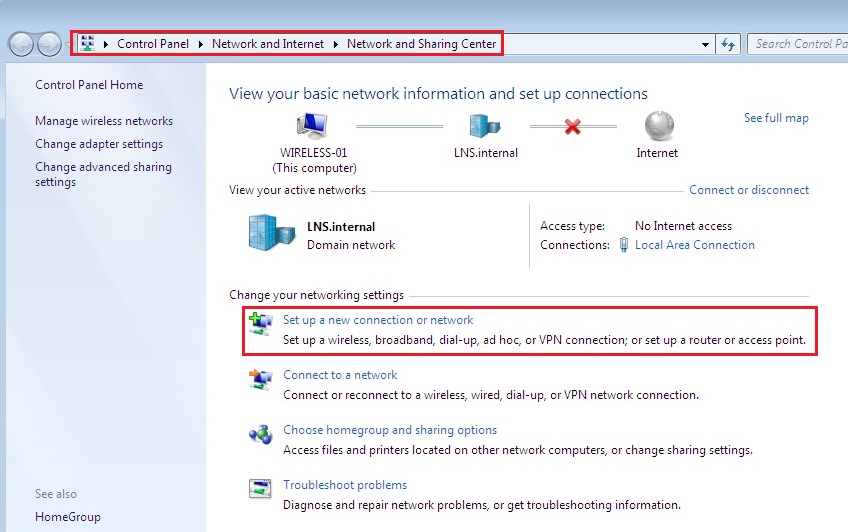
11. Now that our certificates is installed we can configure the SSID locally. Navigate to “Control Panel” – “Network and Internet” – “Network and Sharing Center” click “Setup a new connection or network”
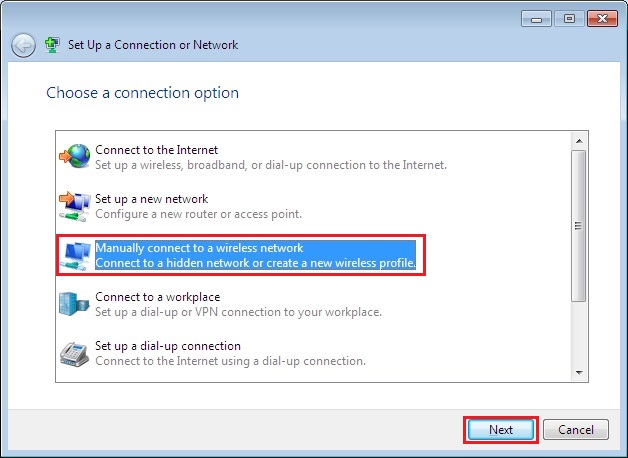
12. Click “Manually connect to a wireless network” click “Next”
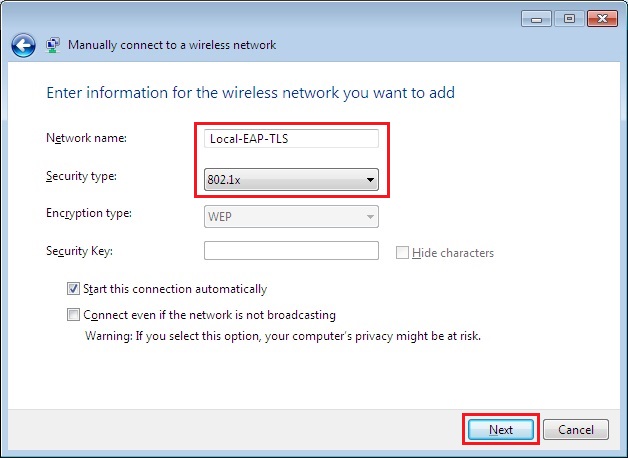
13. Specify the network name that we will be connecting to, this SSID was setup on the WLC earlier. In this case it “Loacl-EAP-TLS” Specify “802.1x” as the security type as we are using “RADIUS”. Click “Next”
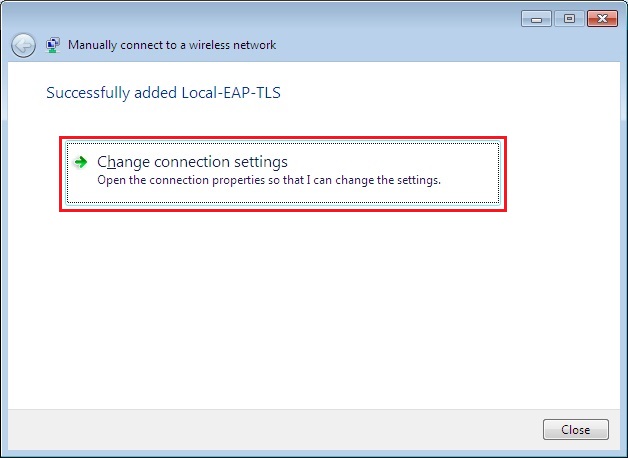
14. Click “Change connection settings”
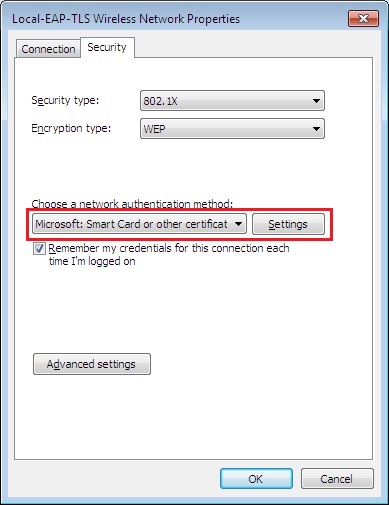
15. Select the “Security tab” and select “Microsoft: Smart Card or other Certificate” and click “Settings”
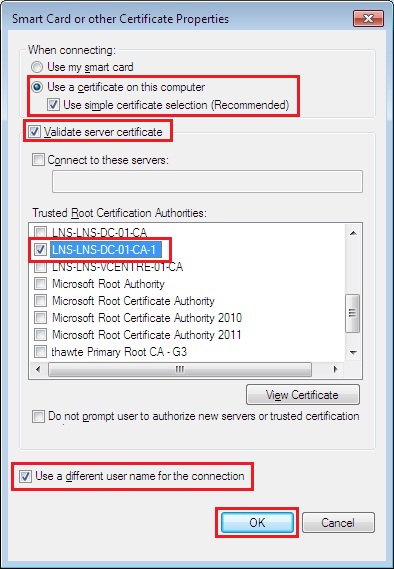
16. Under “When connecting” select “Use a certificate on this computer” tick “Use a simple certificate selection (Recommended)” and tick “Verify the servers identity by validating the certificate”
From the “Trusted Root Certification Authorities” select the root certificate of your root CA, this is the certificate that is issued to the CA server by the CA.
Finally tick “use a different username for the connection” and click “OK” and close all the windows
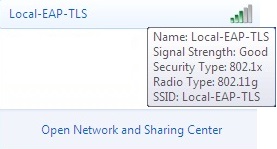
17. Click the wireless icon on the desktop and verify the SSID is visible, click “Connect”
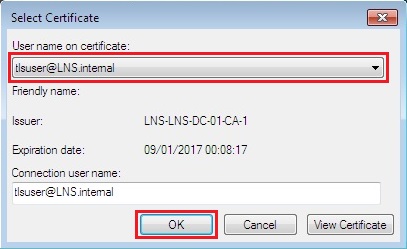
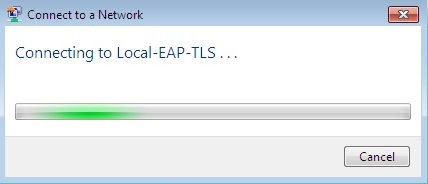
18. A window will pop up displaying the username which is on the user certificate, the connection username will also be the same. This prompt is asking the user to select the certificate in which they would like to use to connect. In a domain environment the logged on user will only be able to see their own certificate. Click “View Certificate” to see the details of the cert, then click “OK” to connect. The prompt only appears the first and only time the user connects, subsequent connections take place automatically in the background.
![]()
Testing and Validation
Lets validate the configuration and test our deployment.
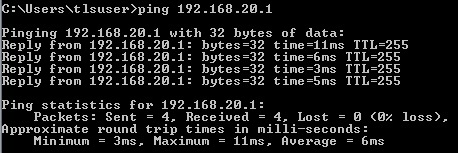
1. Once the network is connected, Launch “CMD” type “IPconfig”and verify DHCP has issued a correct IP address within the VLAN specified in the WLC. In this case we have an IP from VLAN20 which is on the 192.168.20.0 network.

2. Ping the default gateway and verify connectivity
3. On the WLC click “Monitor” – “Clients” Verify the client is visible on the list as a connected client. Click the MAC address of the client for more detail.

4. From the client properties we can see that the WLAN profile and SSID the client is using is “Local-EAP-TLS” the authentication is “Central” which is our Cisco WLC. The username is “[email protected]” and the VLAN id is “20”
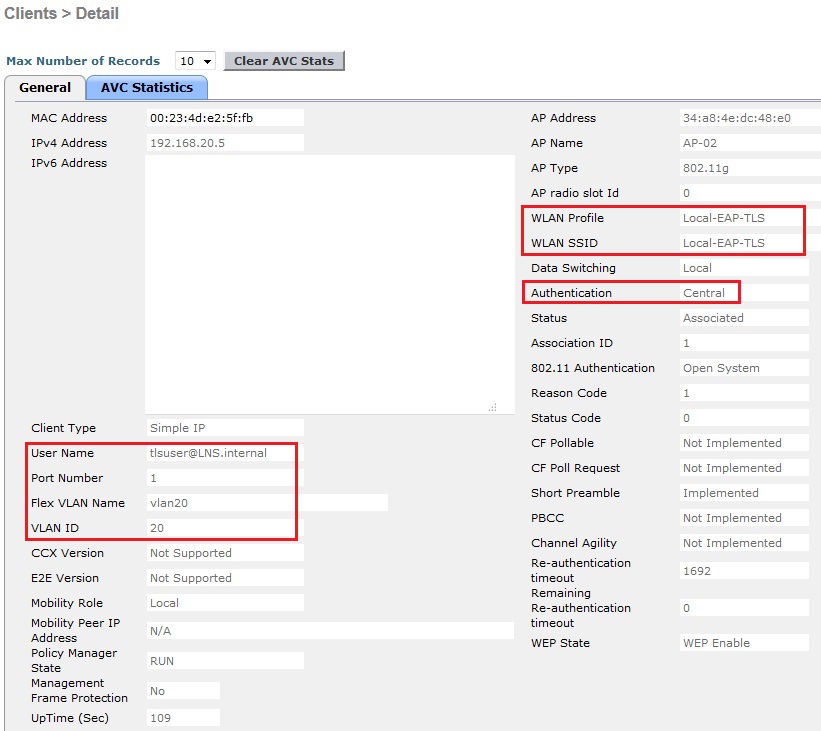
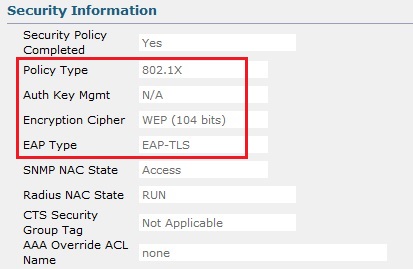
5. If we scroll down to the “Security Information” We can verify that we are using “802.1X” and the EAP Type is “EAP-TLS”
