Blocking URLs Using MPF on the Cisco ASA
The Cisco ASA 5505 doesn’t have a built in feature for URL filtering, nowadays most next generation firewalls will have a URL filtering option built in – which can be licensed and used without the need of a separate device. Commonly this type of deployment would act as a transparent proxy.
Using regular expressions with the modular policy framework (MPF) we can ask the ASA to inspect http traffic and block URLs that we define. By design the ASA 5505 is not capable of deep packet inspection, therefore it is unable to perform https filtering as the content of a packet is encrypted using SSL.
In this step by step guide we will configure the Cisco ASA to to use regular expressions with MPF to block certain http websites (URL), this will be done using ASDM.
The topology used, is a typical deployment – the ASA is placed on the edge of the network behind the WAN router, all http traffic will be inspected as it flows from the inside of the network to the outside. The traffic will then be allowed or dropped according to the inspect maps.
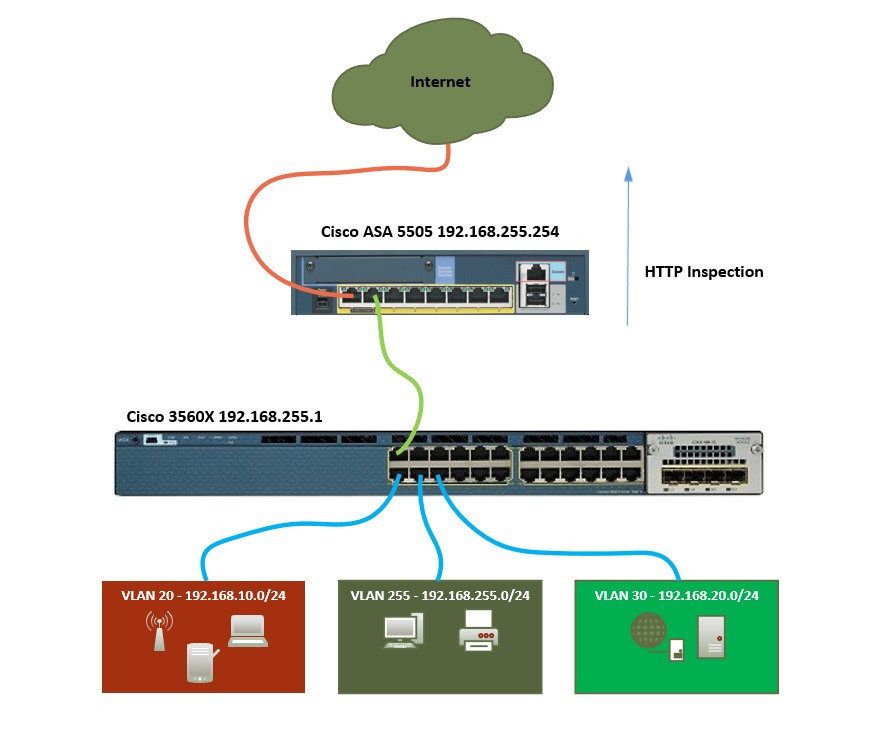
Lets get started!
1. launch ASDM and login
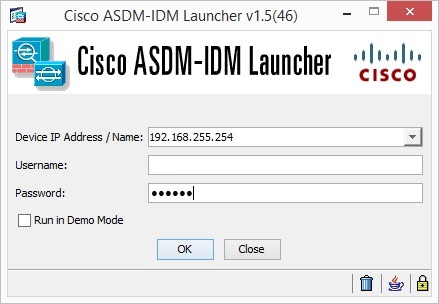
2. Navigate to “Configuration” – “Firewall” – “Objects” – “Regular Expressions” under Regular Expressions click “Add”
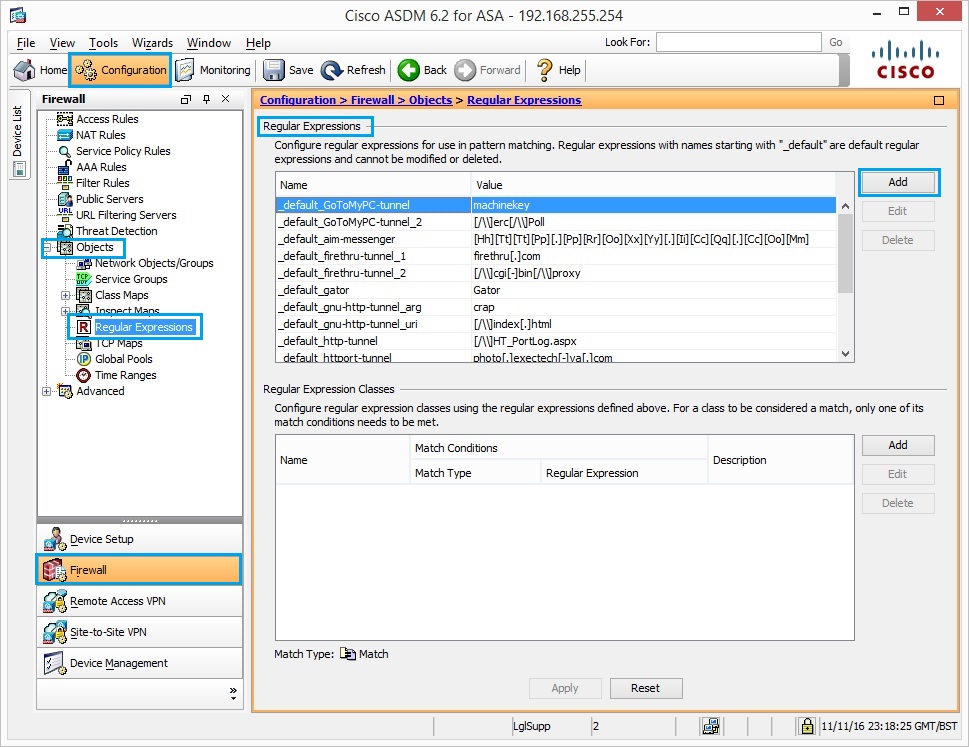
3. Create a regular expression with the value of the URL that you wish to block in the following format “\.facebook\.com” and click “OK”
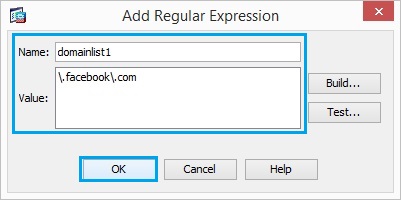
4. Create a regular expression of another URL, and click “OK”
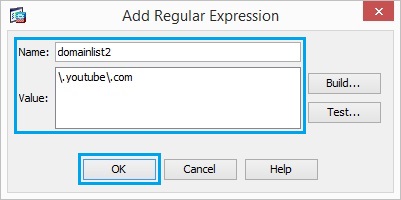
5. Create a regular expression of another URL, and click “OK” repeat the above step to add as many URLs required.
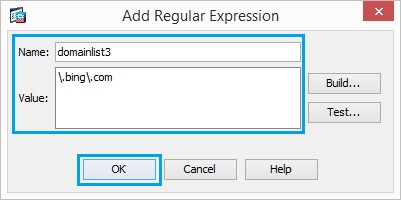
6. Create a regular expression in order to capture the file extensions such as exe, com and bat provided that the https version being used by the web browser must be either 1.0 or 1.1, Enter the following “.*\.([Ee][Xx][Ee]|[Cc][Oo][Mm]|[Bb][Aa][Tt]) HTTP/1.[01]” Click “OK”
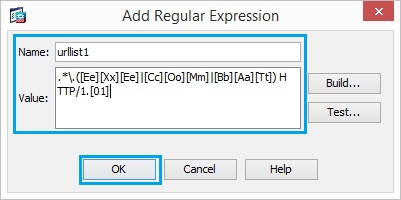
7. Create a regular expression in order to capture the file extensions such as pif, vbs and wsh. Enter the following “.*\.([Pp][Ii][Ff]|[Vv][Bb][Ss]|[Ww][Ss][Hh]) HTTP/1.[01]” Click “OK”
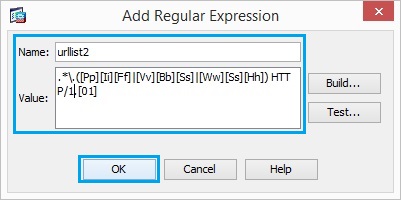
8. Create a regular expression in order to capture the file extensions such as doc, xls and ppt. Enter the following “.*\.([Dd][Oo][Cc]|[Xx][Ll][Ss]|[Pp][Tt]) HTTP/1.[01]” Click “OK”
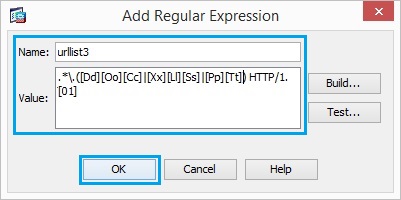
9. Create a regular expression in order to capture the file extensions such as zip, tar and tgz. Enter the following “*\.([Zz][Ii][Pp]|[Tt][Aa][Rr]|[Tt][Gg][Zz]) HTTP/1.[01]” Click “OK”
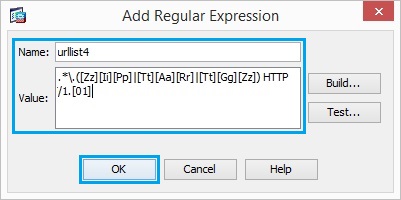
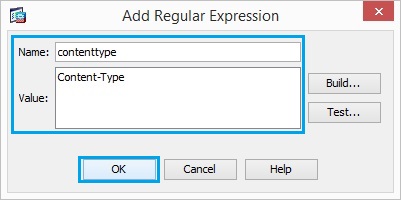
10. Create a regular expression “contenttype” in order to capture the content type. Click “OK”.
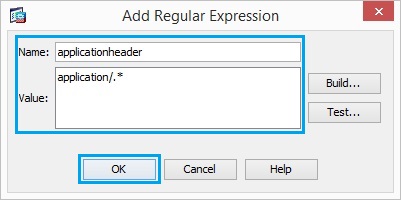
11. Create a regular expression “applicationheader” in order to capture the various application
header. Click “OK”
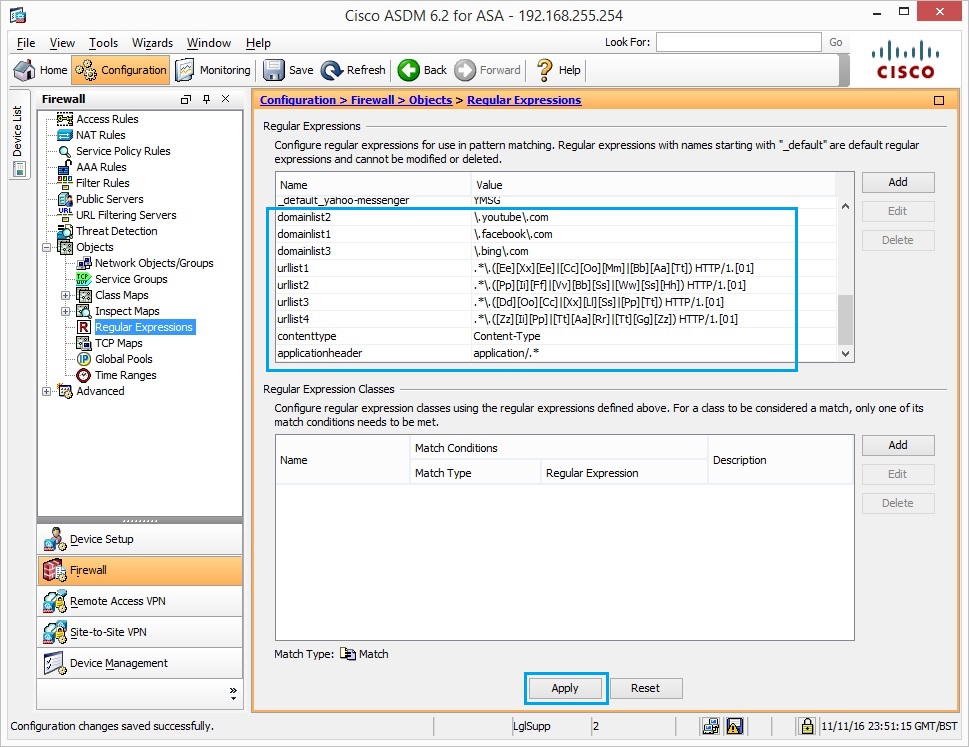
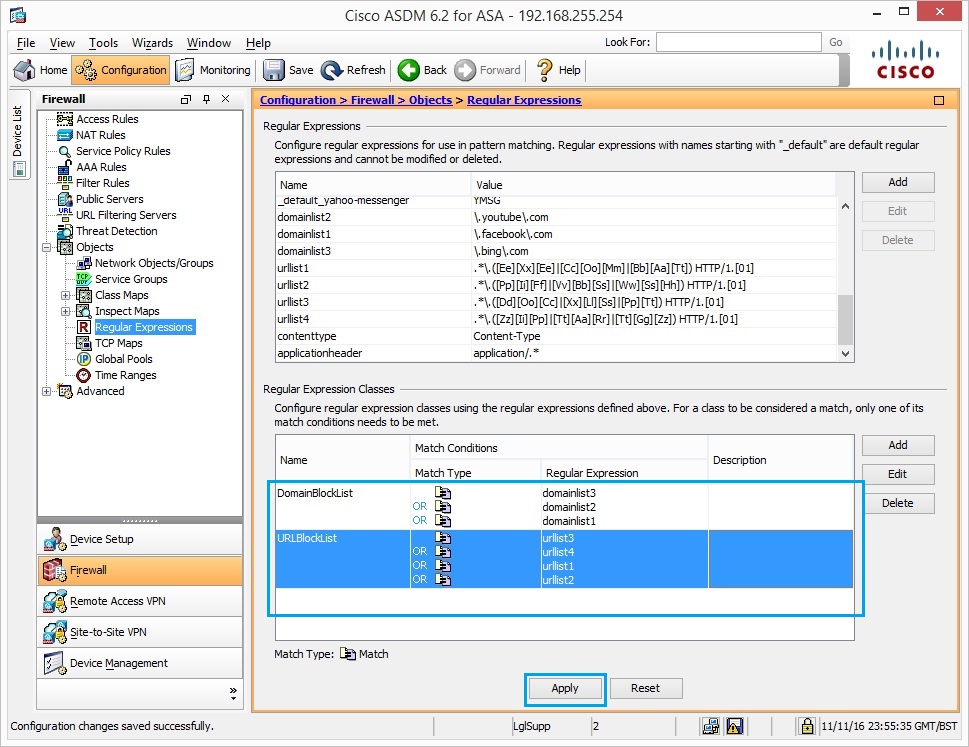
12. Once all the regular expressions have been created, hit “Apply”
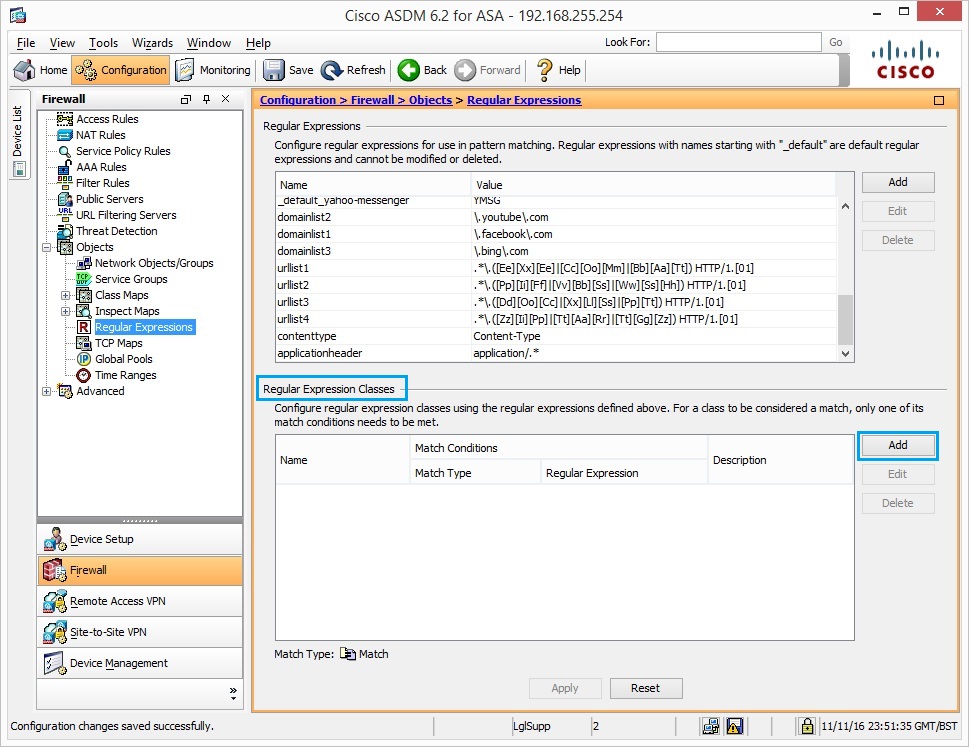
13. Under “Regular Expression Classes” click “Add”
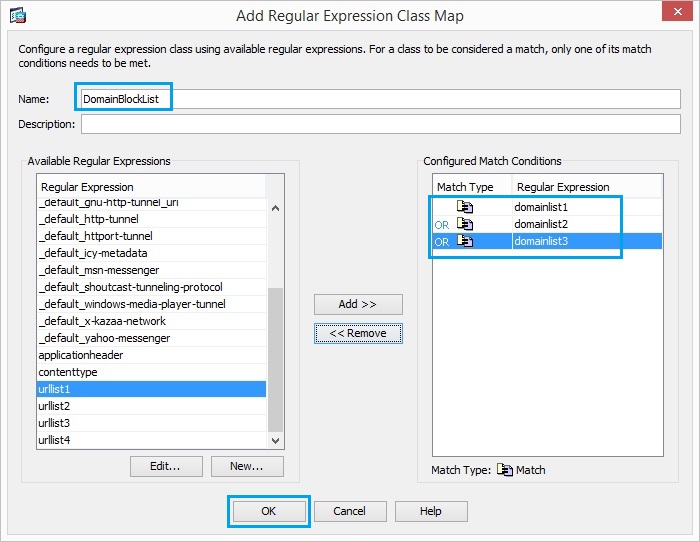
14. Create a regular expression class “DomainBlockList” in order to match any of the regular
expressions “domainlist1”, “domainlist2” and “domainlist3”. Click “OK”.
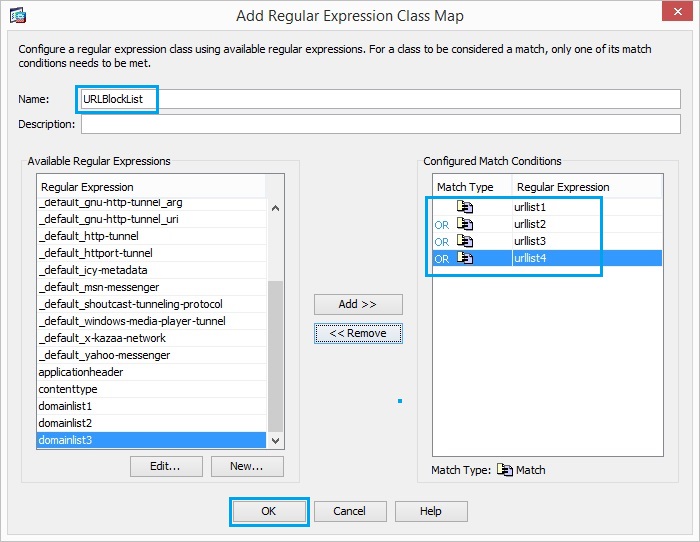
15. Create a regular expression class “URLBlockList” in order to match any of the regular
expressions “urllist1”, “urllist2”, “urllist3” and “urllist4”. Click “OK”.
16. Once the expression classes have been added click “Apply”
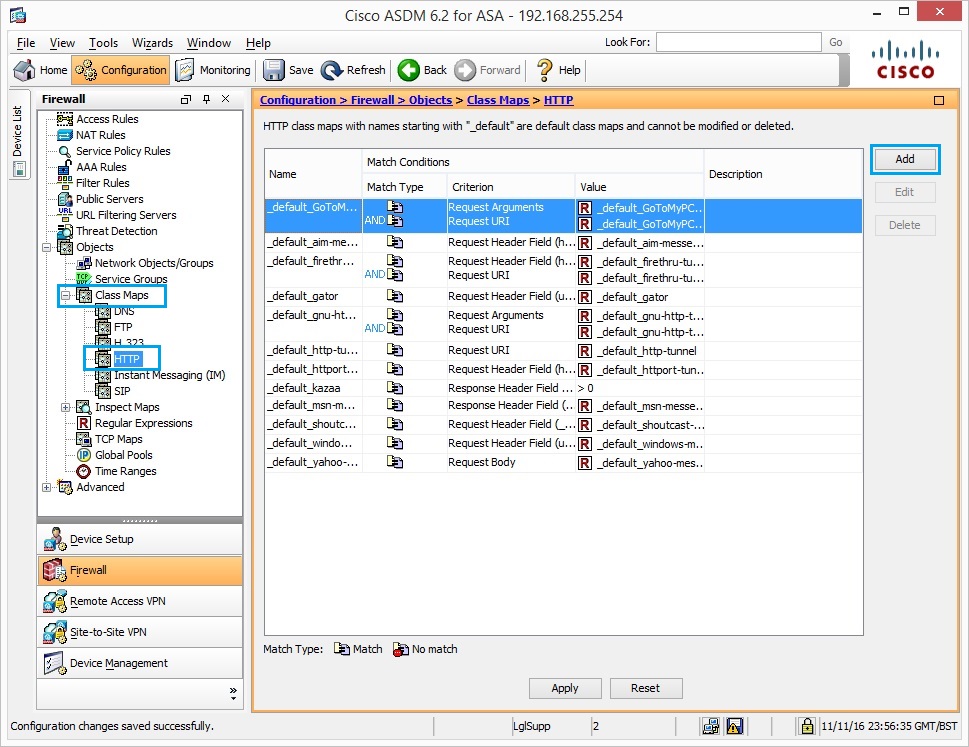
17. Navigate to “Class Maps” – “HTTP” and click “Add”
18. Create a class map “AppHeaderClass” in order to match the response header with regular
expressions captures. Click “Add”
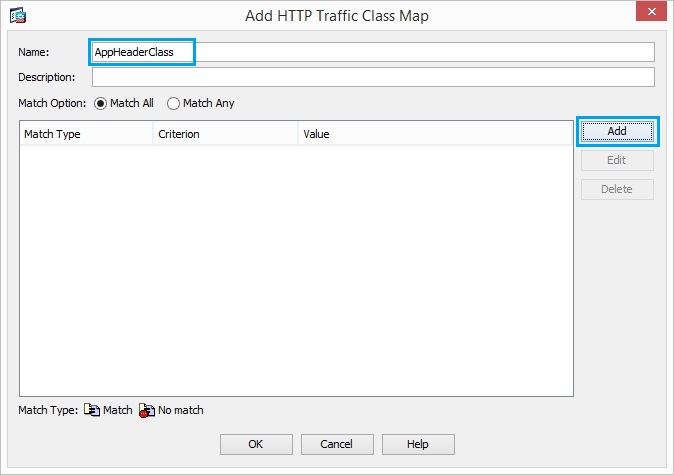
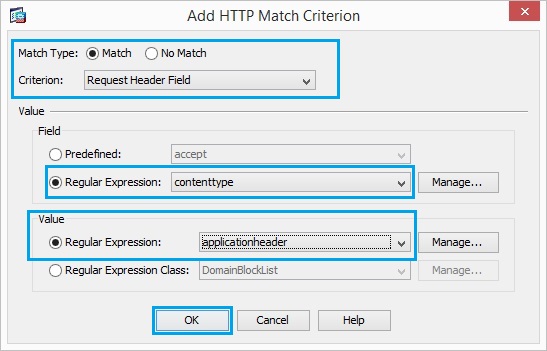
19. Insert the match criteria as shown below, and click “OK”, click “OK”
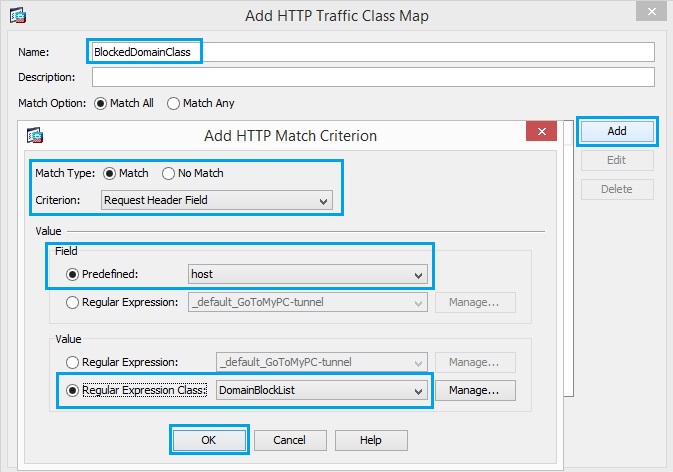
20. Create a class map “BlockedDomainsClass” in order to match the response header with regular
expressions captures. Click “Add” and Insert the match criteria as shown below, and click “OK”, click “OK”
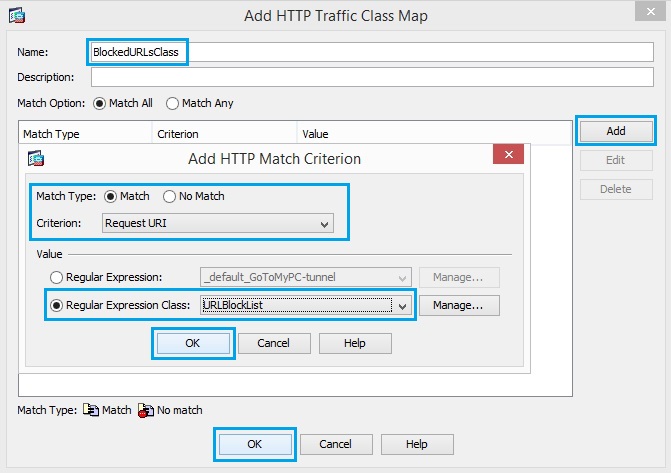
21. Create a class map “BlockedURLsClass” in order to match the response header with regular
expressions captures. Click “Add” and Insert the match criteria as shown below, and click “OK”, click “OK”
22. Navigate to “Inspect Maps” – “HTTP” click “Add”
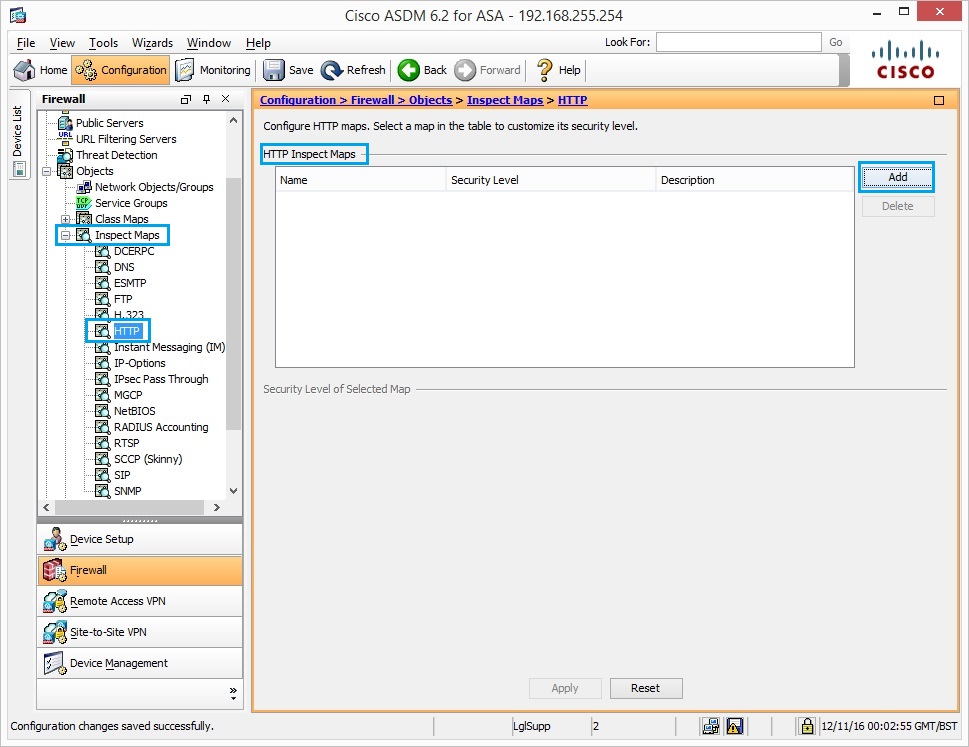
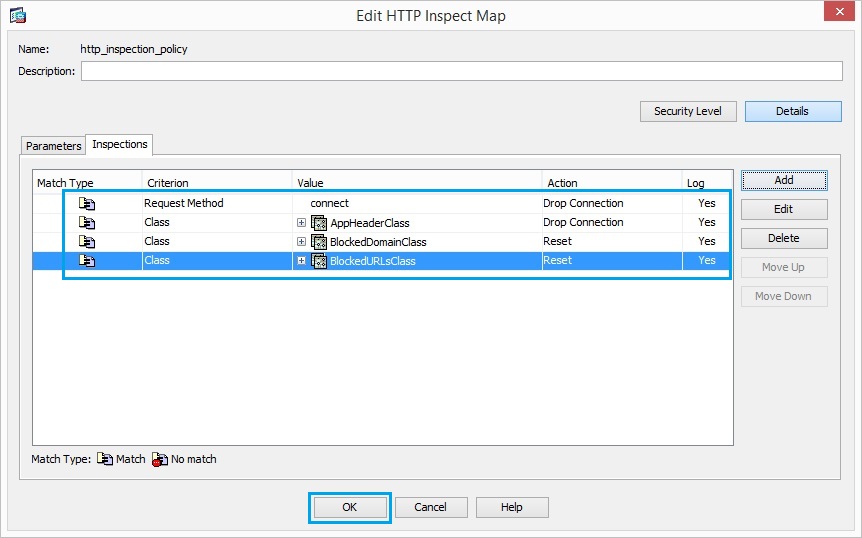
23. Create a “http_inspection_policy” to set the action for the matched traffic as shown. Click “Inspection”, “Details” and “Add”
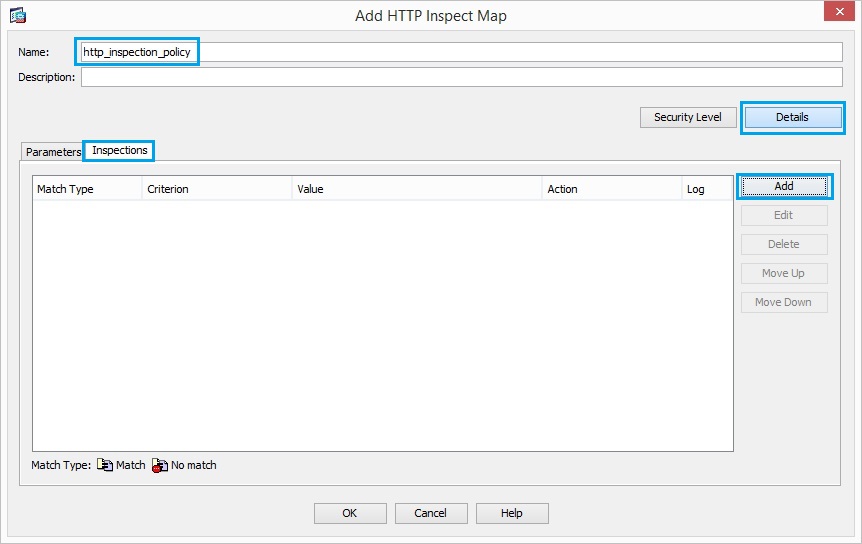
24. Set the action as “Drop Connection” and “Enable” the logging for the Criterion as “Request Method” and Value as “connect”. Click “OK”
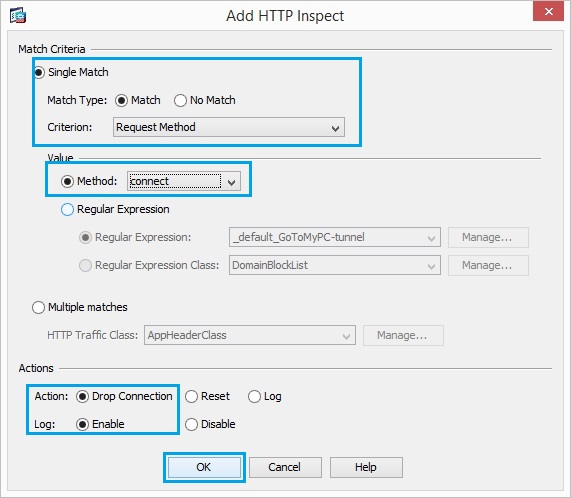
25. Click “Add”
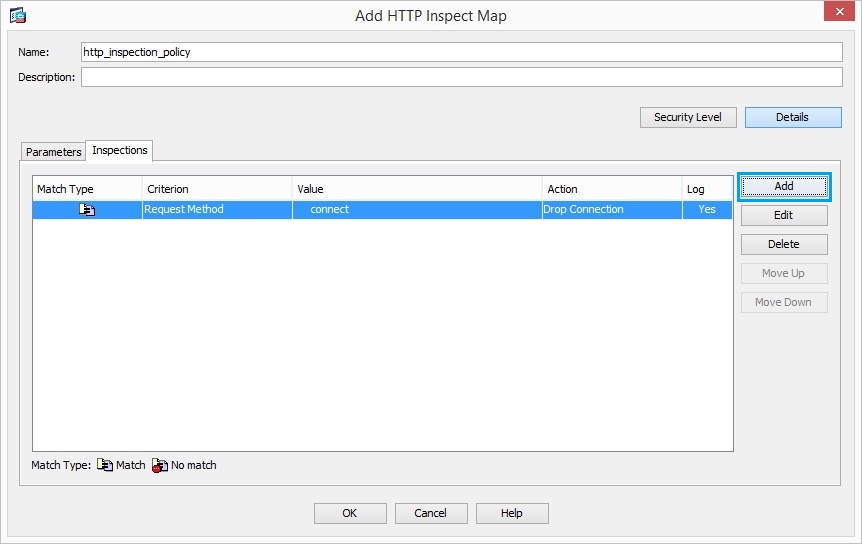
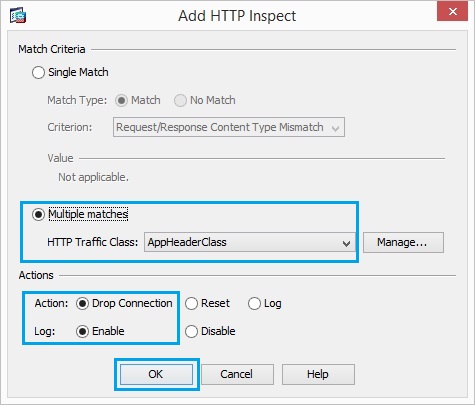
26. Set the action as “Drop Connection” and “Enable” the logging for the class “AppHeaderClass”. Click “OK”
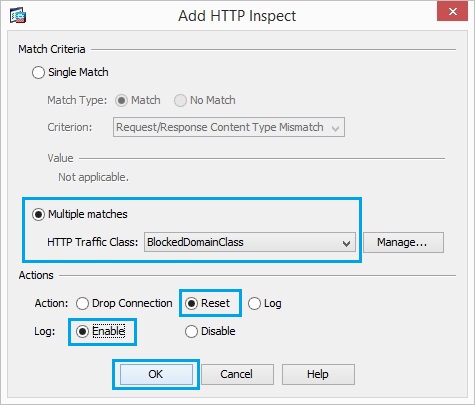
27. Click “Add” Set the action as “Reset” and “Enable” the logging for the class “BlockDomainsClass”. Click “OK”
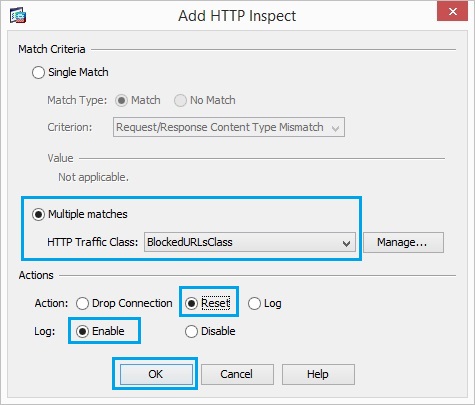
28. Click “Add” Set the action as “Reset” and “Enable” the logging for the class “BlockedURLsClass”. Click “OK”
29. Once all the inspect maps have been added, Click “OK”
30. Click “Apply” for the changes to take effect.

31. Navigate to “Service Policy Rules” and click “Add” – “Add Service Policy Rule”
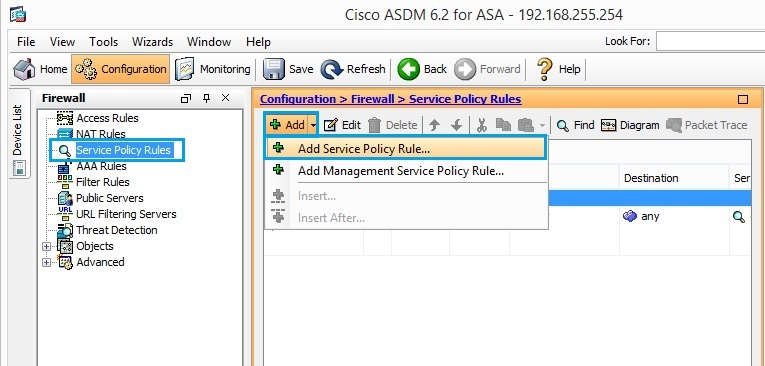
32. Select “Interface” –“Inside-(Create new service policy”, give the policy a name and click “Next”
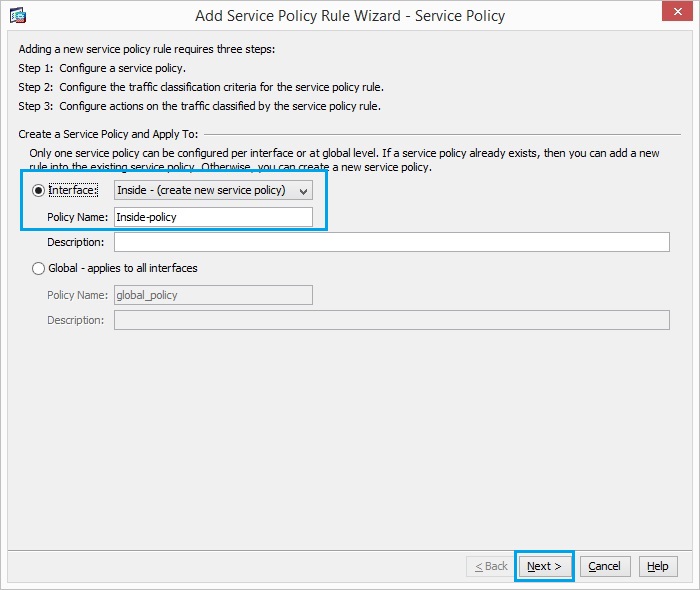
33. Create a class map “httptraffic” and check the “Source and Destination IP Address
(uses ACL)”. Click “Next”.
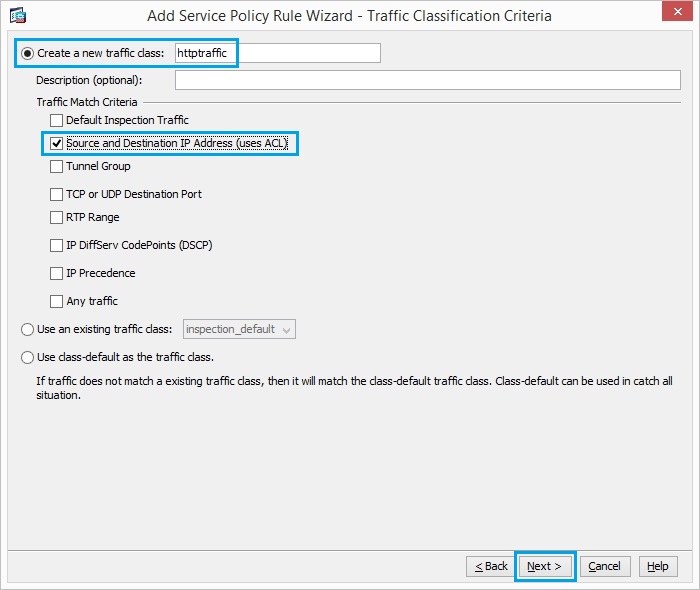
34. Choose the Source and Destination as “any” with service as “tcp−udp/http”. Make sure the “Enable Rule” checkbox is ticked. Click “Next”
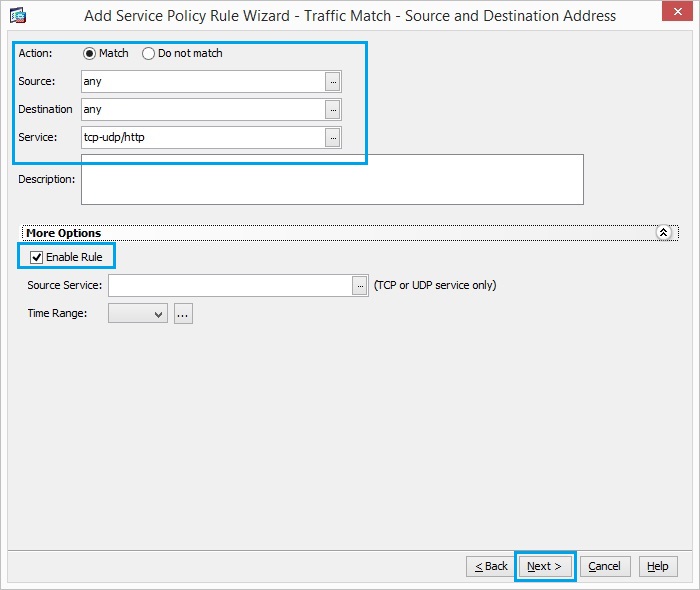
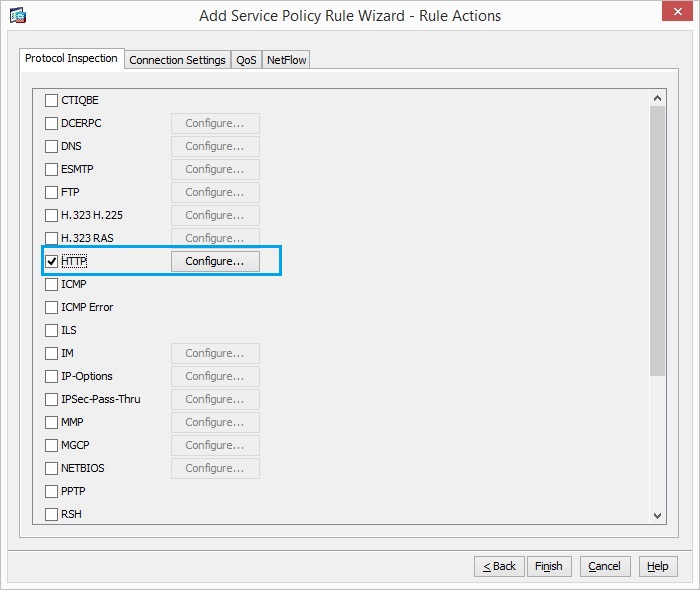
35. Check the “HTTP” radio button and click “Configure”
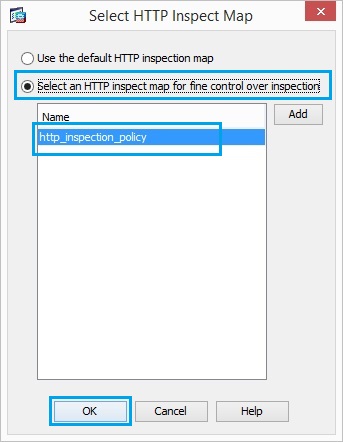
36. Check the radio button Select a “HTTP” inspect map for the control over inspection
as shown. Click “OK”.
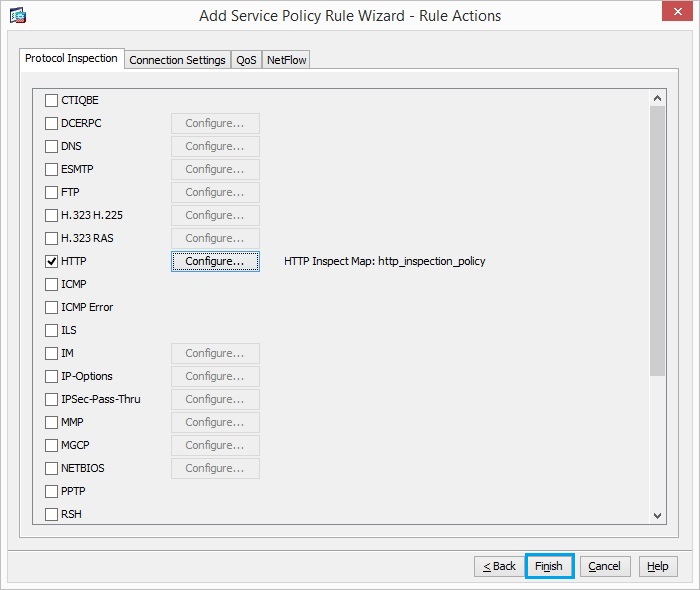
37. Click “Finish”
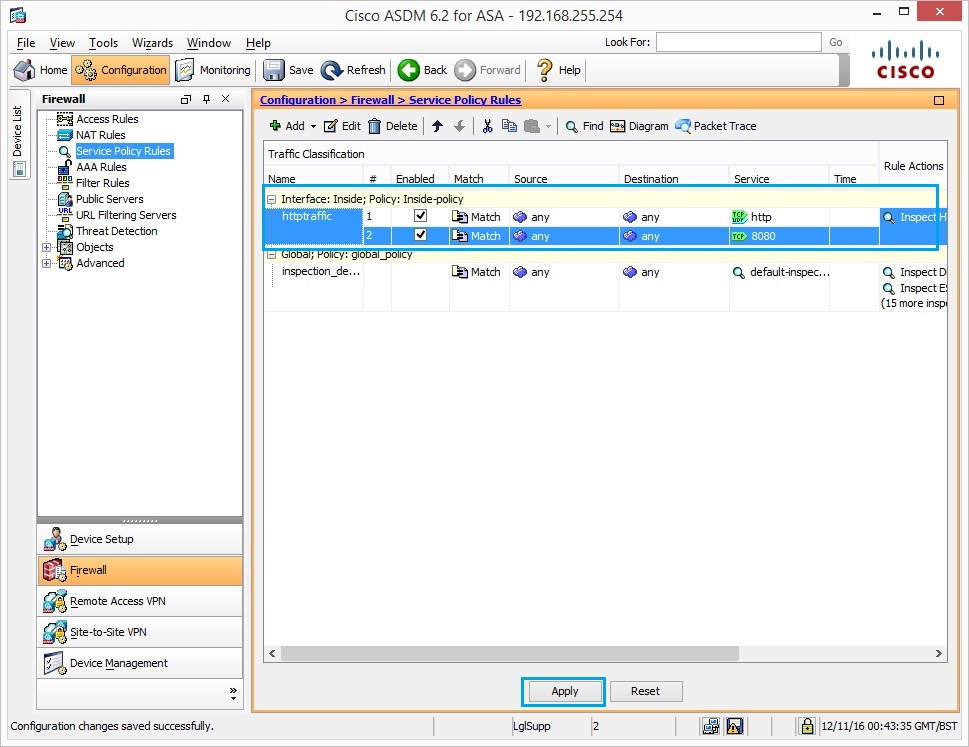
38. The Policy is now visible, we will now add an additional policy for port 8080.
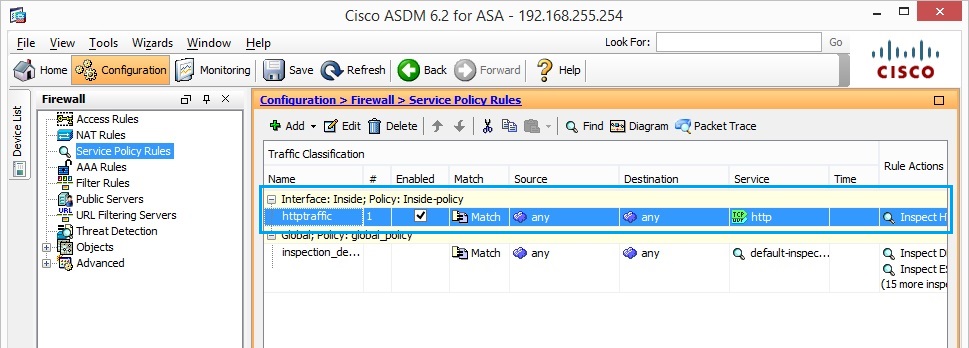
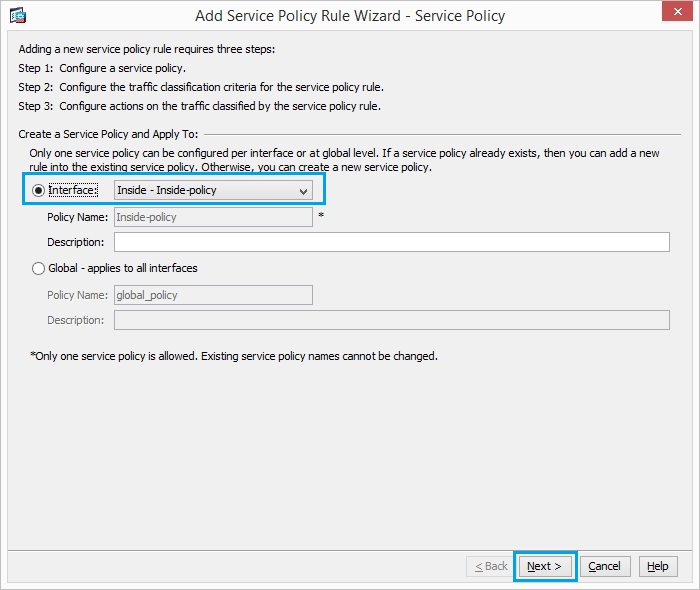
39. Click “Add”> “Add Service Policy Rule”.

40. Click “Next”
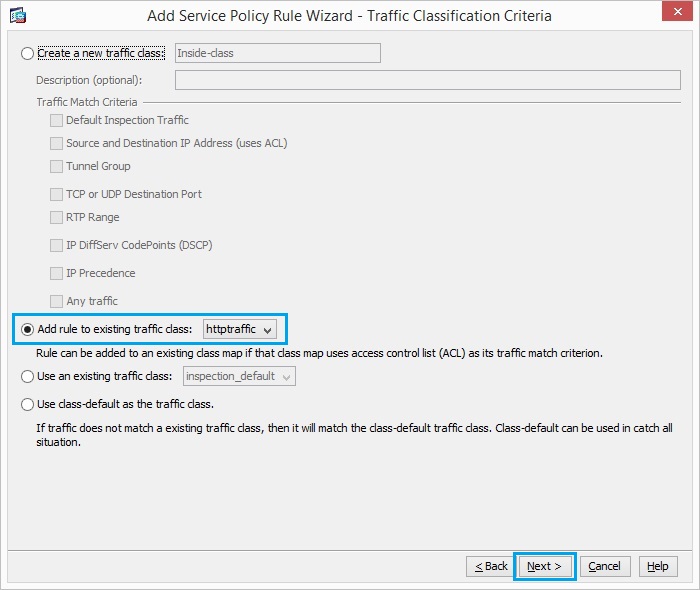
41. Choose the radio button “Add rule to existing traffic class” and choose “httptraffic” from the drop down menu. Click “Next”.
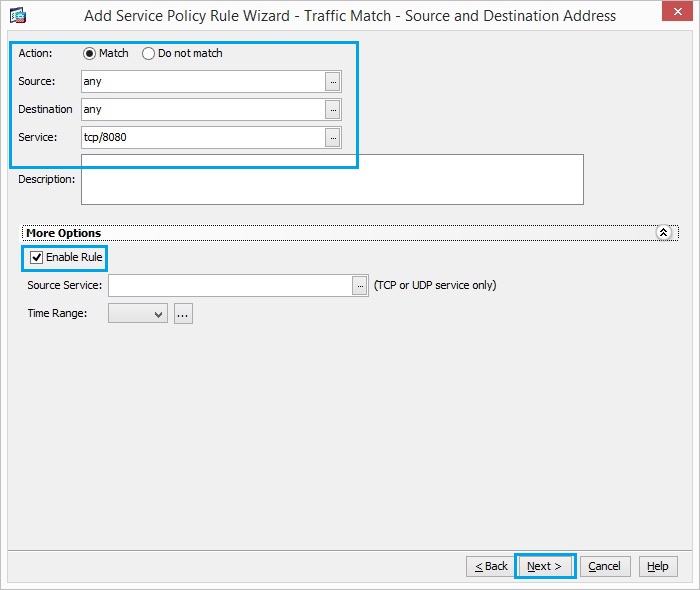
42. Choose the Source and Destination as “any” with “tcp/8080”. Make sure “Enable Rule” is ticked and click “Next”.
43. Click “Finish”
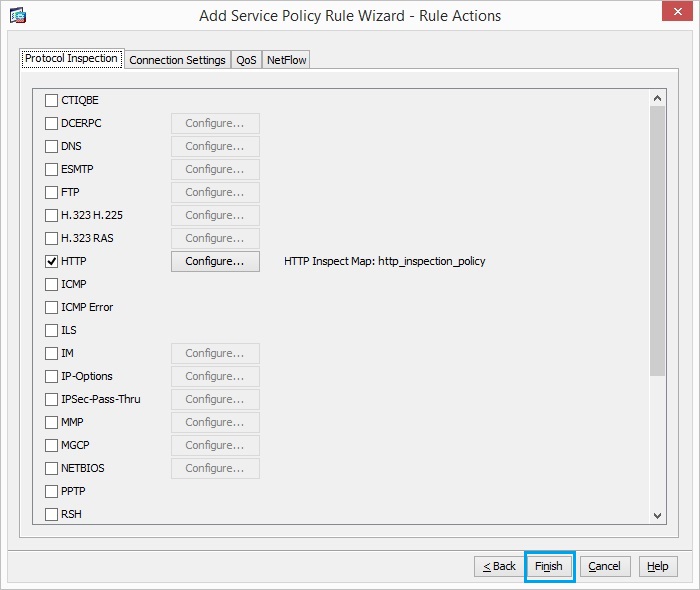
44. Click “Apply” to complete the configuration
45. Now open a browser and test out one of the regular expressions created earlier to see if it is blocked. In this case “Bing.com” is being blocked or the traffic is being inspected and it is being dropped by our Policy.
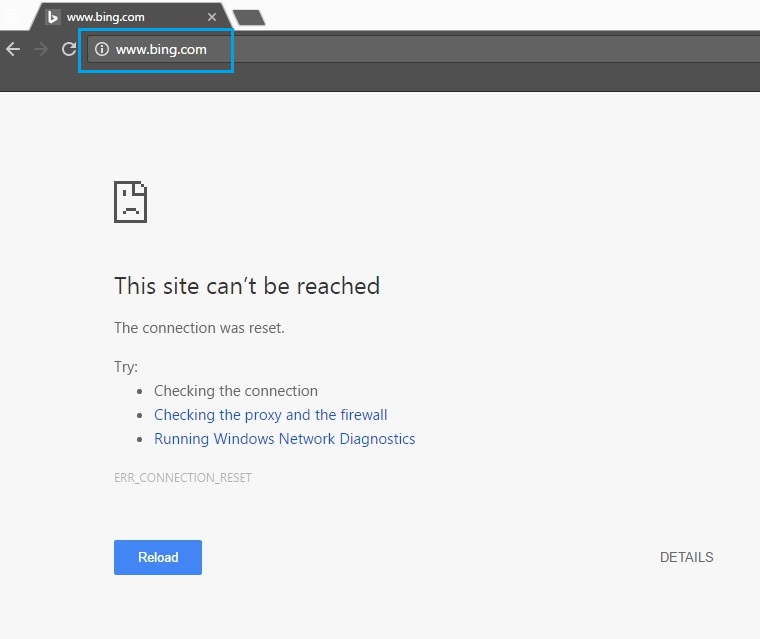
46. If we check the logging on the ASA we can see that the request to bing.com is being terminated by the inspection engine and therefore the connection is being reset. we can also see that the HTTP request matched our “BlockedDomainClass” in the “http_inspection_policy”

